Practical resources forPolymer Clay Makers
Technique walkthroughs, project ideas, and clay and finish details from the Clay Bake Studio library.
More articles
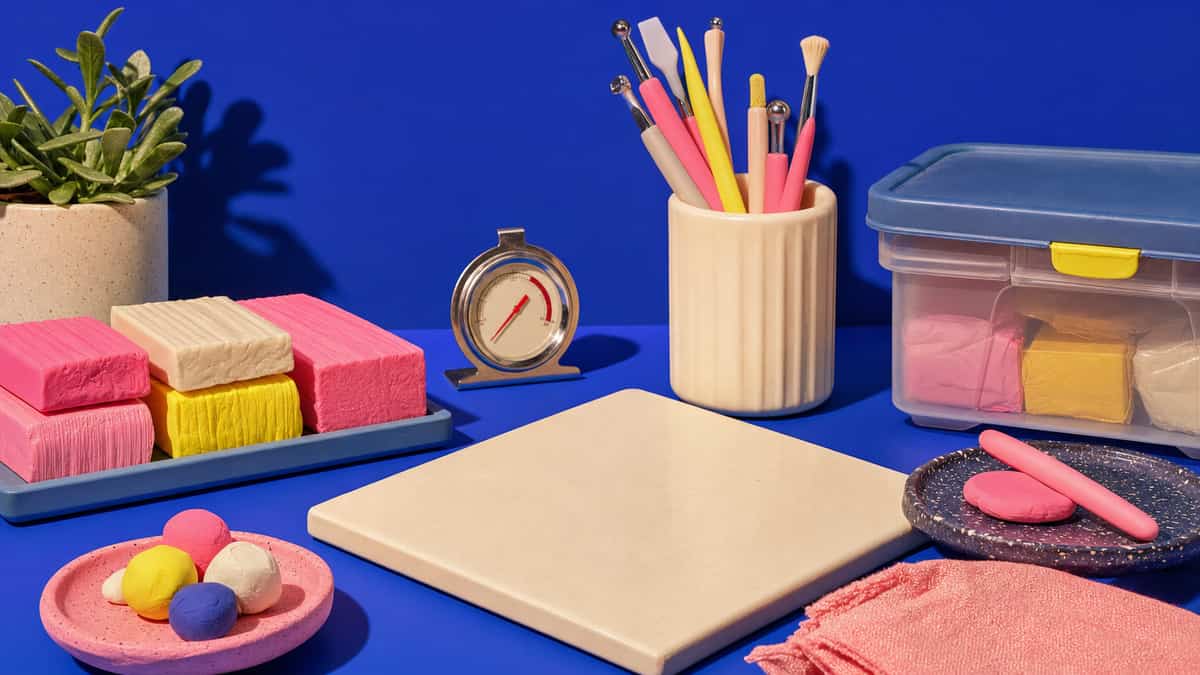
Polymer Clay Safety and Studio Setup: A Practical Reference
Set up a polymer clay workspace around the exact package bake, an oven thermometer, good ventilation, clay-only tools, and the maker's food-contact guidance.
Read the build
Best Polymer Clay Beginner Toolkit (2026): Core Tools To Start With
Start with one clay line, an acrylic roller, a tissue blade, a needle tool, a ceramic tile to bake on, and an oven thermometer. These basics help you roll cleaner slabs, cut neater shapes, and check the real bake temperature before adding specialty tools.
Read the build
Best Polymer Clay Brands for Beginners: Premo vs Soufflé vs FIMO Soft
Read what each maker documents for Premo, Soufflé, and FIMO Soft, then test one exact line by its current package before adding another.
Read the build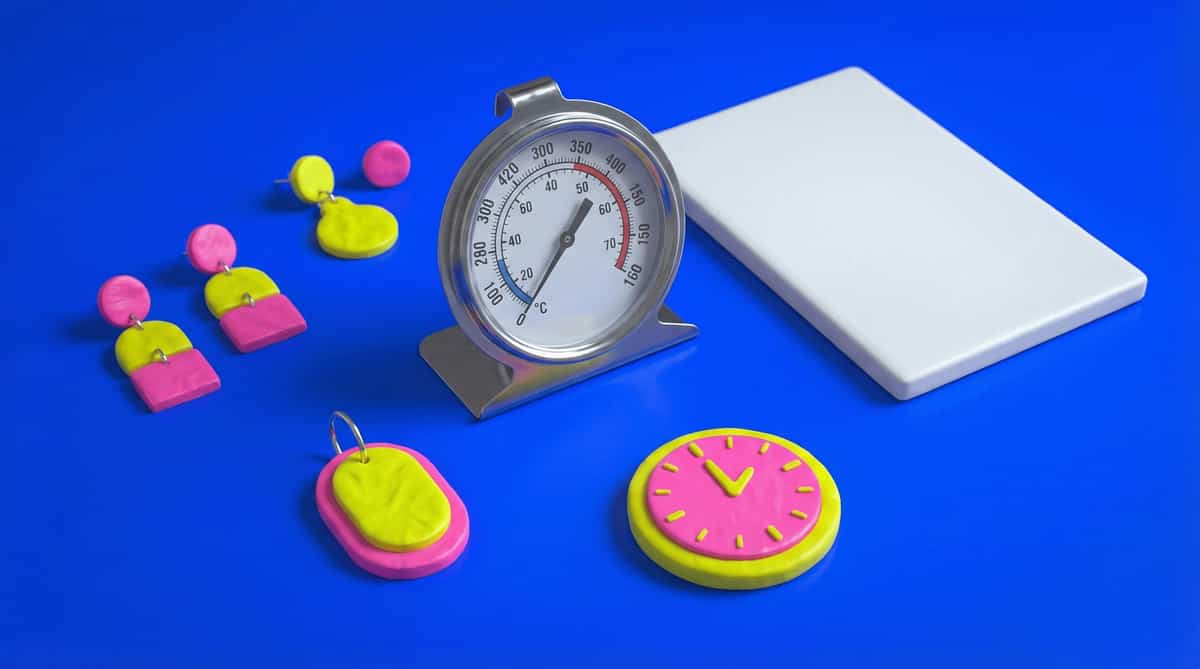
Polymer Clay Oven Thermometer: Baking-Area Checks
Start with the exact package directions, then use an oven thermometer in the baking area to compare the measured temperature with that target.
Read the build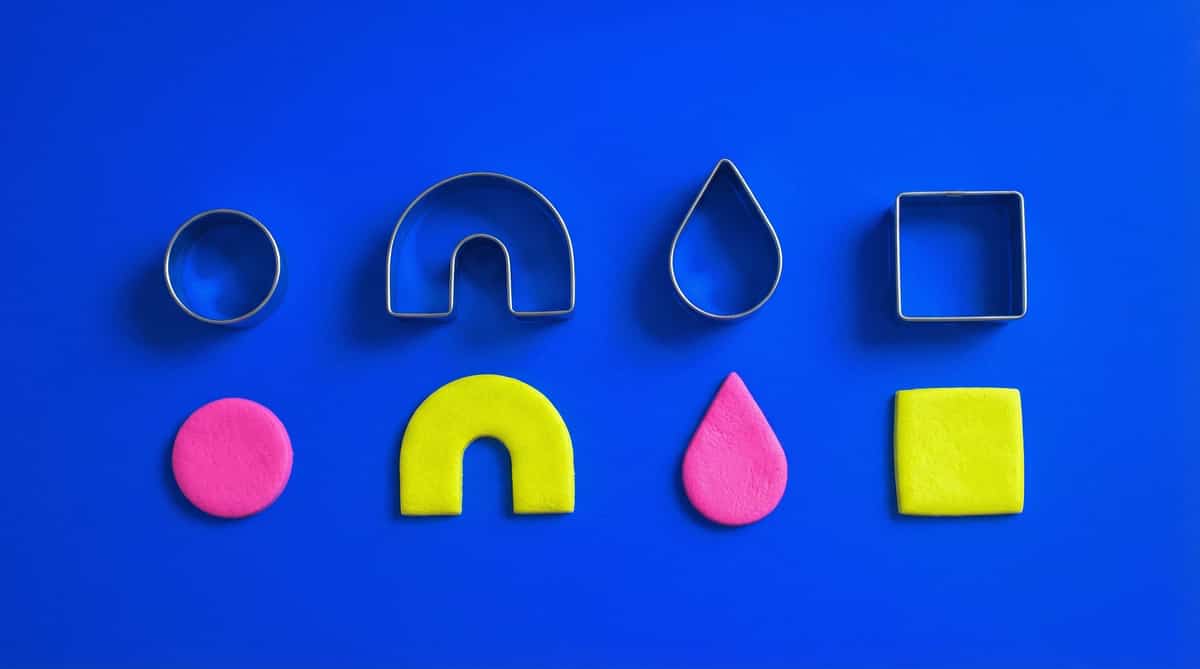
Best Polymer Clay Cutters for Beginners: Sharp Starter Shapes (2026)
Beginner clay cutters work best as a small repeatable starter set. Clean release and even slab thickness matter more than a long novelty list.
Read the build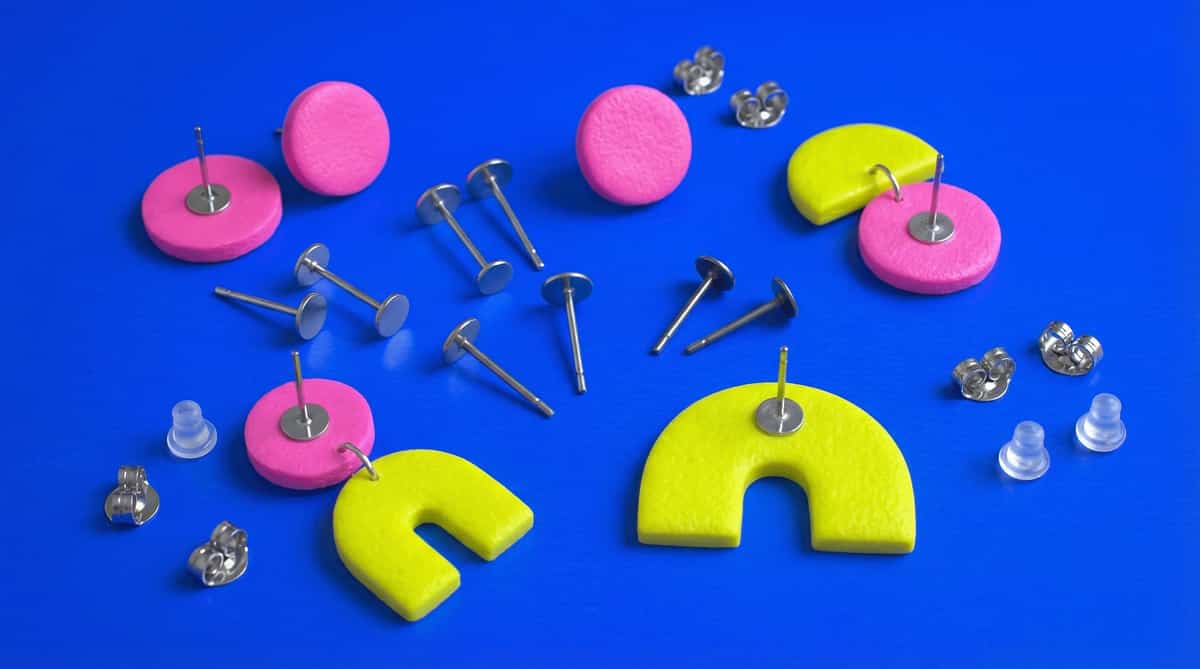
Best Earring Posts for Polymer Clay Jewelry
Verify the exact post and pad specifications, compare them with the cured back, and test the complete material stack before making a batch.
Read the build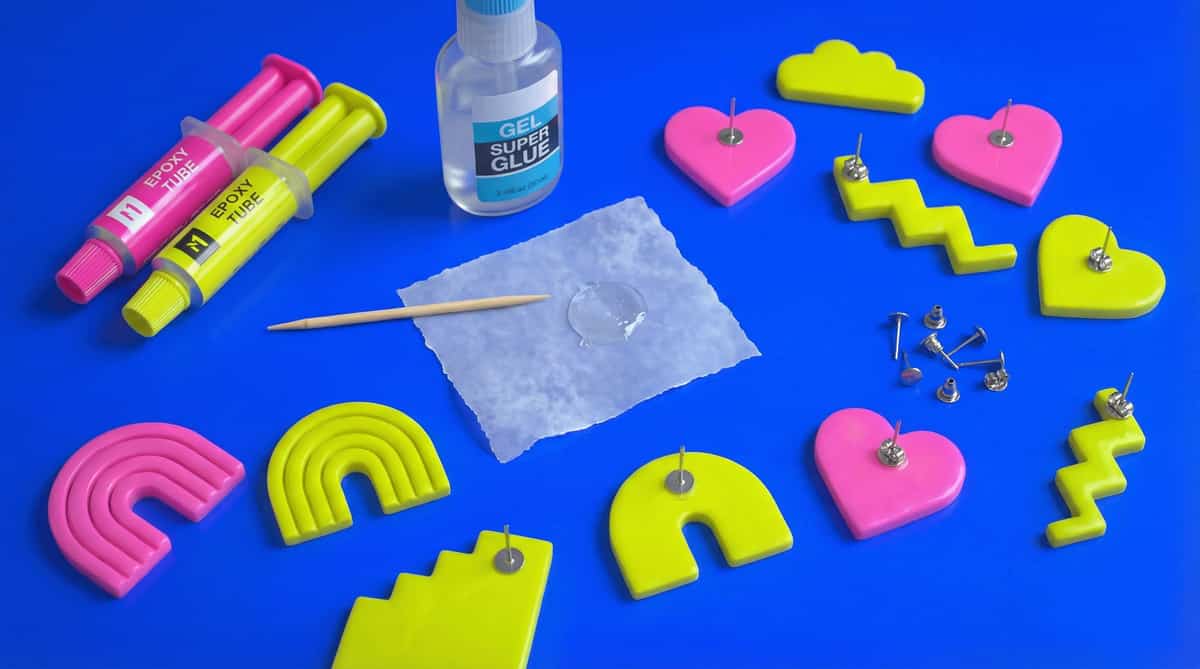
How to Choose Glue for Polymer Clay Earring Posts
Choose adhesive by the exact cured clay, metal finding, and finish in the joint. Follow that product's preparation and cure instructions, then test one pair before a batch.
Read the build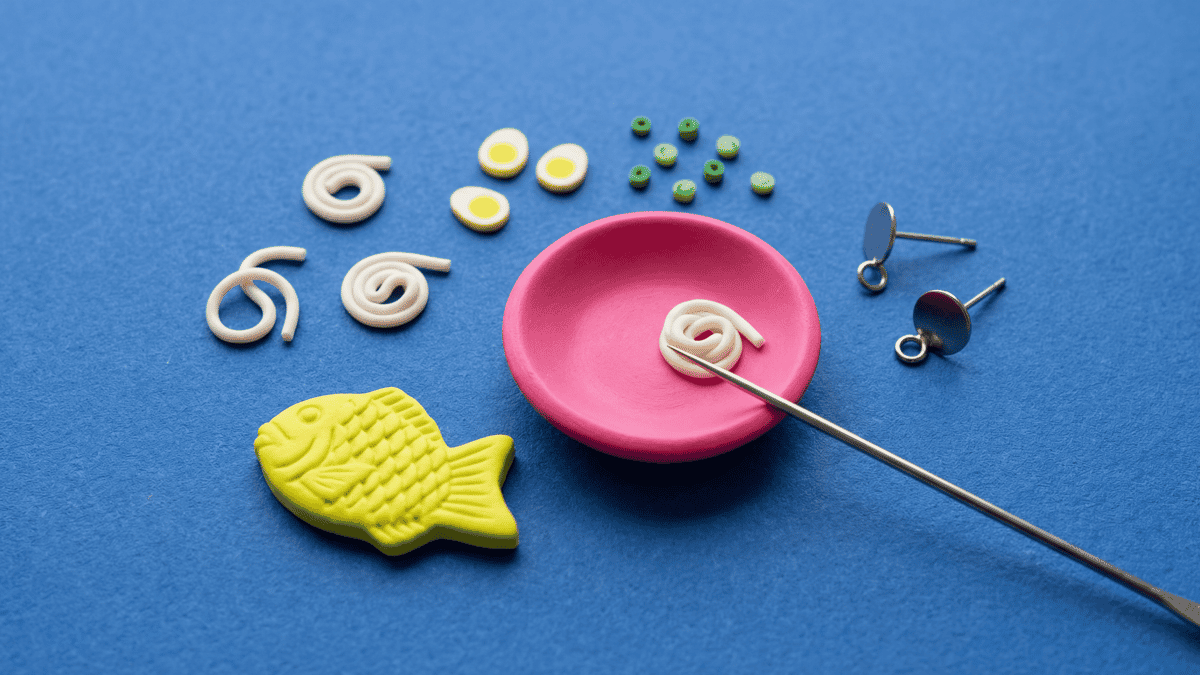
Polymer Clay Miniature Food Charms: Bowls, Fish, and Tiny Toppings
Miniature food pieces usually look clearer when the base shape, topping scale, and hardware choice are planned before the details go on. This guide covers shallow bowls, flat fish charms, noodle coils, egg slices, and keeping small food builds lighter.
Read the build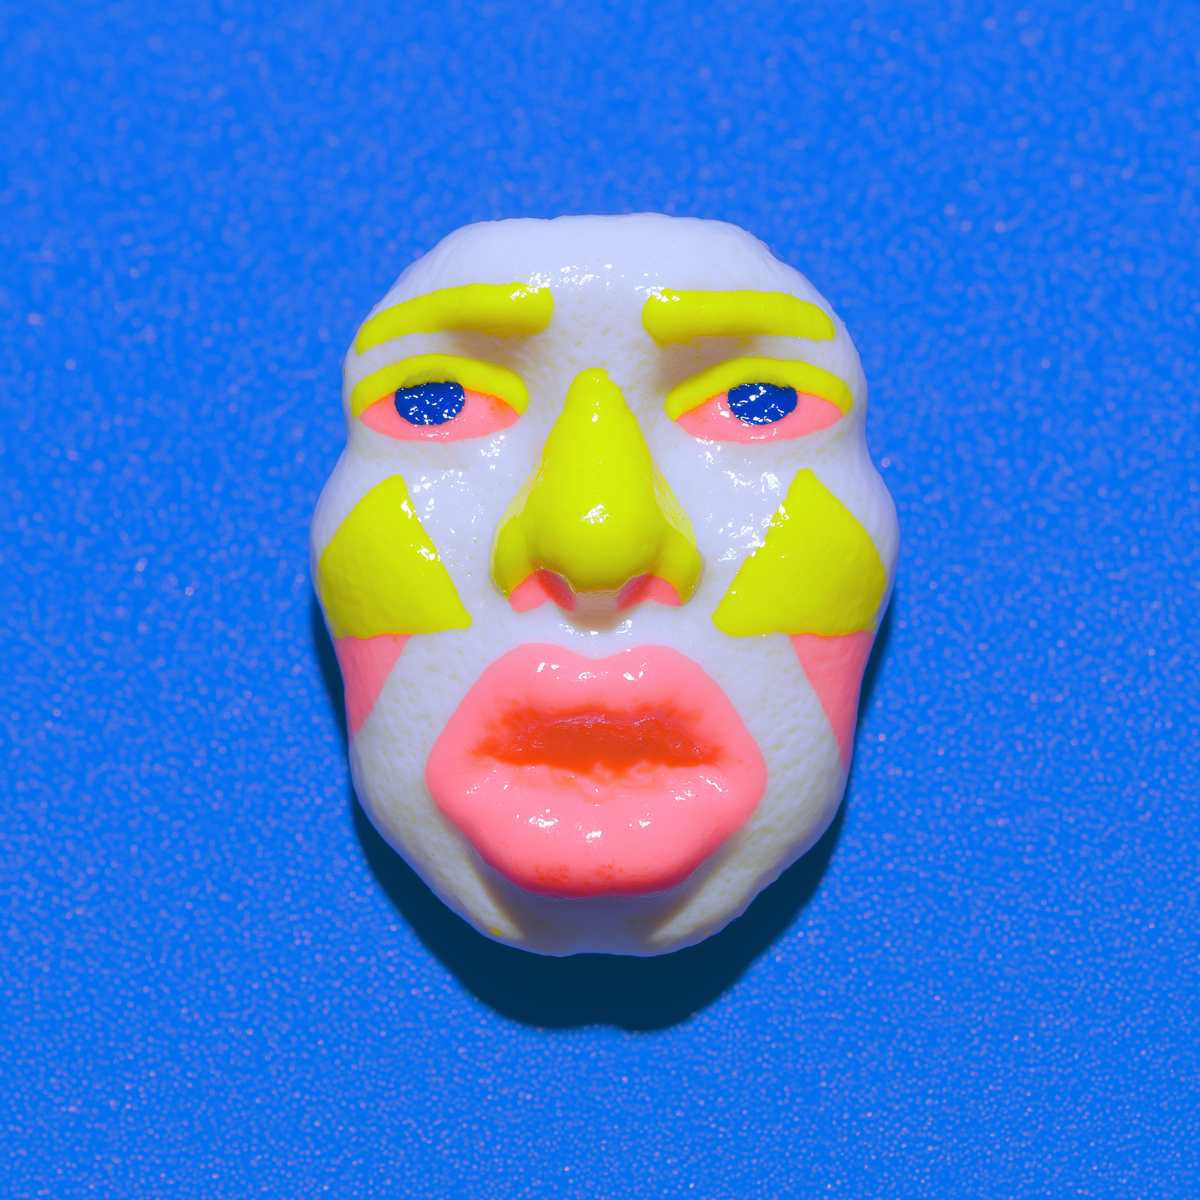
Polymer Clay Relief Faces, Portrait Plaques, and Stud Toppers
Face plaques, cameo-style shapes, and portrait drops stay cleaner when the silhouette is solved first, the facial planes stay low relief, and the topper or brooch hardware is planned as part of the front design rather than as an afterthought.
Read the build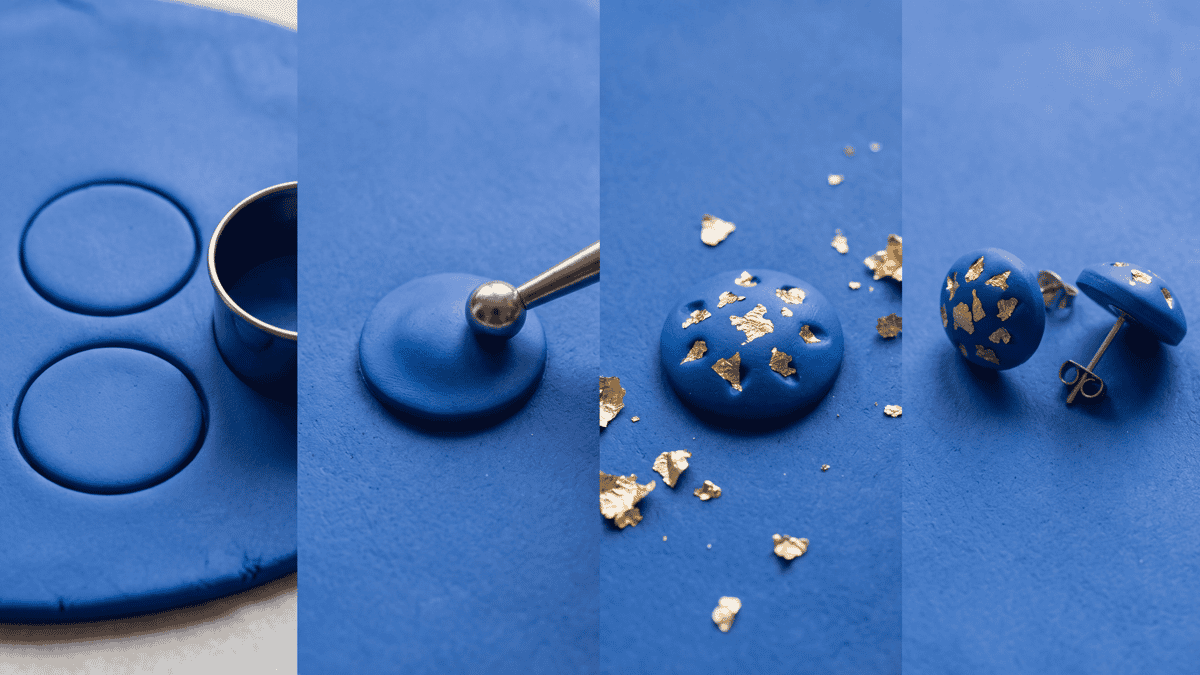
Polymer Clay Domed Studs, Metallic Inlay, and Gilded Details
Domed statement studs stay cleaner when the blank starts as a matched round plaque, the dome stays shallow enough for a flat back, and the metallic detail is pressed in without turning the surface into a lumpy foil patch.
Read the build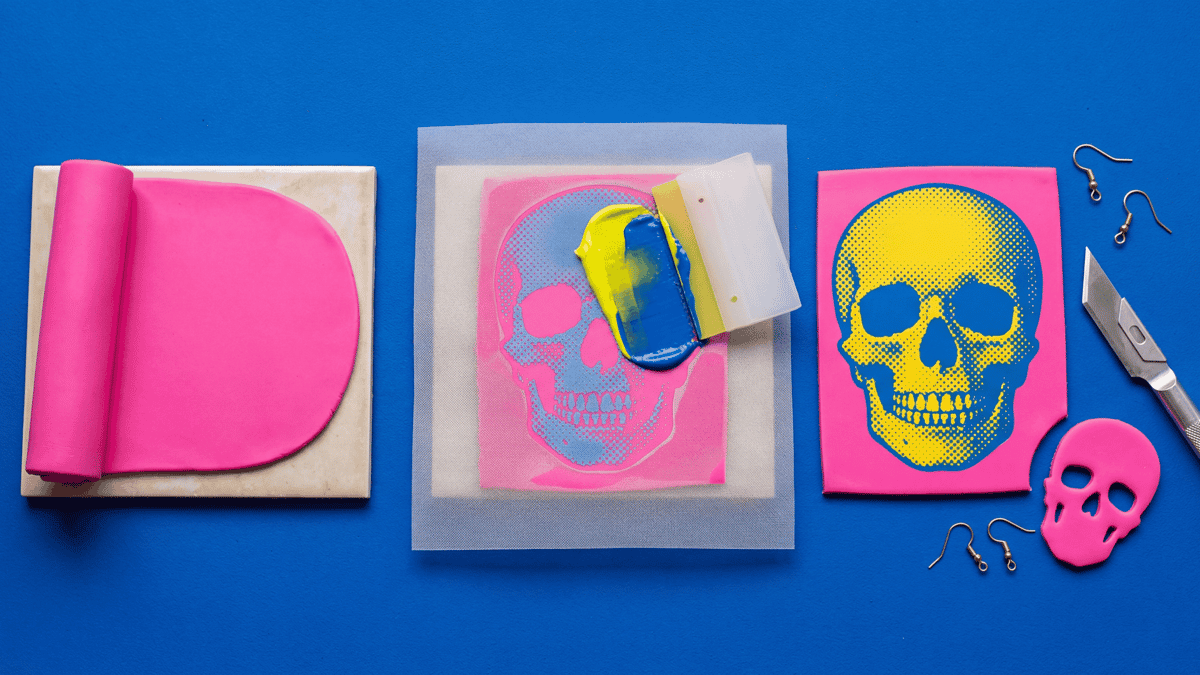
Polymer Clay Silkscreens, Stencils, And Halftone Graphic Slabs
Graphic skulls and other bold printed slabs stay cleaner when the clay slab is even, the screen seals tightly, and the silhouette gets cut only after the printed surface dries.
Read the build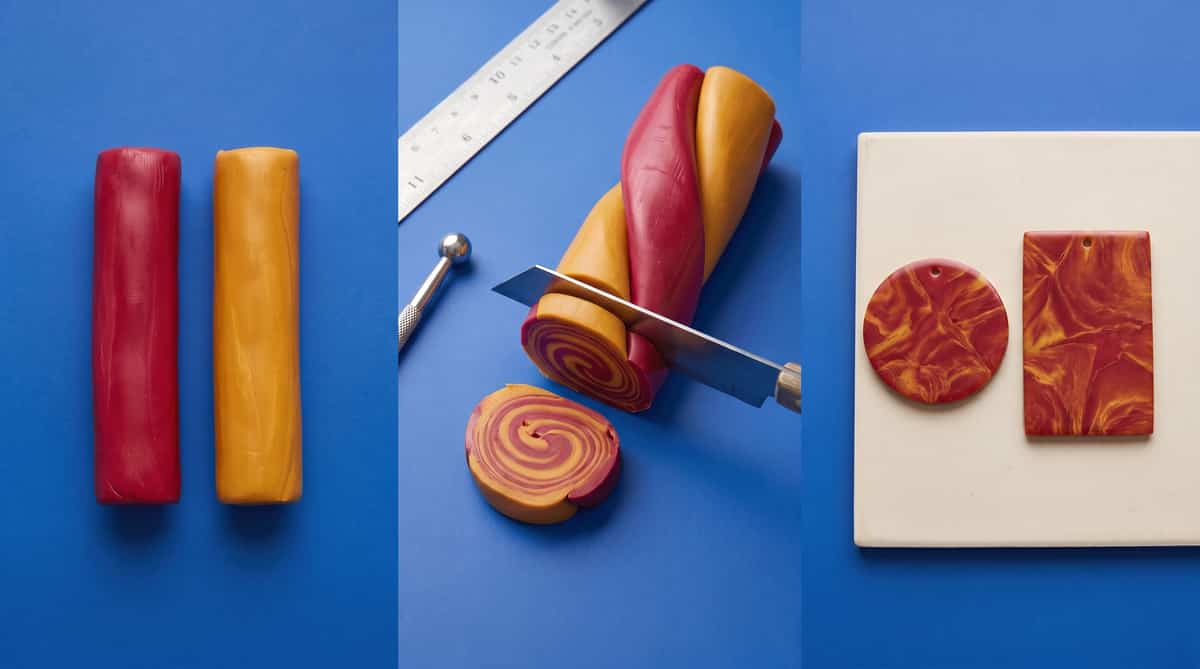
How to Make Faux Bakelite in Polymer Clay (Cherry-Amber Swirl Tutorial)
The cherry-amber faux bakelite look depends on a twisted swirl, not an over-blended marble. This guide covers the color mix, how to stop before the vein muddies, and how to slice the cane so the pattern stays distinct on buttons or drops.
Read the build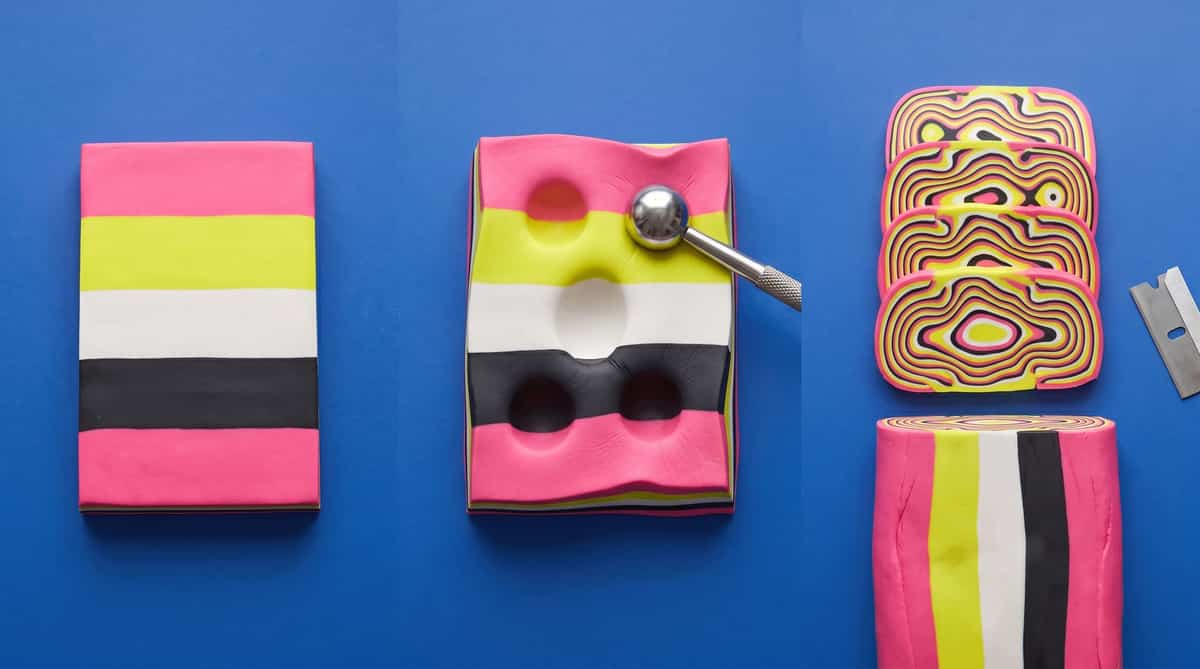
Polymer Clay Mokume Gane: Reduction, Distortion, and Slicing
Mokume gane only reveals its topographic pattern when the stack is distorted before slicing. This guide covers slab thickness, the poke-and-press distortion step, and slicing the stack so each layer makes a clean ring instead of a smear.
Read the build
Sculpey Soufflé Sutton Slice: One Official Project
This guide stays within one official Sculpey Soufflé project and does not turn that example into a universal stamp, clay, depth, or transfer rule.
Read the build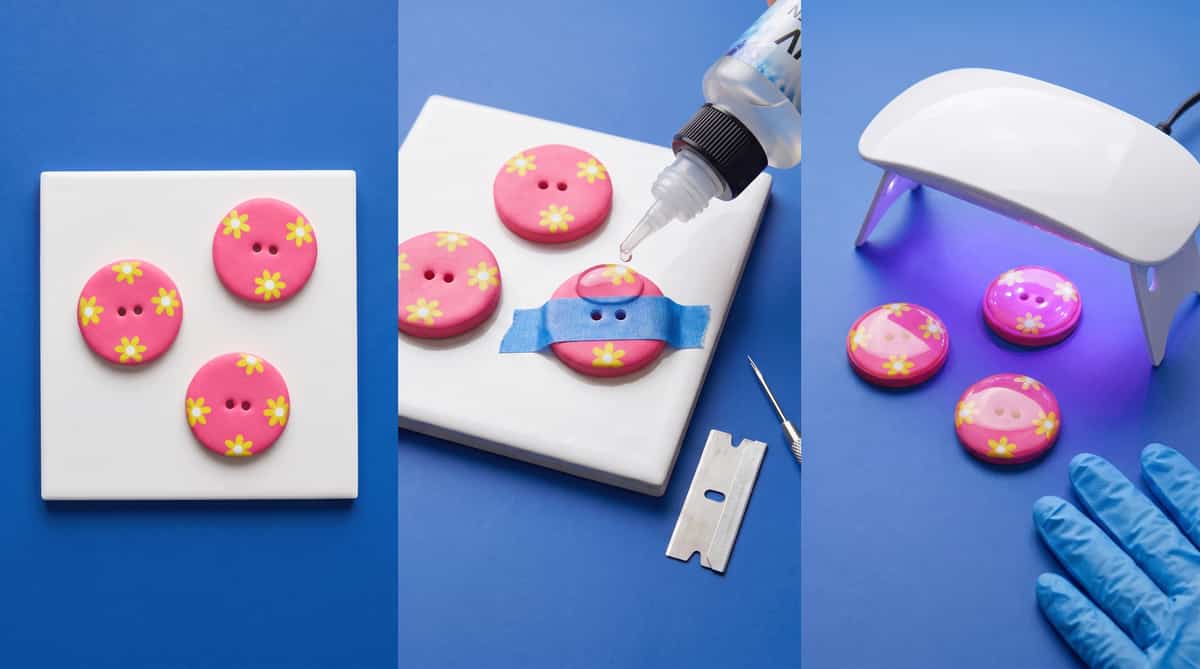
Resin on Polymer Clay: Label-First UV and Epoxy Checks
Bake and cool the clay first, then use the exact resin maker's instructions for compatibility, PPE, lamp or mixing requirements, layer depth, and cure.
Read the build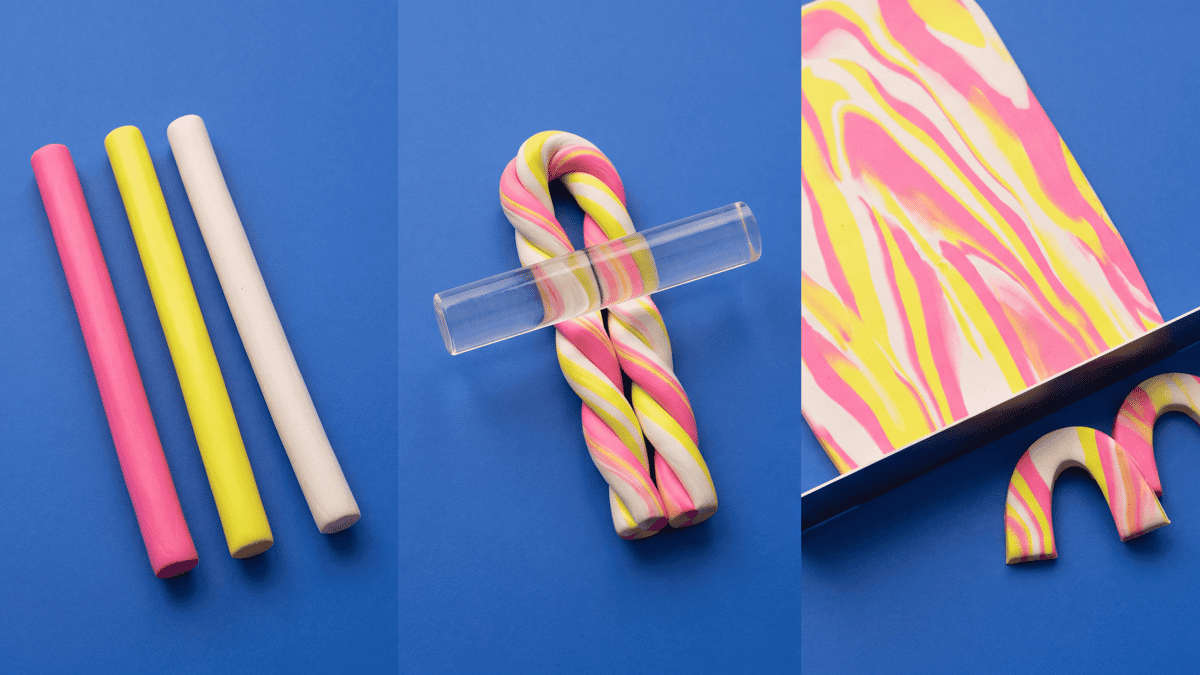
How to Marble Polymer Clay: Beginner Tutorial (Step by Step)
Learn how to marble polymer clay with three colors, a roller, and a blade. A beginner tutorial with pulled, stacked, and tile-cut variations, plus the fix for muddy slabs.
Read the build
Do You Need a Sealer for Polymer Clay? Compatible Finish Options
Leave a good cured surface bare, or choose one documented water-based finish, test it on the same clay line, and follow the current product label.
Read the build
How to Make Polymer Clay Mushrooms: Cap, Stem, and Spotting Tutorial
A beginner-friendly polymer clay mushroom tutorial: condition, shape a stable stem, dome the cap, press on white spots, support the overhang, and bake by package directions.
Read the build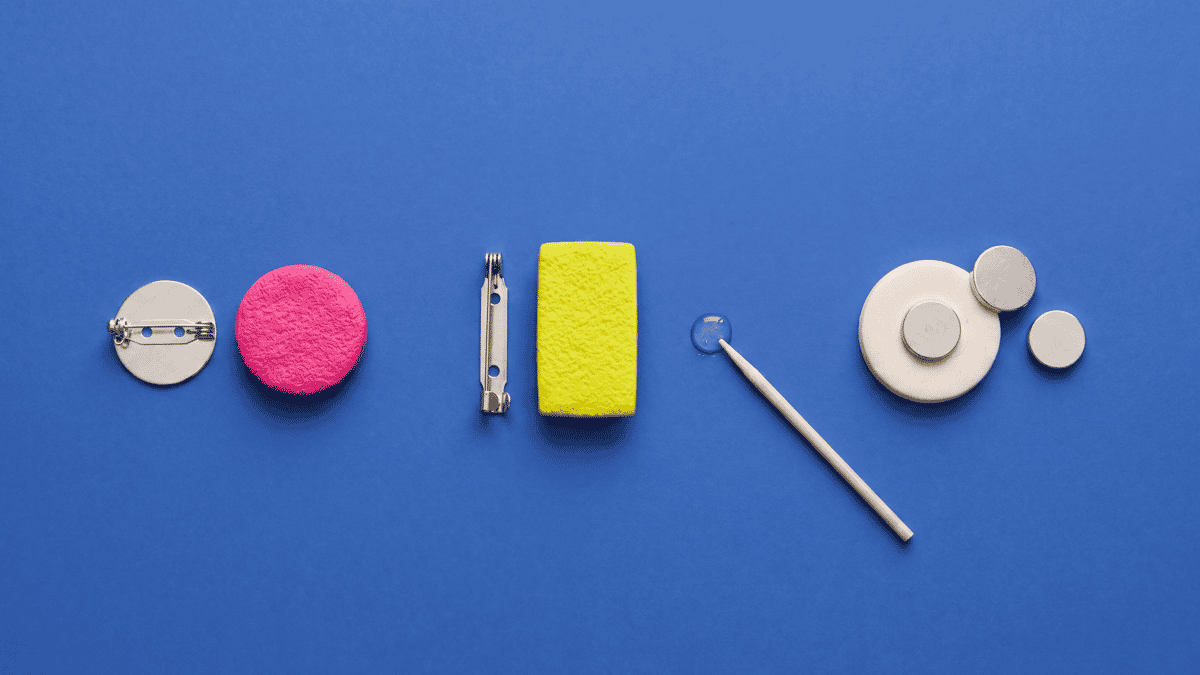
Polymer Clay Brooch Backs: How to Compare Pin, Bar, and Magnet Hardware
Brooch back choice decides whether a polymer clay pin hangs straight, stays closed, and respects the fabric. Compare flat-pad, locking bar, and magnetic backs by pad width, weight, and wear use.
Read the build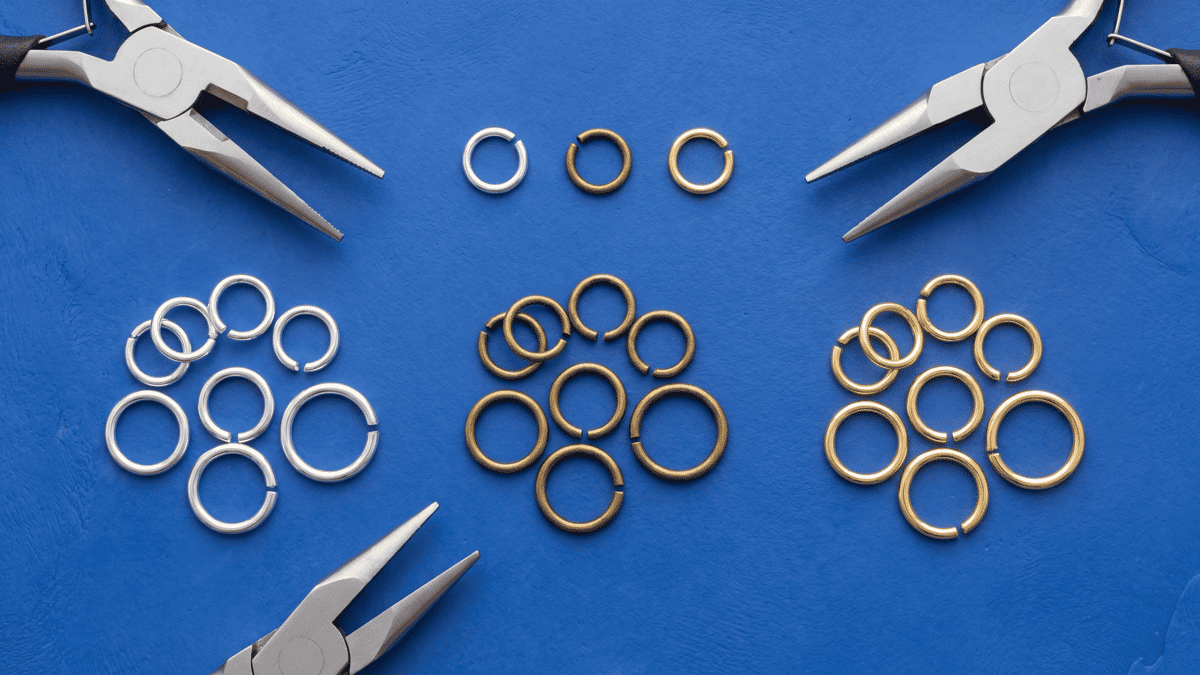
Jump Rings for Polymer Clay Jewelry: What to Check Before Assembly
Compare the ring's supplier-stated material and dimensions, then check one finished assembly before using that ring for a batch.
Read the build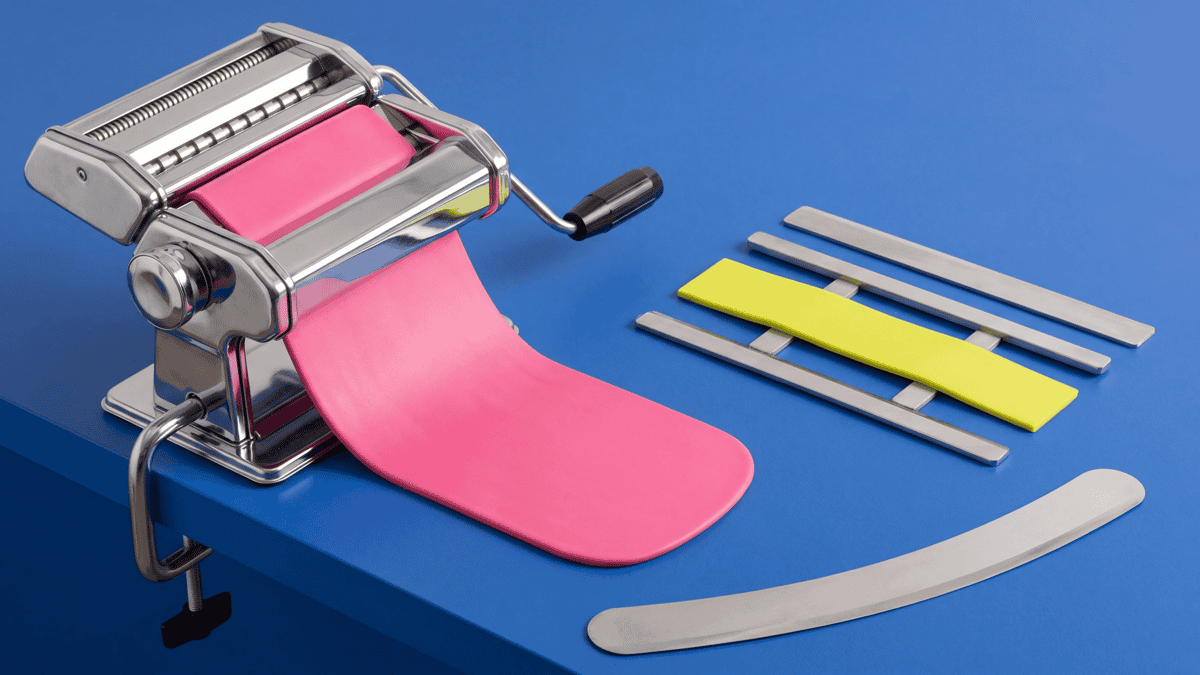
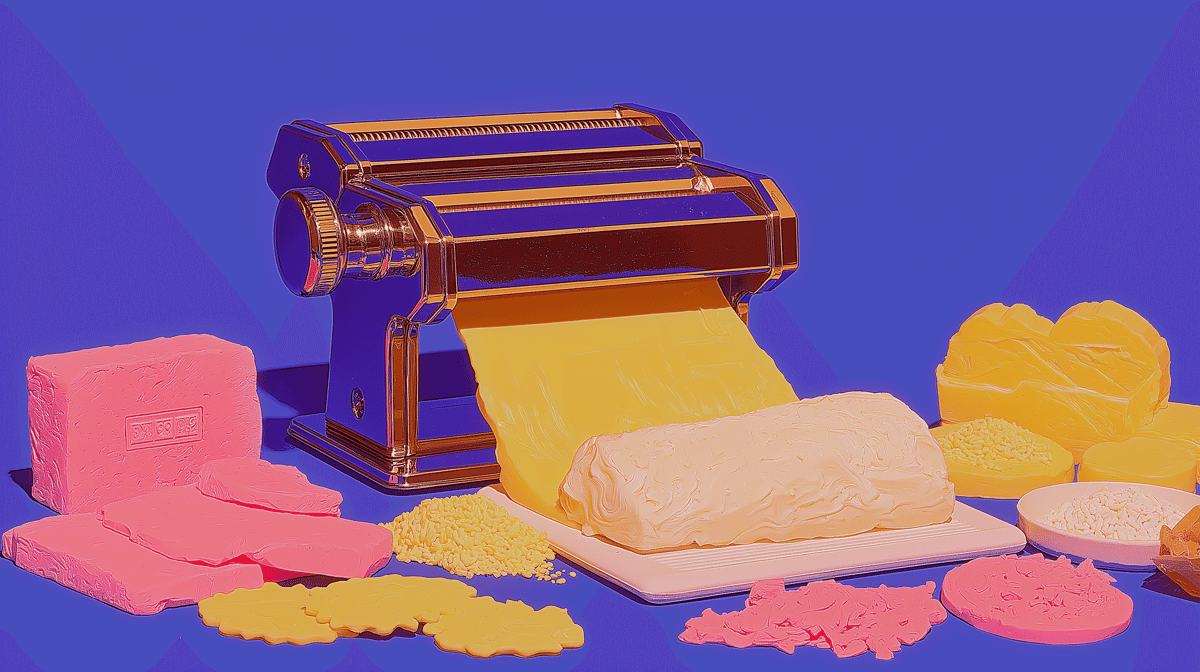
Best Pasta Machine for Polymer Clay: Machine or Roller? (2026)
A machine is worth it when the second sheet must match the first. Use the setting-strip test to compare Atlas, Sculpey, Imperia, starter machines, and rollers.
Read the build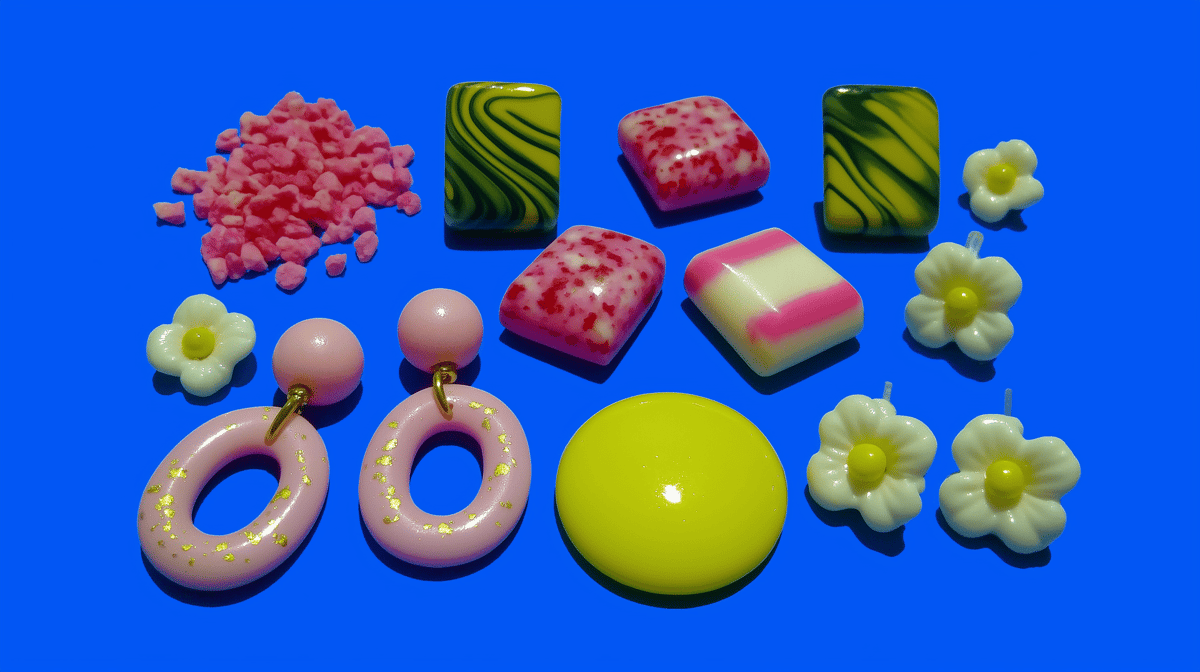
Polymer Clay Color Mixing: Sage, Terracotta + Test Chips
Premo starting ratios, color theory basics, and troubleshooting notes you can verify with baked swatch chips before mixing a larger batch.
Read the build
Batch Production Checklist for Polymer Clay Sellers
Rejects, sanding time, and last-minute fixes eat your margin. This checklist catches problems at every stage so your batch stays consistent from first piece to last, without the full-table repair session at the end.
Read the build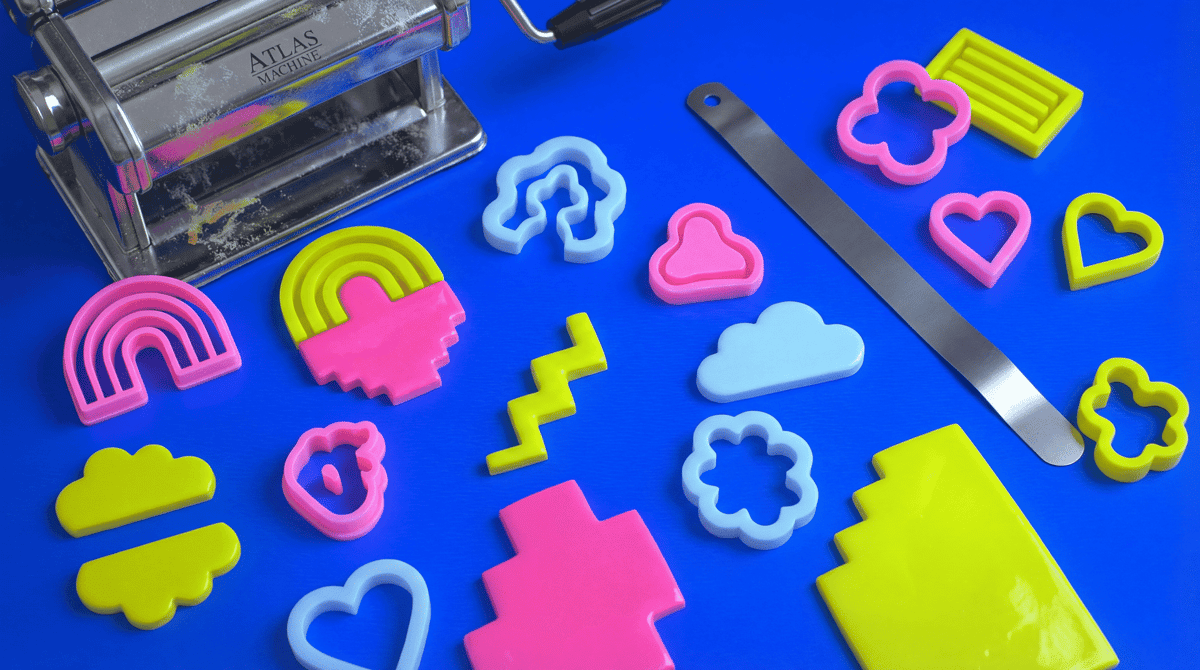
Polymer Clay Cutters: The 10 Shape Families Worth Owning (2026)
A practical 2026 cutter guide built around shape families, cleaner release, the checks to run on a listing before you buy, and the care habits that keep edges true.
Read the build
Sanding and Buffing Polymer Clay: Pressure and When to Stop
Start with Sculpey's documented wet-sanding range, use progressively finer paper with water, and test pressure and sheen on cured scrap before finishing a batch.
Read the build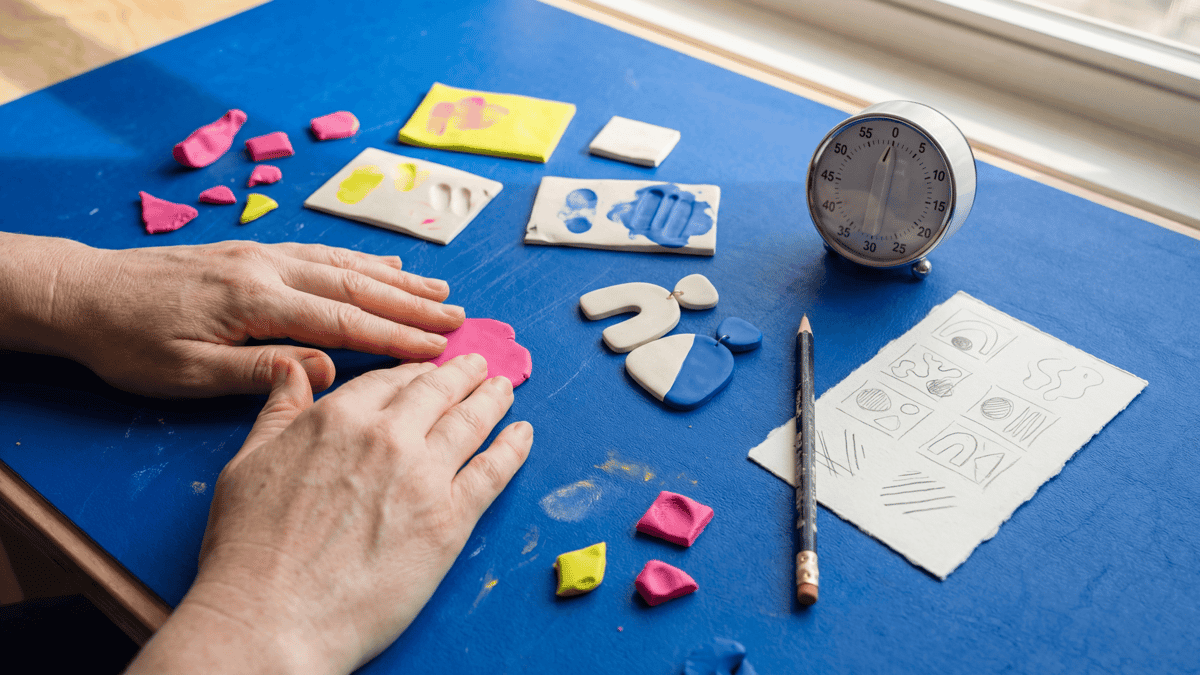
Polymer Clay Creative Block and the Bestseller Trap
The block that stops sellers is usually not 'no ideas.' It is being trapped by the one design everyone buys, or staring at orders you no longer want to make. This guide names the seller-specific triggers and gives 8 resets that clear the worktable faster than another mood board.
Read the build
How to Reverse-Engineer a Polymer Clay Design from a Photo
You tried to copy a photo and ended up with a pile of failed test pieces because you guessed the build order. Study the front view first, diagnose the exact construction, and test your build theory on scrap clay before you touch your good colors.
Read the build
Faux Stone and Translucent Effects With Cernit Tests
Choose one Cernit Translucent product, make one small visual study, follow its exact package, and keep the result tied to the recorded sample.
Read the build
Three 2026 Paint Color Signals to Test in Polymer Clay
Chasing every 2026 trend color can leave you with blocks you do not use. Before you commit to a full batch, bake small swatch chips and test the finish. This guide gives you three 2026 color directions plus the swatch test that confirms a color before you scale it.
Read the build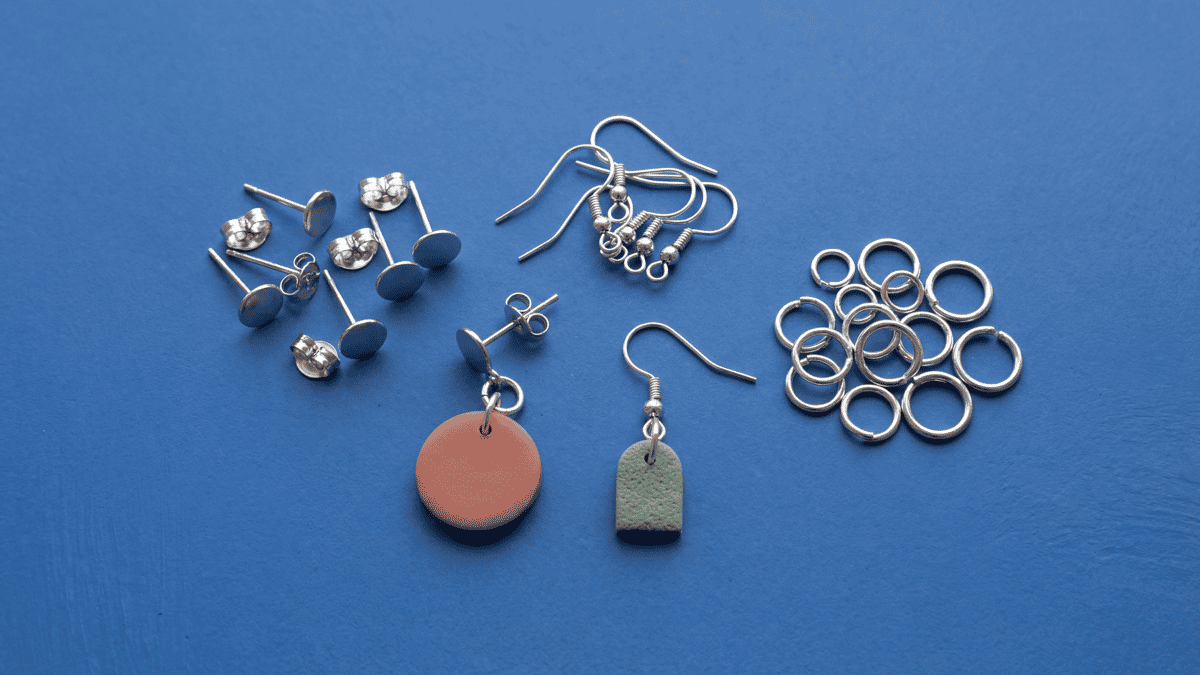
Earring Findings for Polymer Clay: Posts, Hooks, Jump Rings, and Attachment Planning
Verify the exact hardware and adhesive, compare dimensions with the cured piece, and test one complete pair before repeating the setup.
Read the build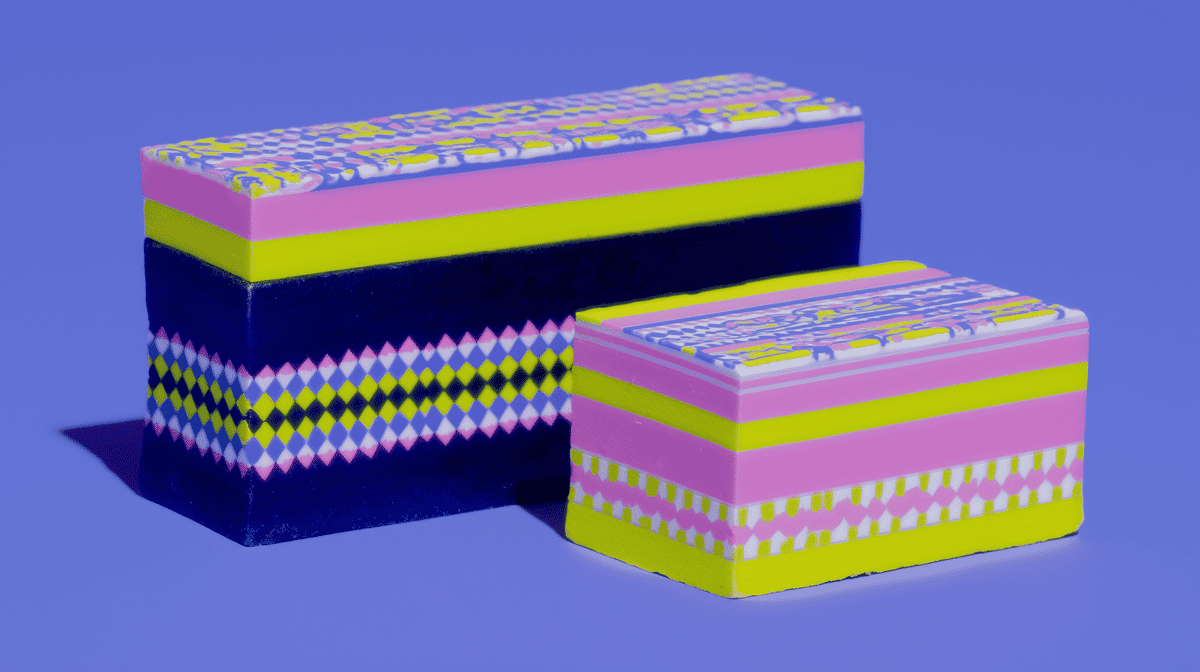
Nerikomi-Inspired Polymer Clay: A Layered Test Block
Test one small layered polymer-clay block, inspect the cut face, and bake the sample by its package. Use nerikomi-inspired as the project label.
Read the build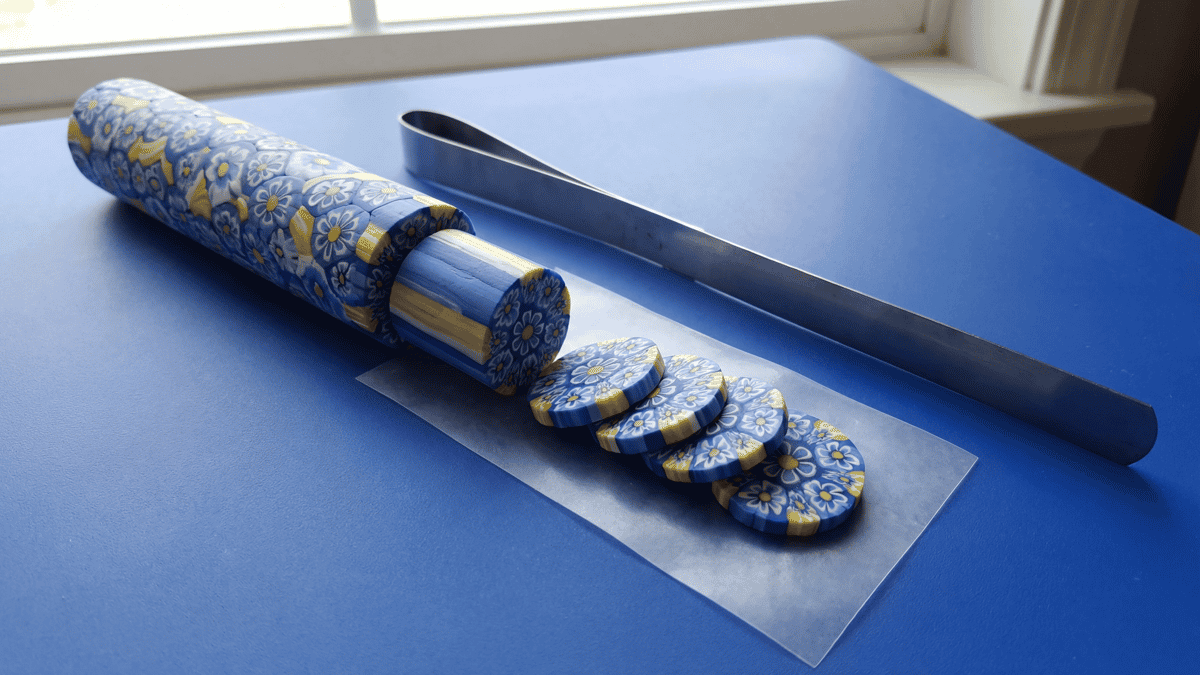
Polymer Clay Cane: A Small Recorded Pattern Exercise
Use a simple patterned-log exercise to test one clay, arrangement, cut face, and package-directed bake without turning it into a universal cane method.
Read the build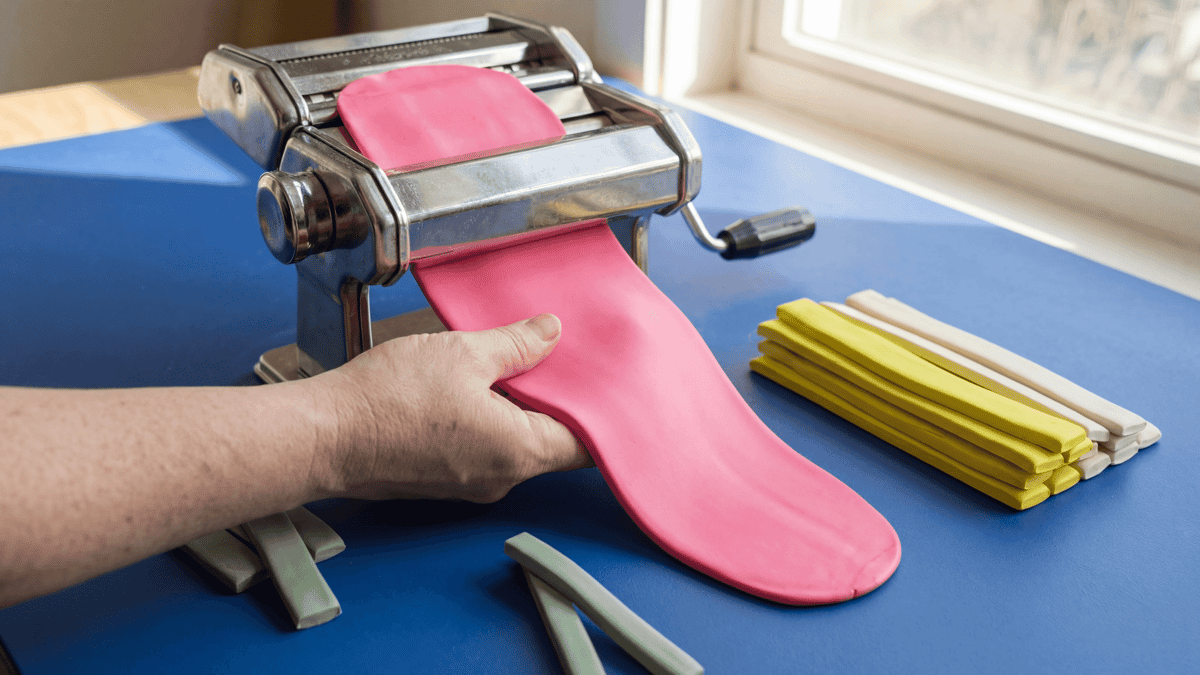
Conditioning Polymer Clay for Clean Cuts and Crack-Free Edges
Your slab cracked at the edge, your cutter dragged, or one color distorted more than the rest. Condition until every color folds the same way, then do the fold test before you cut.
Read the build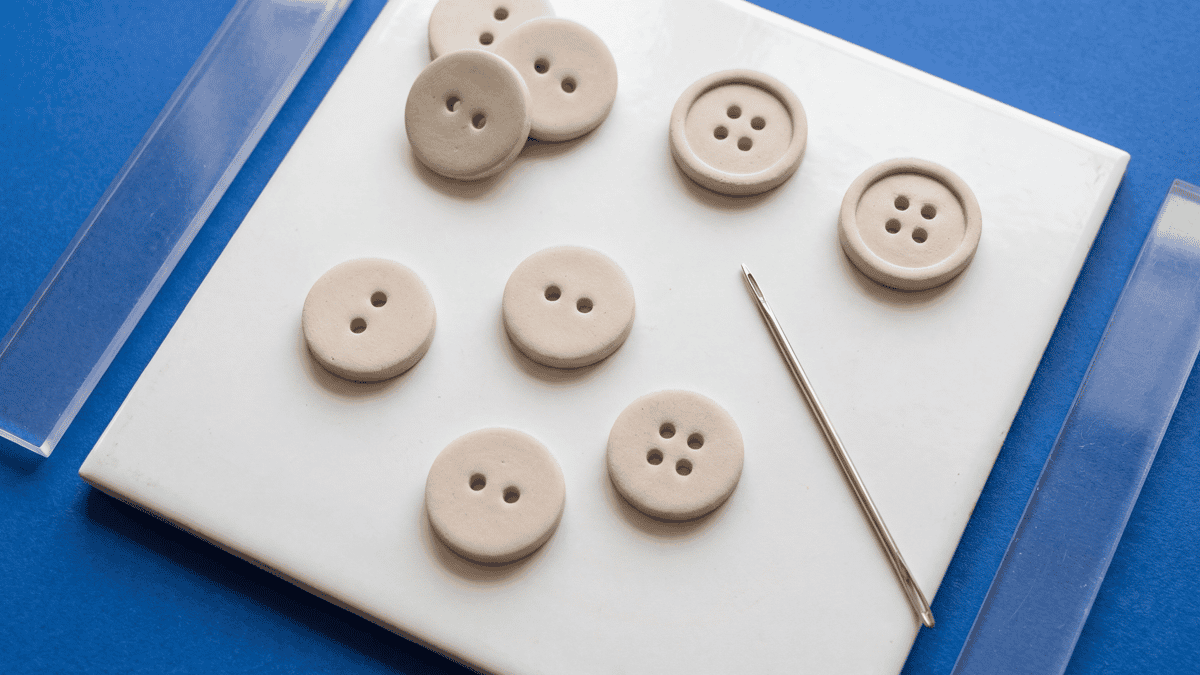
Polymer Clay Buttons: Holes, Flat Baking, and Thickness
Small button sets fail when the holes are too close to the edge, the blanks bake unevenly, or the thickness drifts from one button to the next. This guide shows the repeatable build path that keeps polymer clay buttons more consistent and easier to test on garments.
Read the build
Polymer Clay Striped Buttons: Chevron Wraps and Drum Blanks
Patterned polymer clay buttons get much easier when you lock the blank size first, then build stripes, chevrons, or wrapped sidewalls around that structure. This guide covers a clean build order for flat sew-through buttons and short drum blanks.
Read the build
Polymer Clay Surface Applique and Confetti Inlay Guide
If an inspiration piece looks like it was built from placed petals, dots, lips, stars, or tiny cut motifs, this is usually the technique family you need. Learn when to applique, when to press pieces flush, and how to keep flat builds crisp instead of lumpy.
Read the build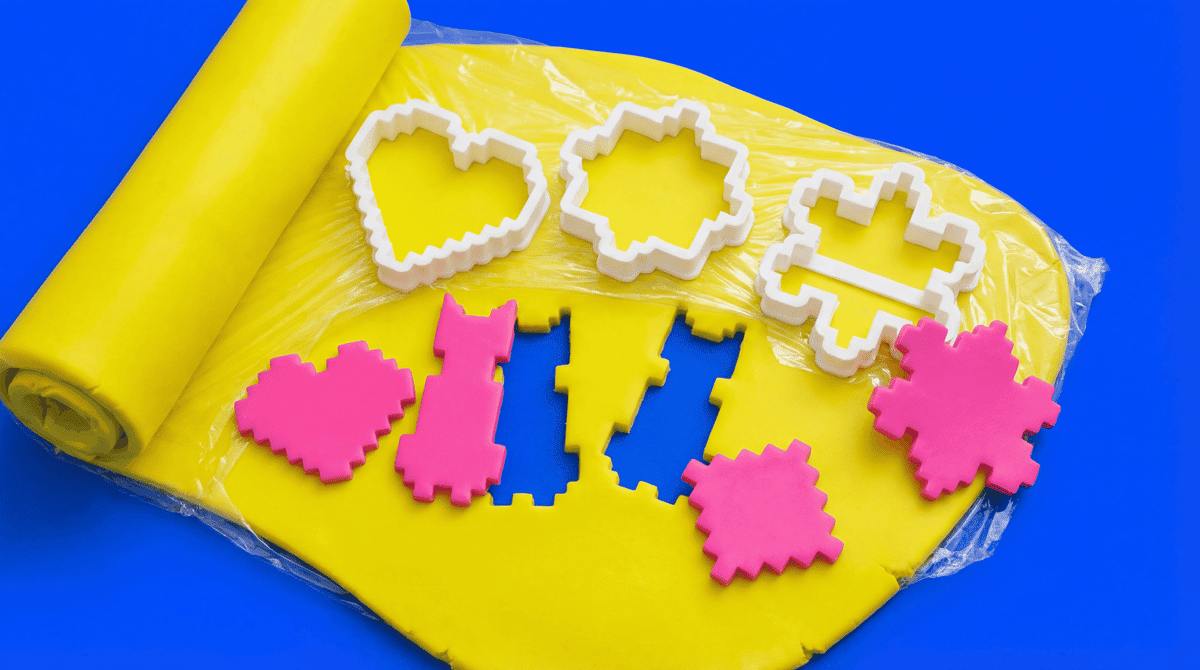
The Cling Wrap Trick for Smoother Polymer Clay Cutter Edges
If your cutters keep grabbing the clay or leaving rough edges, plastic wrap can help on the right shapes. Here is when to use it, which wraps tend to release more cleanly, when to skip it, and how to get a softer rounded edge when that suits the piece.
Read the build
How to Support Polymer Clay During Bake by Shape
Match a documented tile, glass, shaped support, armature, or lightweight core to the part that must stay flat, curved, raised, or aligned.
Read the build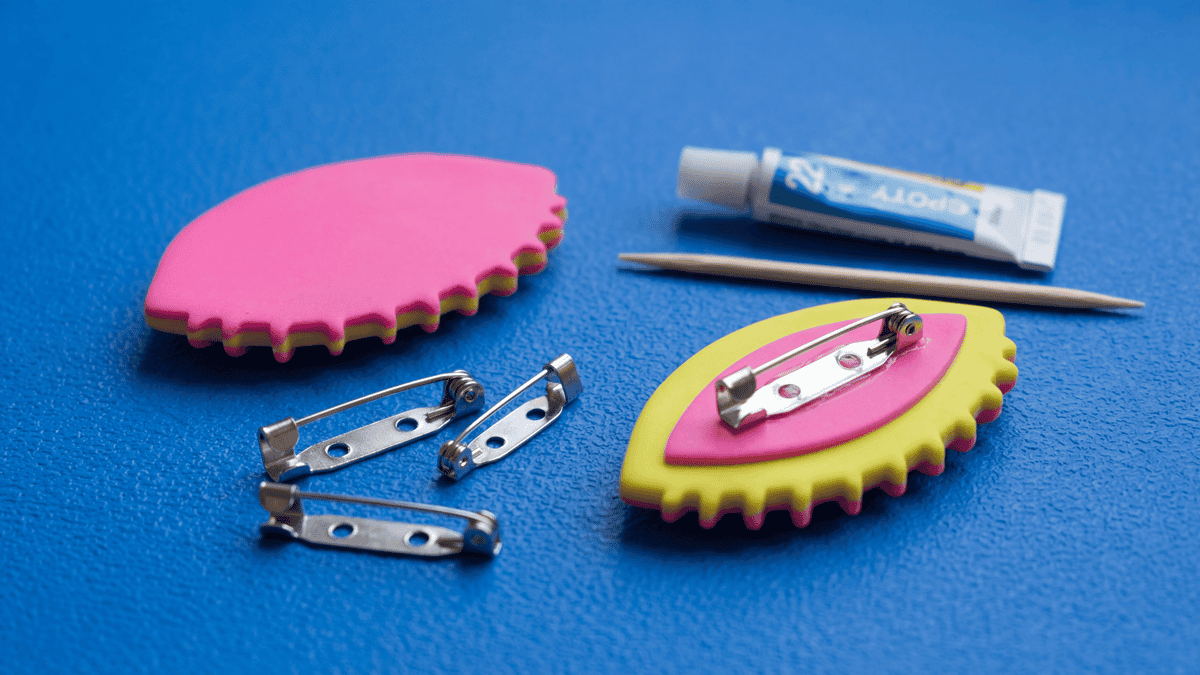
How to Attach Brooch Backs to Polymer Clay
Brooch fronts can tip or lose grip when the rear contact is curved, too small, or glued over a finish. Prepare a flat zone, match the finding size to the scale, and place it on the visual balance line before the adhesive cures.
Read the build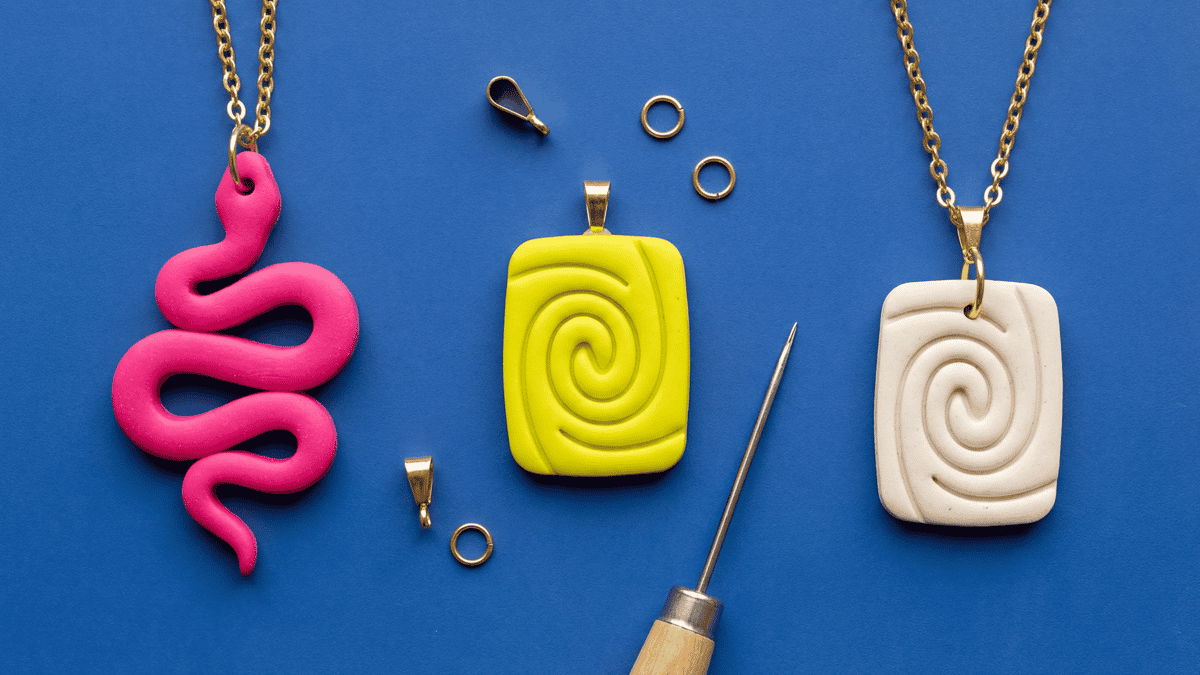
Polymer Clay Pendant Holes, Bails, and Jump Ring Placement
Pendants hang crooked or the hole tears through the top edge because the hardware was placed from the side instead of the visual center. Mark the real balance line, leave enough clay margin, and choose drilled hole, bail, or short jump ring from the finished front view.
Read the build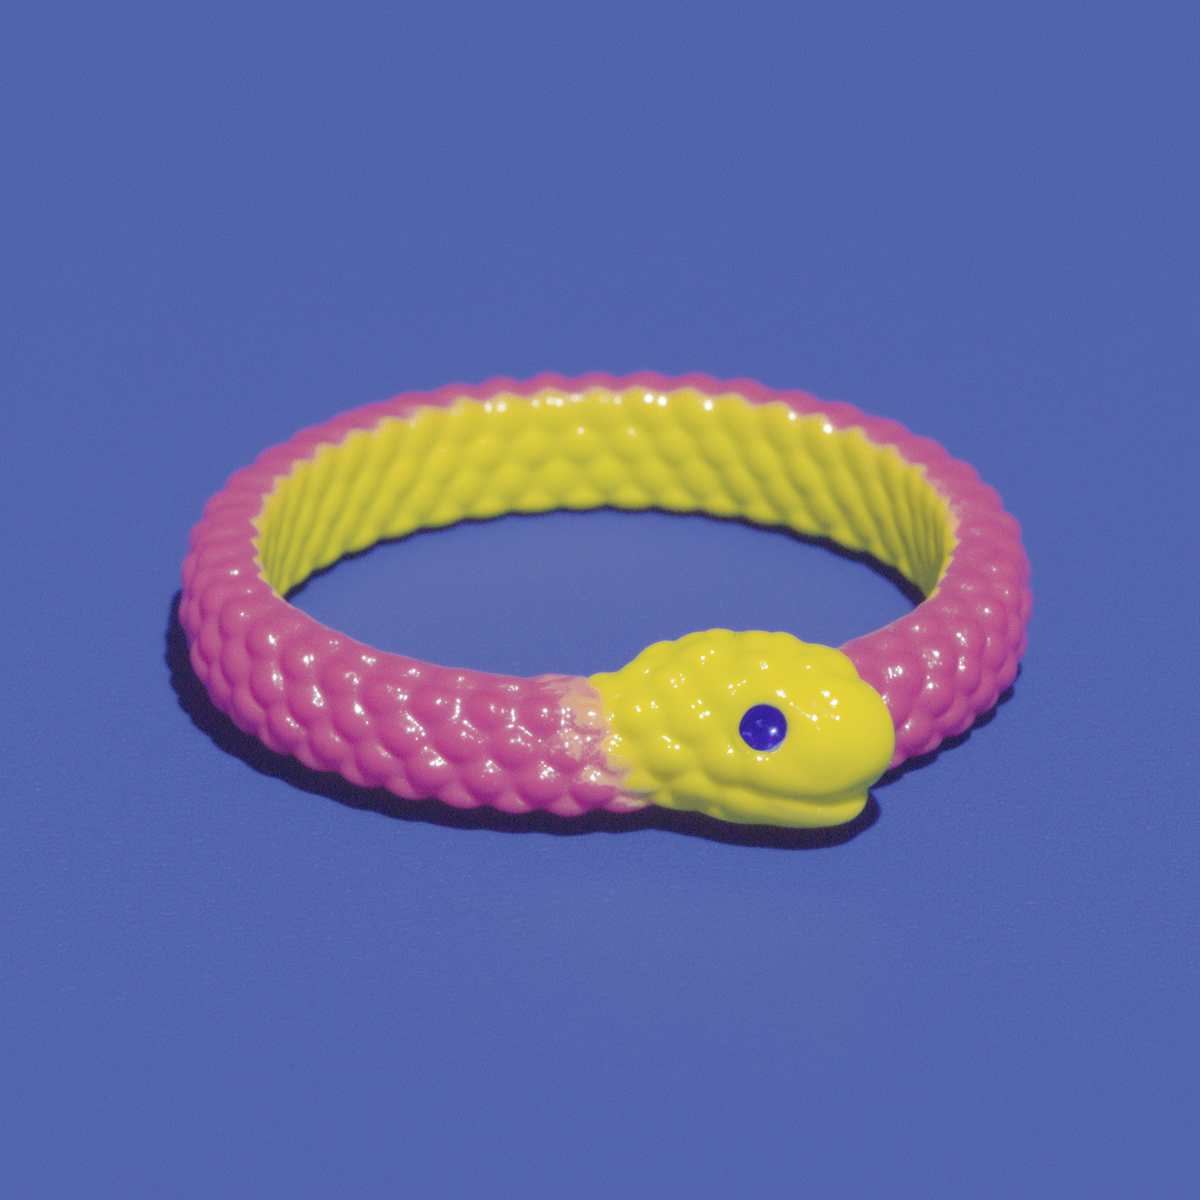
Polymer Clay Snake Bangles: Size, Sculpt, Texture
This kind of bracelet is easier to size and refine cleanly when the wrist curve is set before the snake detail goes on. This guide shows how to form the circle first, then sculpt the head, belly, and scale pattern with less chance of distorting the intended bracelet fit.
Read the build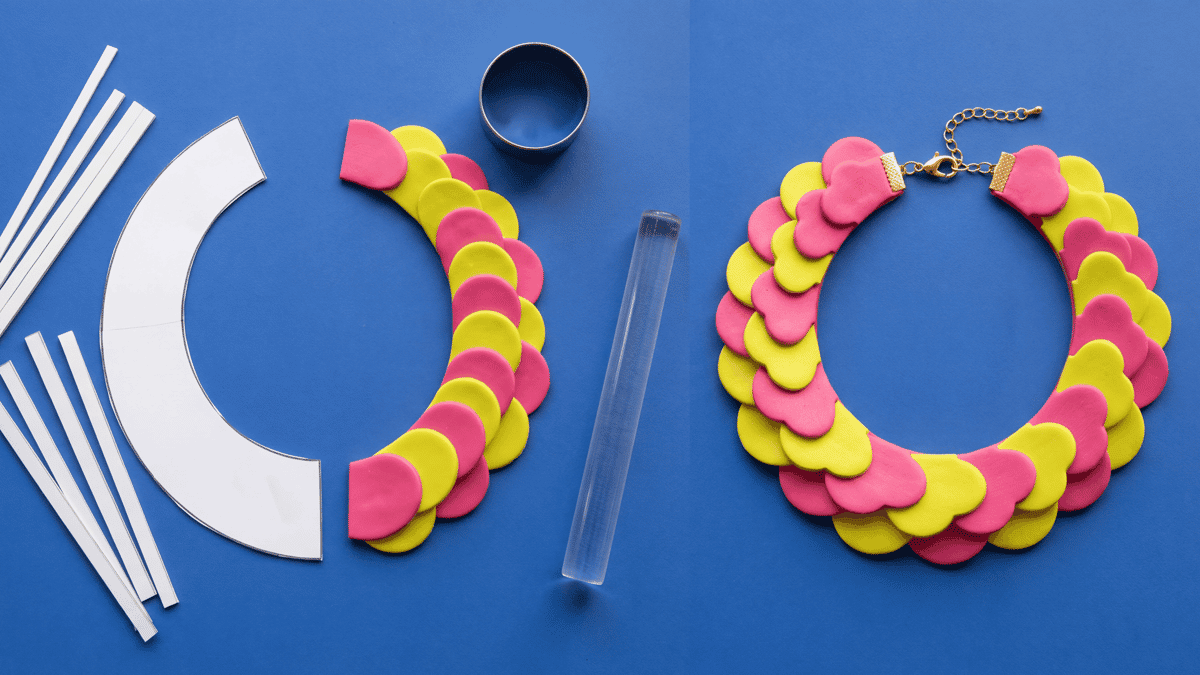
Polymer Clay Collar Necklaces, Bibs, and Curved Bases
Statement collars go wrong when you guess the neckline arc too late, build the front pieces as loose pendants, or let the collar flatten or relax in the oven. This guide gives the curved-base build order for rigid collar necklaces and layered bibs.
Read the build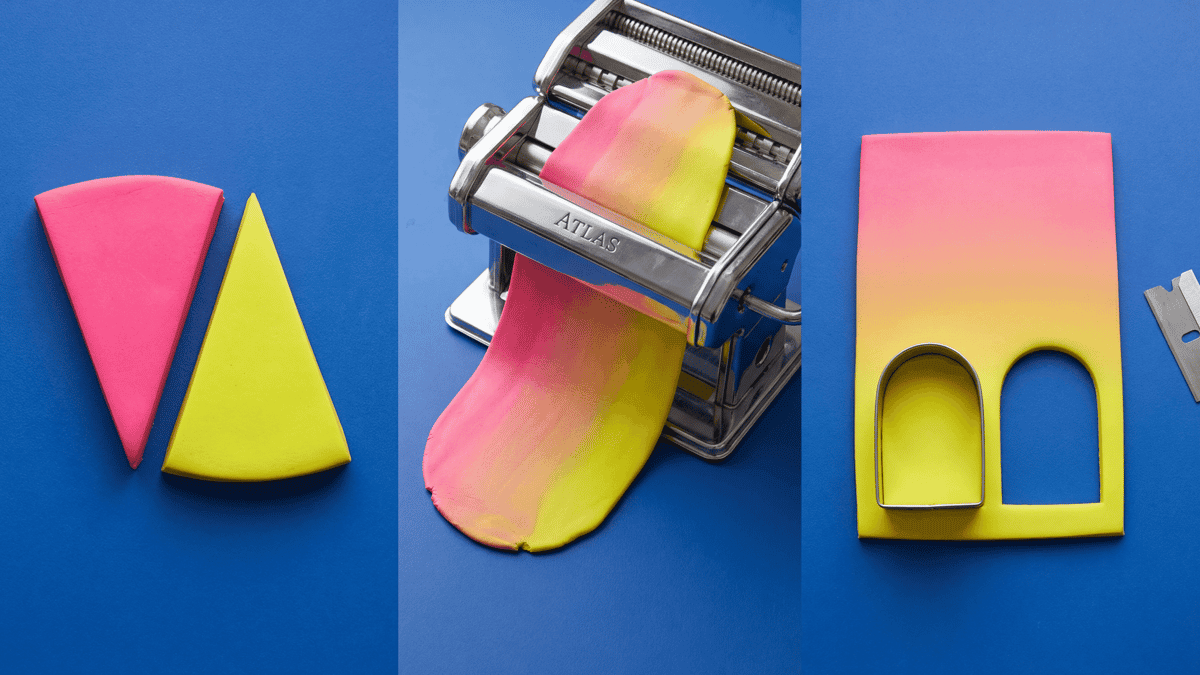
Polymer Clay Skinner Blends, Gradients, and Ombre Slabs
Use Skinner blend and ombre as project labels for a two-color gradient exercise. Record one small fold-and-roll sample and stop before the colors blend into mud.
Read the build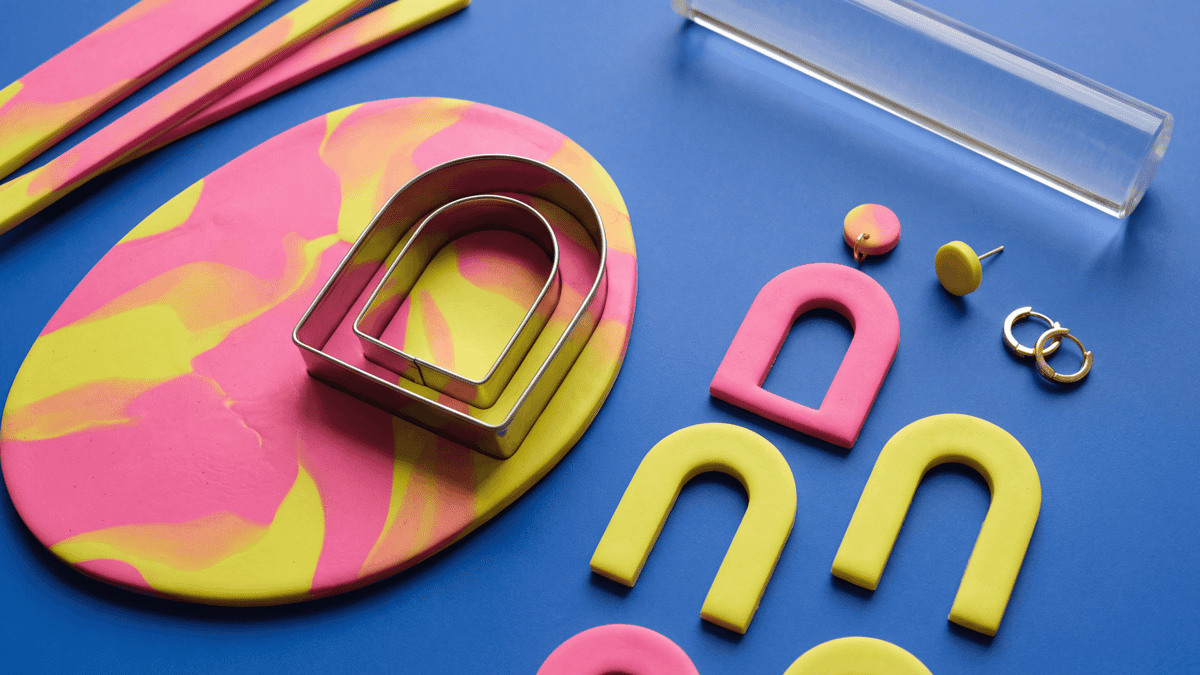
Polymer Clay Cutout Arch Earrings and Hoop Drops
Cutout arches and hoops work best when the wall width is even, the inner opening matches the outer curve, and the hardware choice is made from the finished front view.
Read the build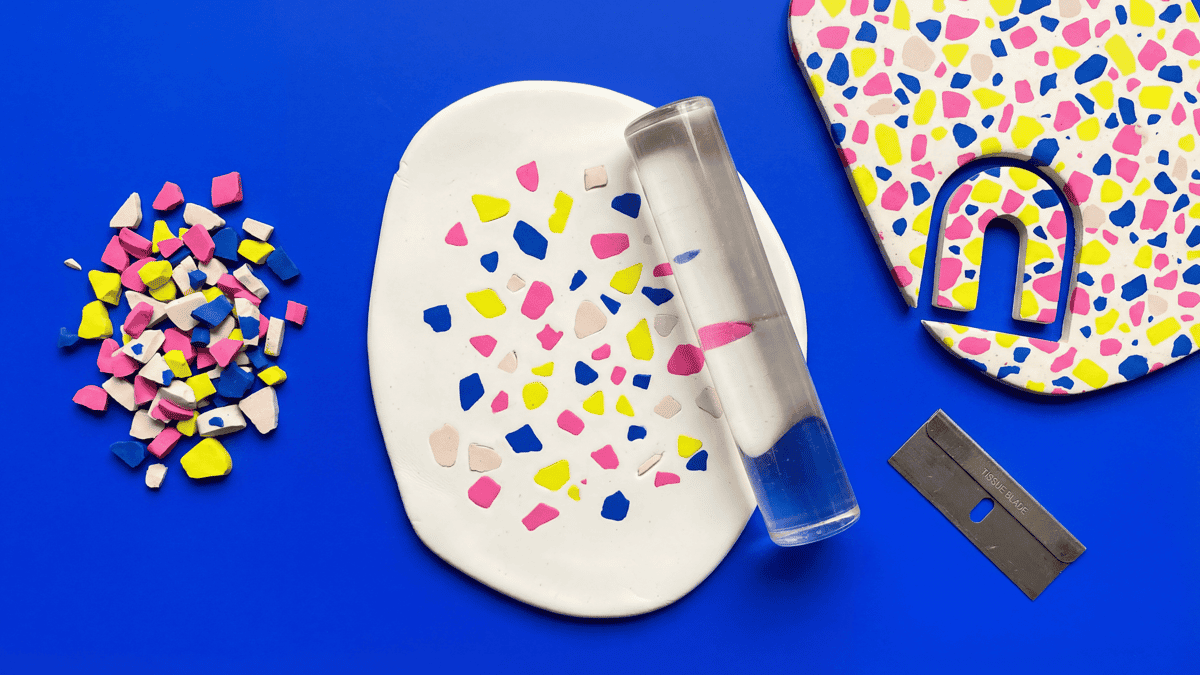
Polymer Clay Terrazzo Slabs, Chips, and Clean Cuts
Terrazzo slabs turn muddy when chips drag, sink unevenly, or blur into the base color during rolling. The fix starts with chip size and density decisions before you ever press them in.
Read the build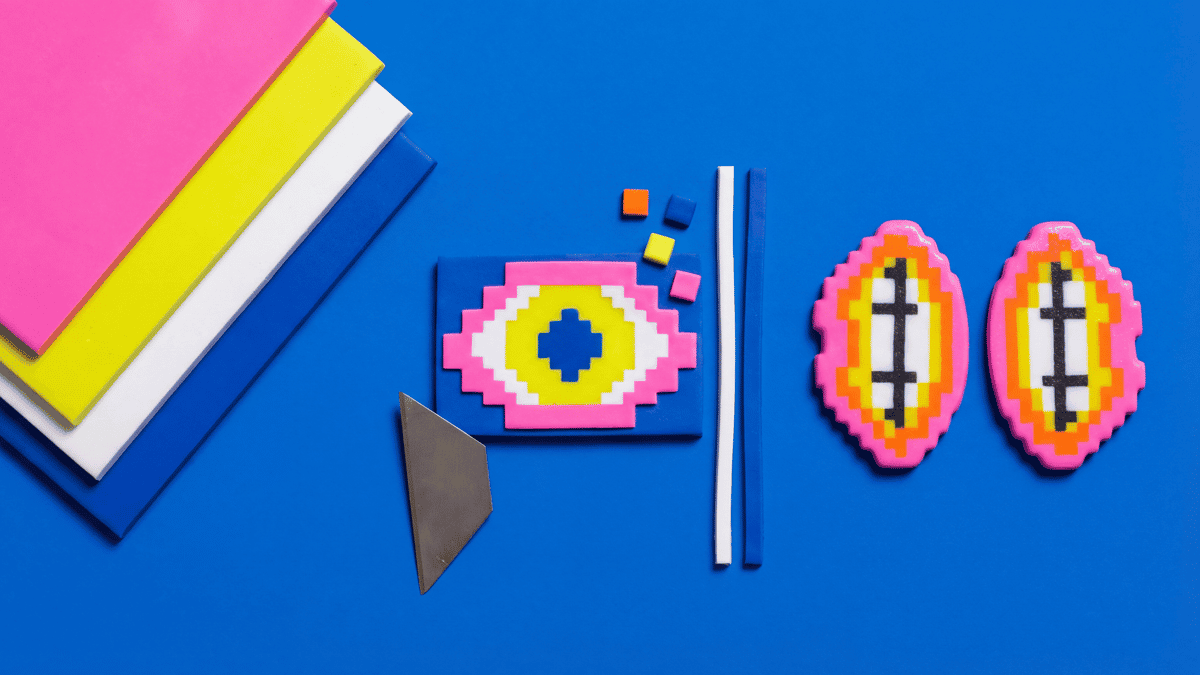
Polymer Clay Pixel Earrings: Slab Layering and Mirrored Pairs
Graphic lips, eyes, mushrooms, and badge-like brooches are often easier to build as flat or gently domed pixel slabs. This guide covers crisp staircase edges, stacked layers, and ways to keep left and right pieces matched.
Read the build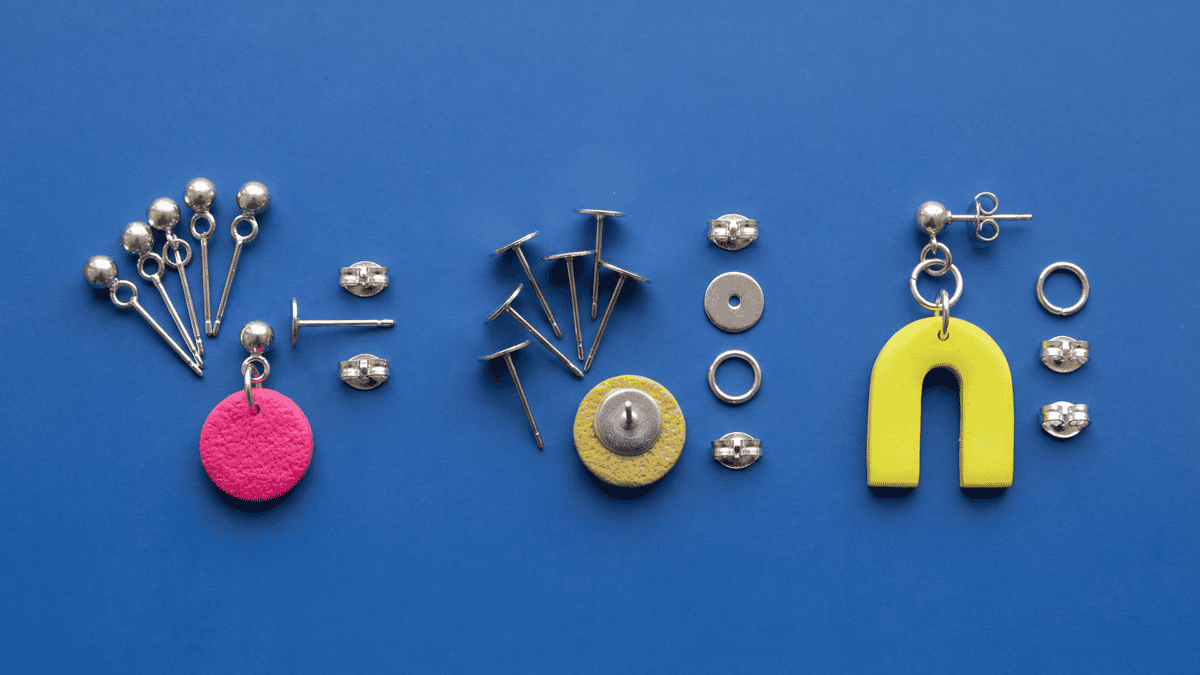
Polymer Clay Stud Toppers, Flat Pads, and Connector Rings
Choose the top connection from the front view first, then keep the attachment short and balanced. Compare visible loop-tops, flat pads, short ring paths, and balance-line marks on a sample before you make the final pair.
Read the build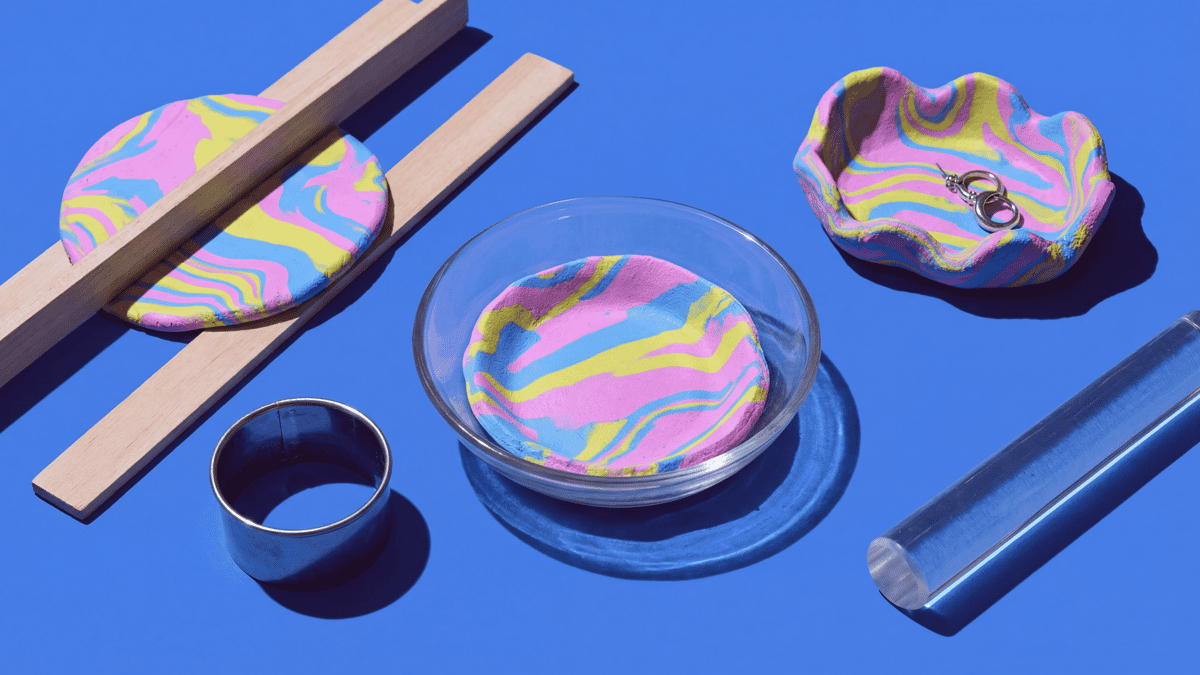
Polymer Clay Trinket Dishes, Forms, and Rims
Use a documented trinket-dish project as the starting point, verify the form and package bake, and keep the result decorative unless the maker supports another use.
Read the build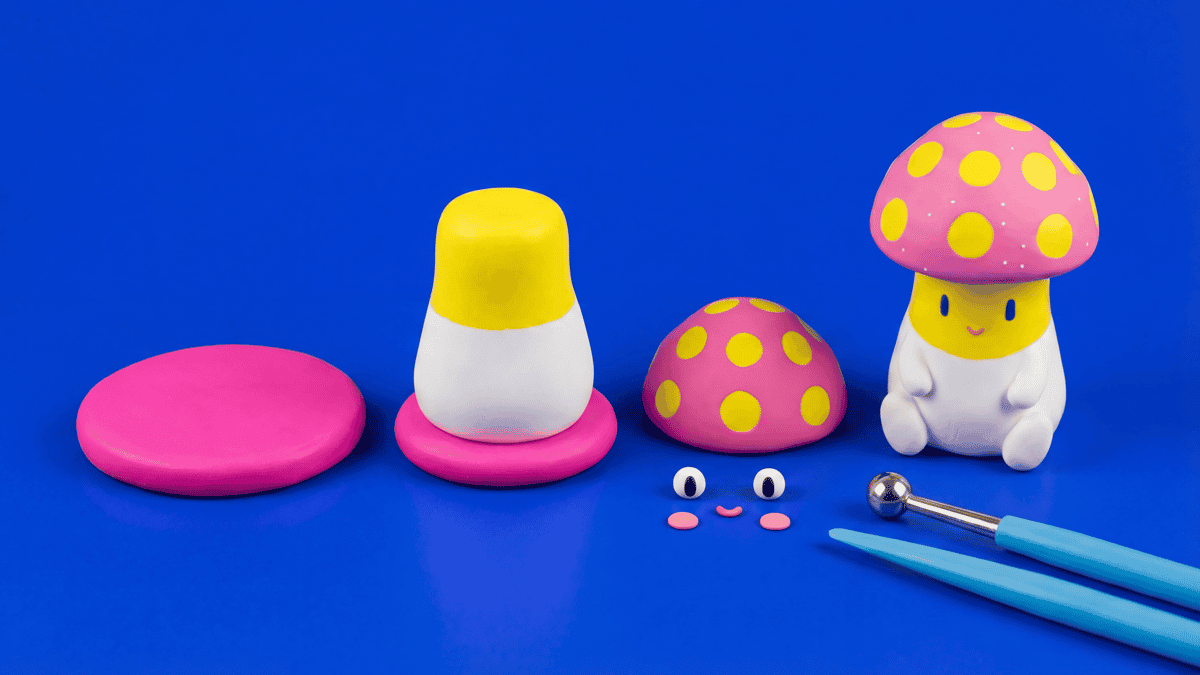
Polymer Clay Figurines: Stable Bases and Clean Features
Small figurines look simple until the base wobbles, the cap droops, or the face gets smudged while you are still shaping the body. This guide covers the order of operations that keeps polymer clay characters stable with cleaner features.
Read the build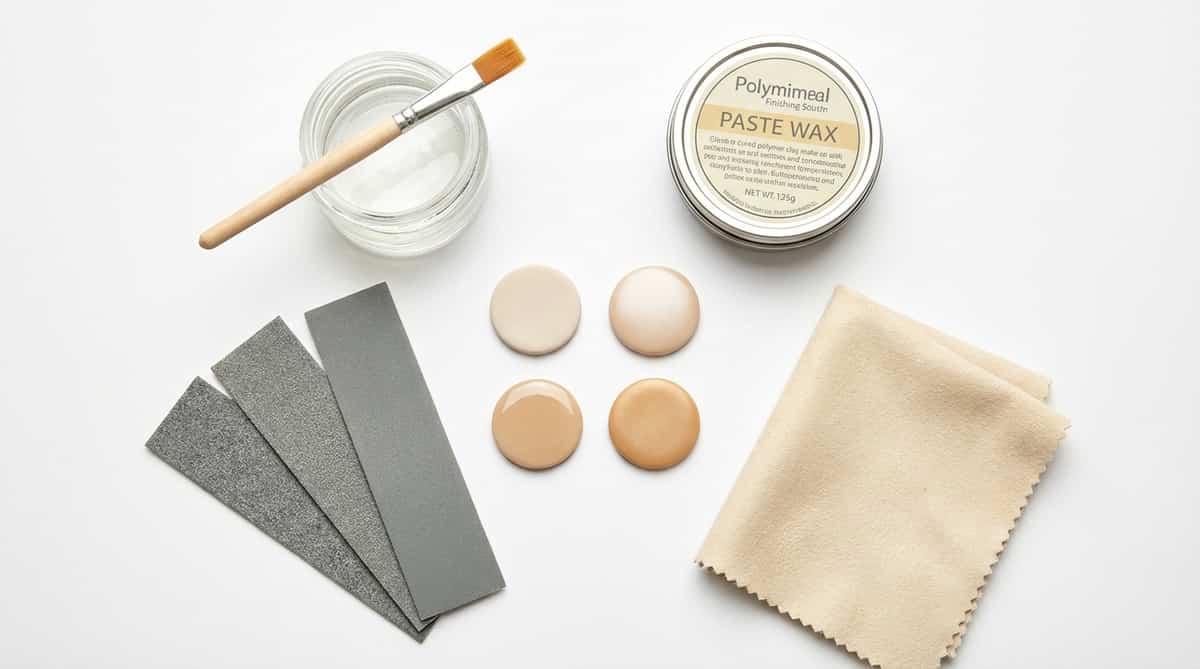
Polymer Clay Sealers, Wax, and Glaze: Compatibility Tests
Leave cured clay bare when it already looks right, or test an exact documented finish on baked scrap before coating the finished piece.
Read the build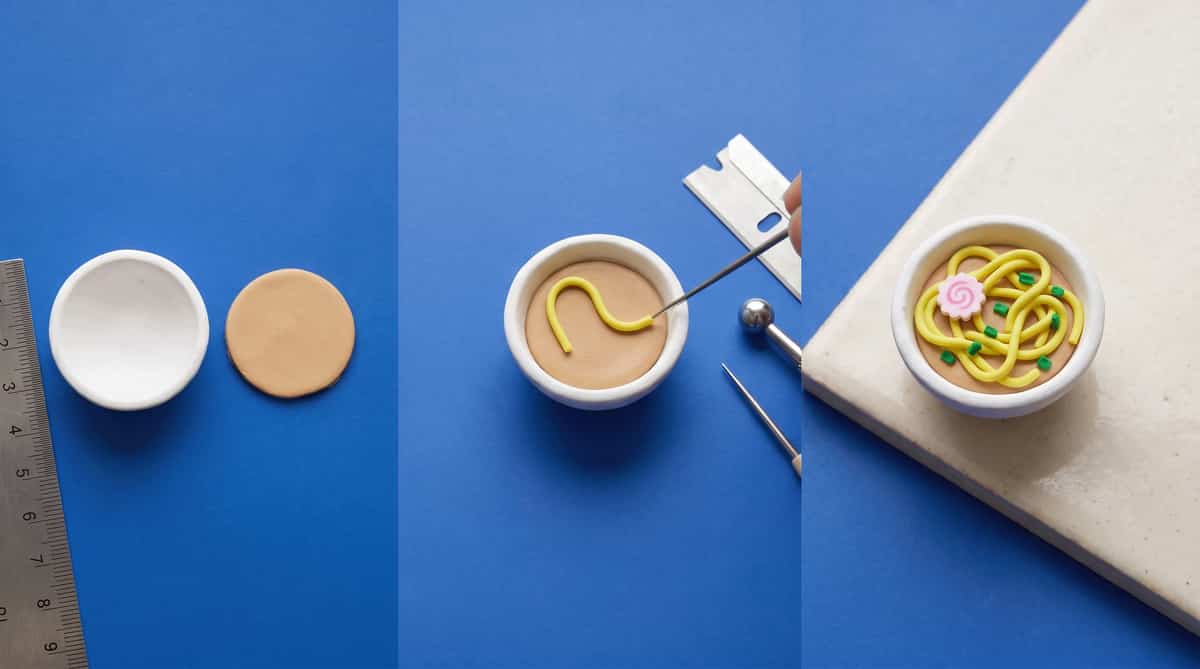
How to Make Polymer Clay Ramen Charms (Broth and Noodle Build)
Tiny ramen bowls, pho studs, and udon charms look cleaner when the bowl, broth disc, and noodles are built as three deliberate layers. This guide covers the build order, broth disc thickness, and how to seat noodles without cracking the rim.
Read the build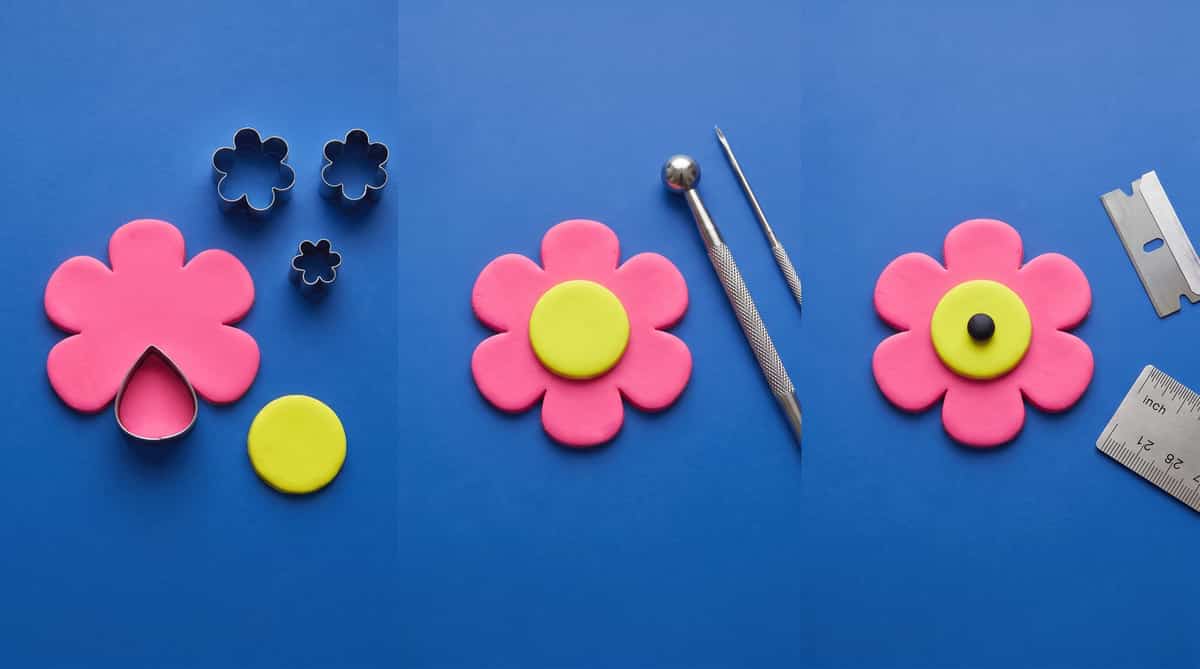
Two-Color Flower Applique: Buttons, Pendants, Earrings
Hand-built two-color flower applique for buttons, pendants, and earrings looks deliberate when the petal layer, contrasting center disc, and tiny accent dot are built in scale relationships. This guide covers petal cutter sizing, center disc proportions, and how to seat the parts without flattening the petals.
Read the build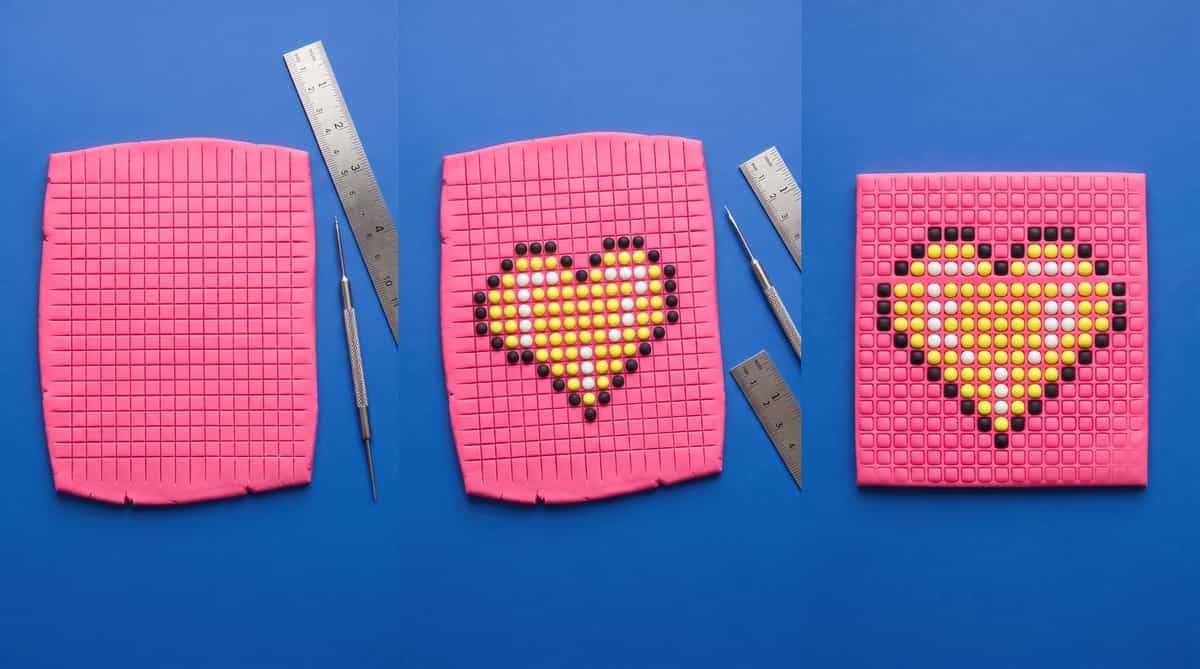
Polymer Clay Bead Grid Tutorial: Cross-Stitch Pixel Patterns
A regular grid of small clay beads can look like cross-stitch when the bead size, spacing, and color placement stay disciplined. This guide covers bead rolling, grid jigs, and how to keep the inlay flat and aligned through cure.
Read the build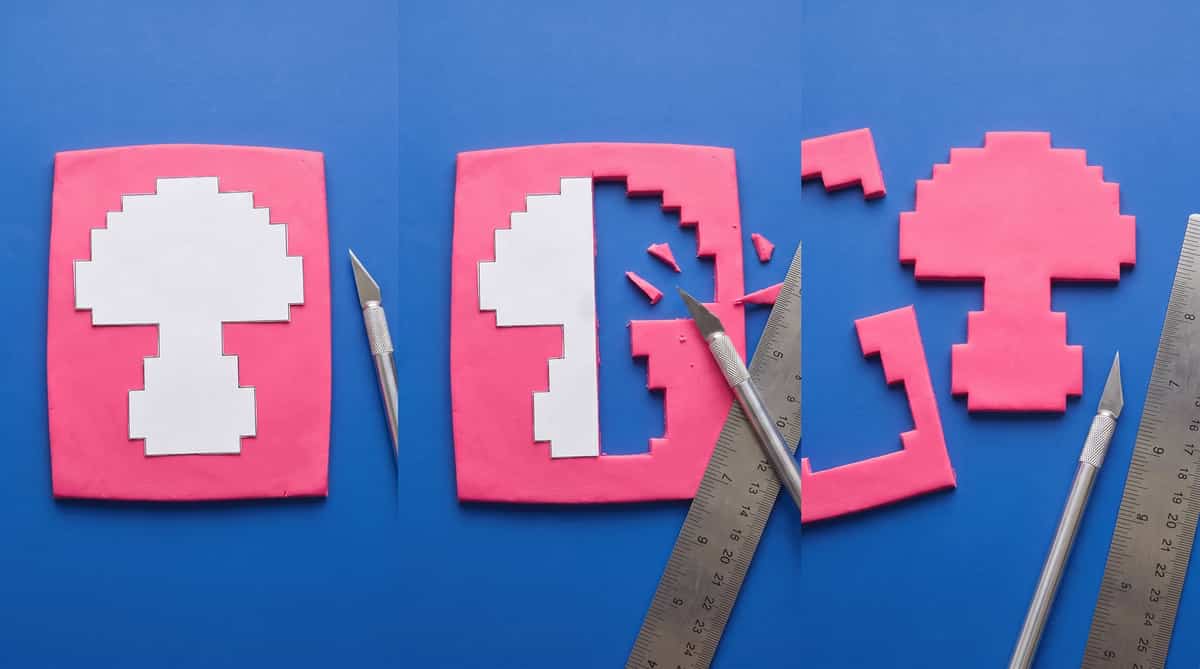
Cut 8-Bit Pixel Polymer Clay Earrings: Staircase Guide
True 8-bit pixel earrings and brooches need stepped-edge silhouettes that look like deliberate pixels from a distance, not softened curves. This guide covers grid-based templates, blade-cut checks, and keeping the staircase crisp through cure.
Read the build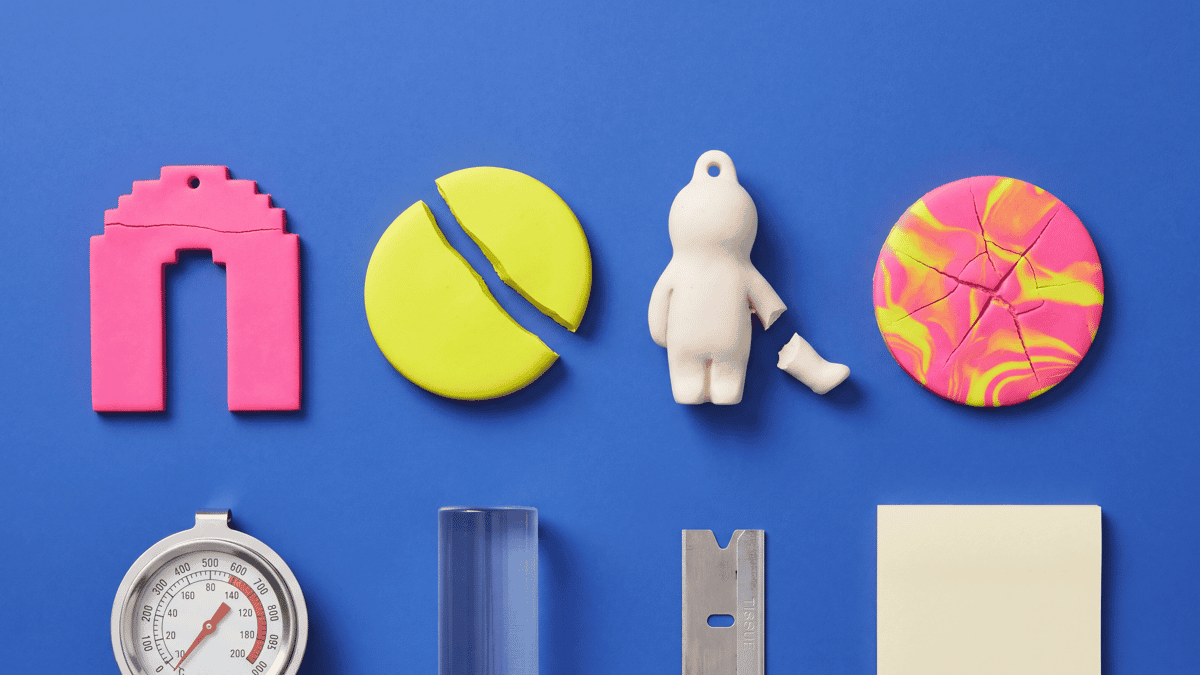
Why Is My Polymer Clay Cracking? Causes and Checks
When polymer clay cracks, check the package bake, measured oven temperature, conditioning, thickness, and support before assigning one cause.
Read the build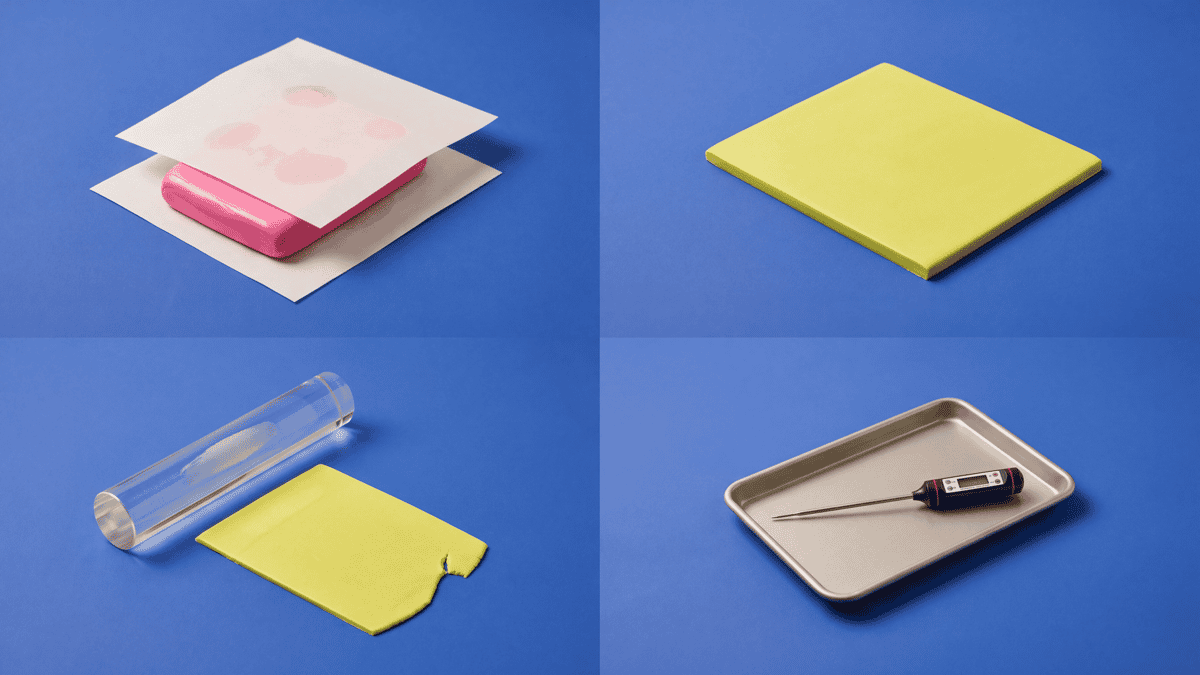
How to Fix Soft, Sticky Polymer Clay So It Stops Dragging
Identify how the clay feels, try one manufacturer-supported adjustment on a small piece, check it again, and stop when it is workable.
Read the build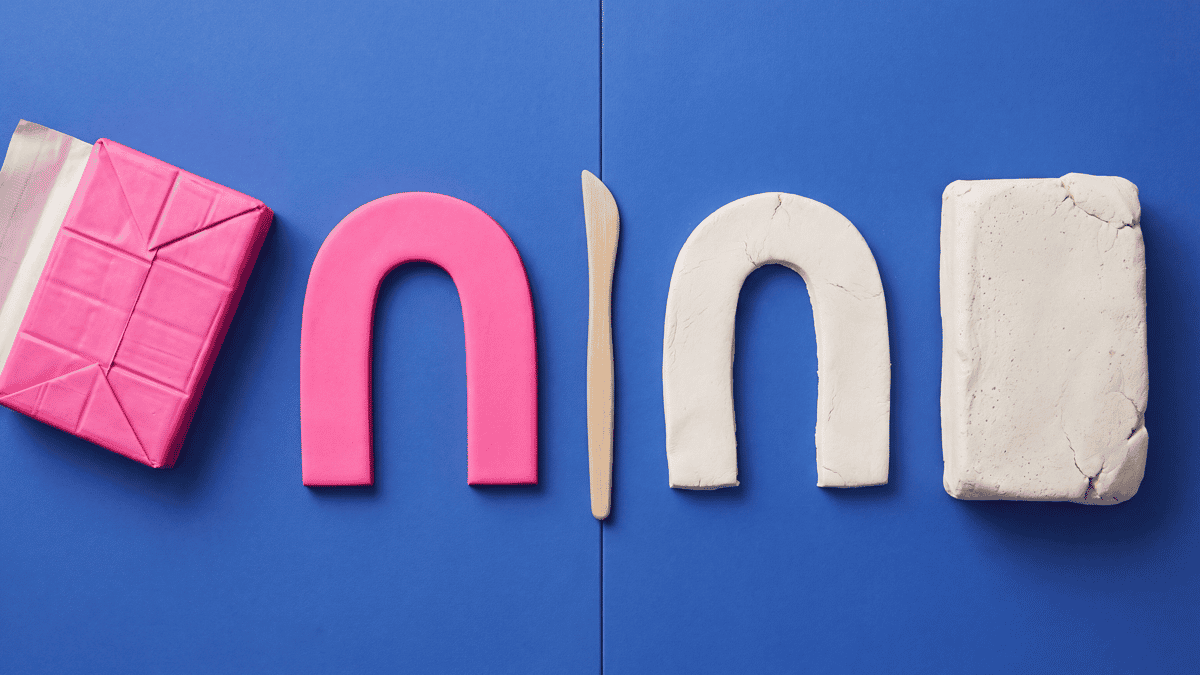
Polymer Clay vs Air Dry Clay: Which to Use
Compare exact product instructions rather than transferring cure, drying, moisture, thickness, or safety claims across two broad clay categories.
Read the build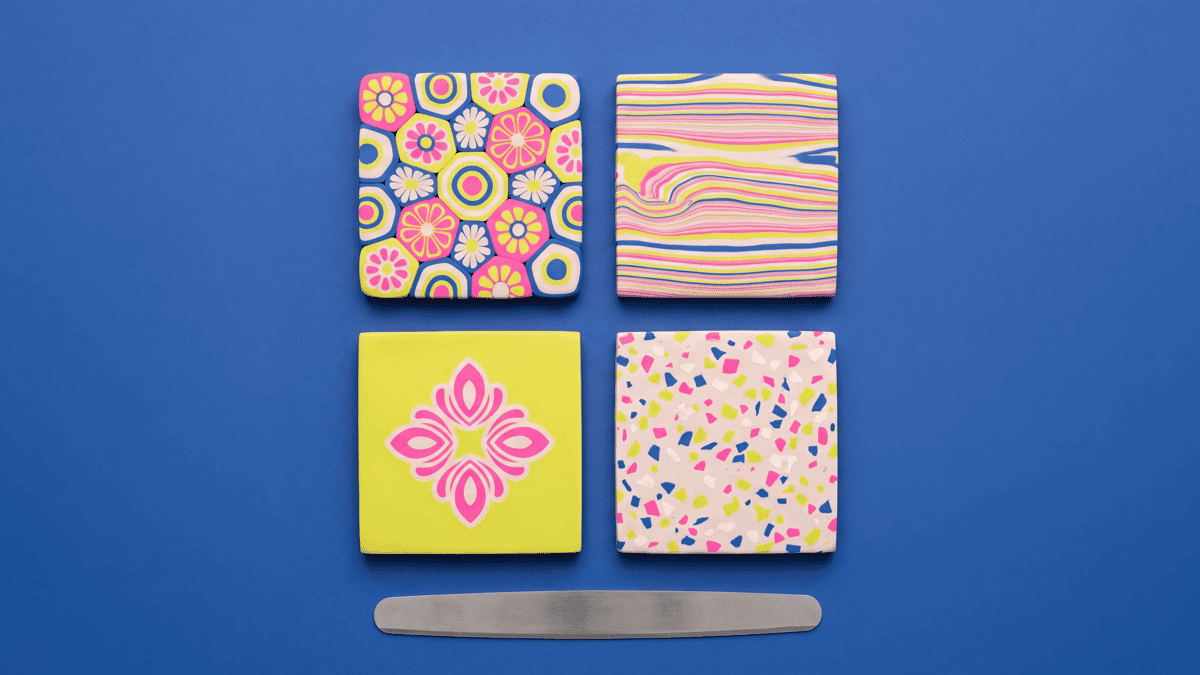
Polymer Clay Surface Effects: Cane, Inlay, Texture, or Print
You added inlay or a cane slice and the surface cracked or the pattern dragged because you chose the wrong technique for the shape. Match the effect to the result you need: repeating pattern (cane), precise placement (inlay), raised detail (applique), or loose texture (marbling/print). Then go to the right deeper guide.
Read the build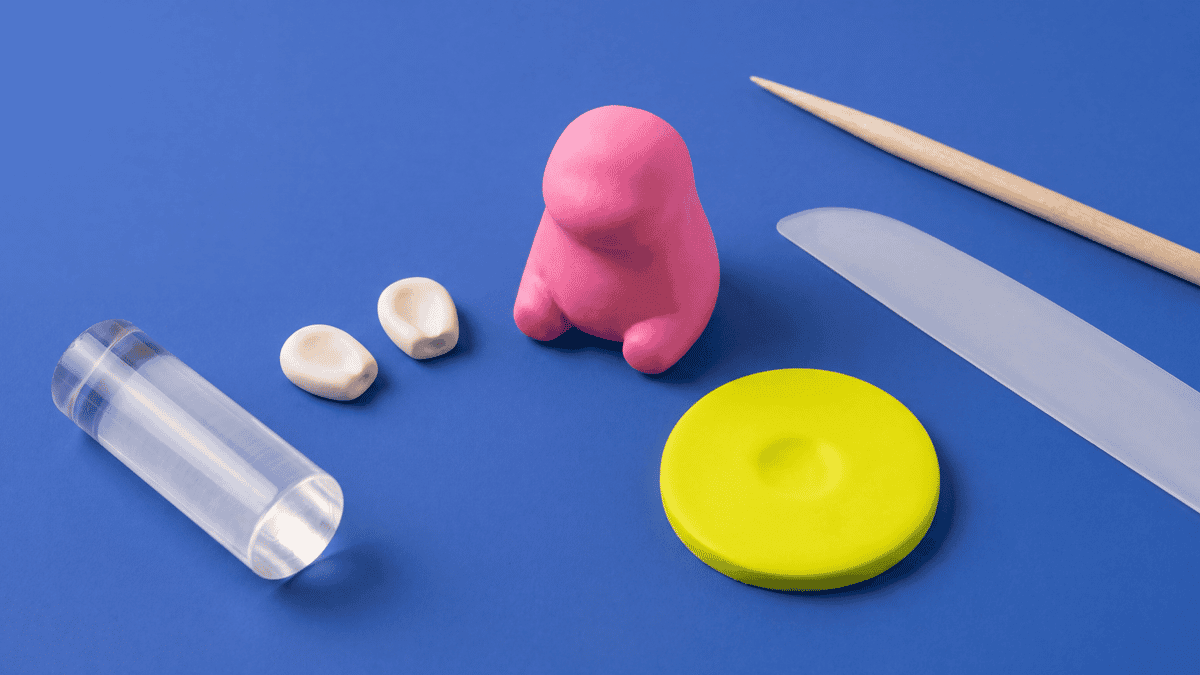
Polymer Clay Assembly: Build Order and Join Planning
Stabilize thickness and support before cure. Follow package directions, verify oven temperature, and support raised or extended portions during baking.
Read the build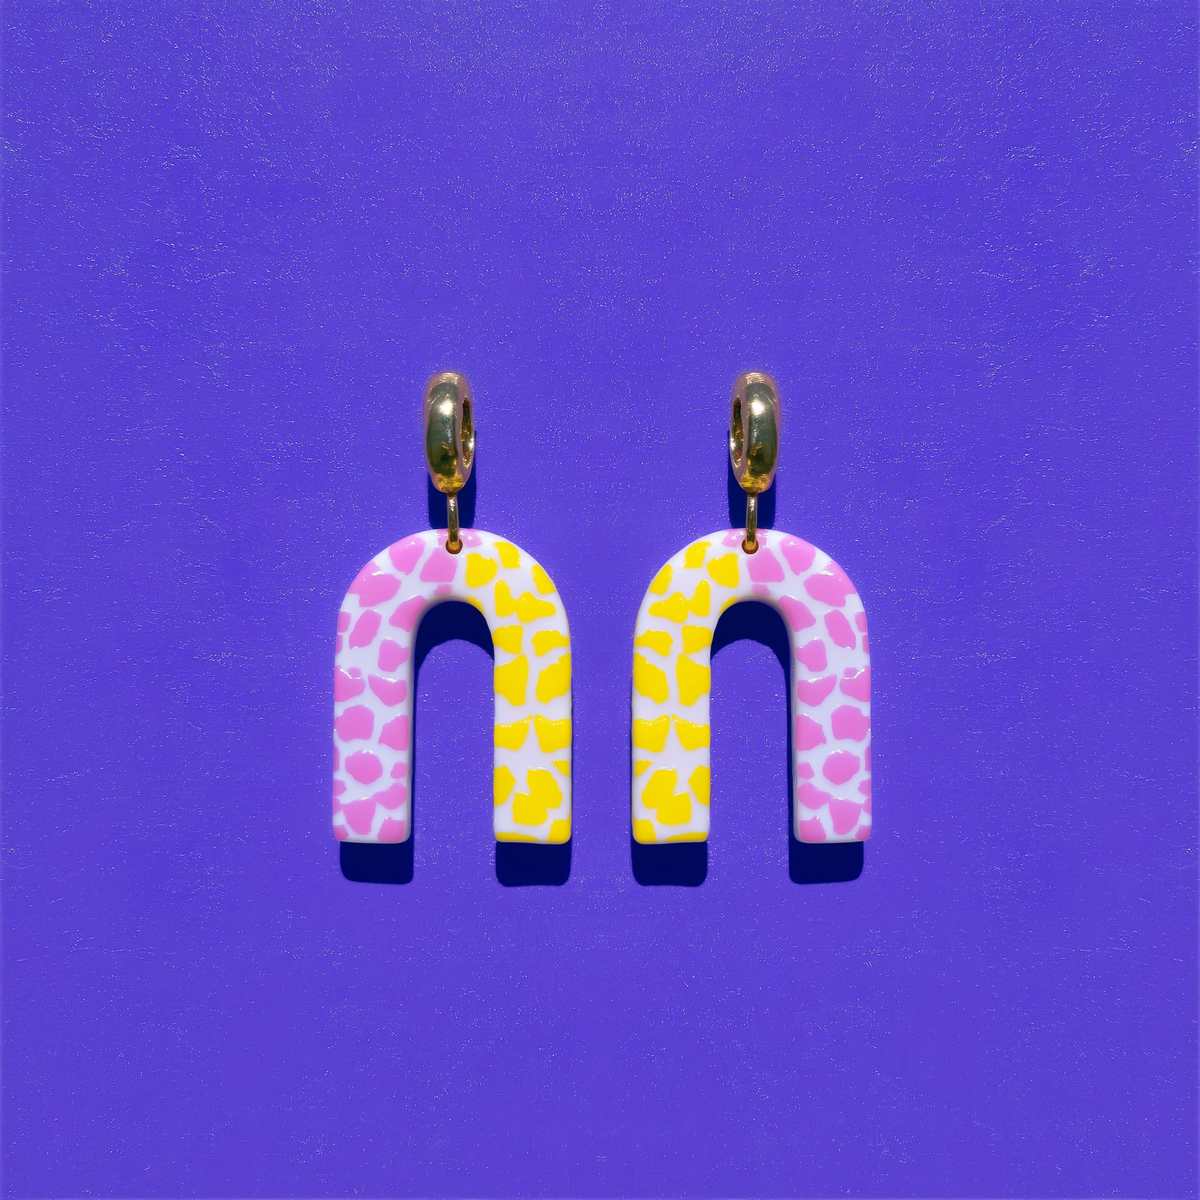
Pasta Machine for Polymer Clay Earrings: The Setting, Not the Brand
For earrings, the useful setting is the one that still works after baking, cooling, and holding the piece from its hardware point.
Read the build
Polymer Clay Pixel Art: Pick the Build Method for Your Design
Saved a pixel design and not sure how to build it in clay? Compare the separate color units, stepped outer edge, and repeated dots to choose assembled blocks, a staircase silhouette, or a bead grid.
Read the buildStudio notes
Get polymer clay resource notes
New technique reads, tool picks, and build notes as they publish. Free, no spam, unsubscribe anytime.
We will not share or sell your email. Unsubscribe anytime.