How to Attach Brooch Backs to Polymer Clay
Brooch fronts can tip or lose grip when the rear contact is curved, too small, or glued over a finish. Prepare a flat zone, match the finding size to the scale, and place it on the visual balance line before the adhesive cures.

In brief
Key takeaways
- 1Cure the brooch front first, then test the finding placement on the baked back. Adjusting after bake is easier than discovering a misaligned pin in raw clay
- 2Raw clay does not reliably bond itself to smooth metal during cure. Plan a mechanical wrap, an embedded loop, or a separately tested adhesive
- 3Reserve a flat rear zone wide enough for the full pin pad to sit flush. A pad on a curved back will rock and lever the bond loose
- 4Placement along the balance line matters as much as the glue. A perfect bond on the wrong line still hangs crooked
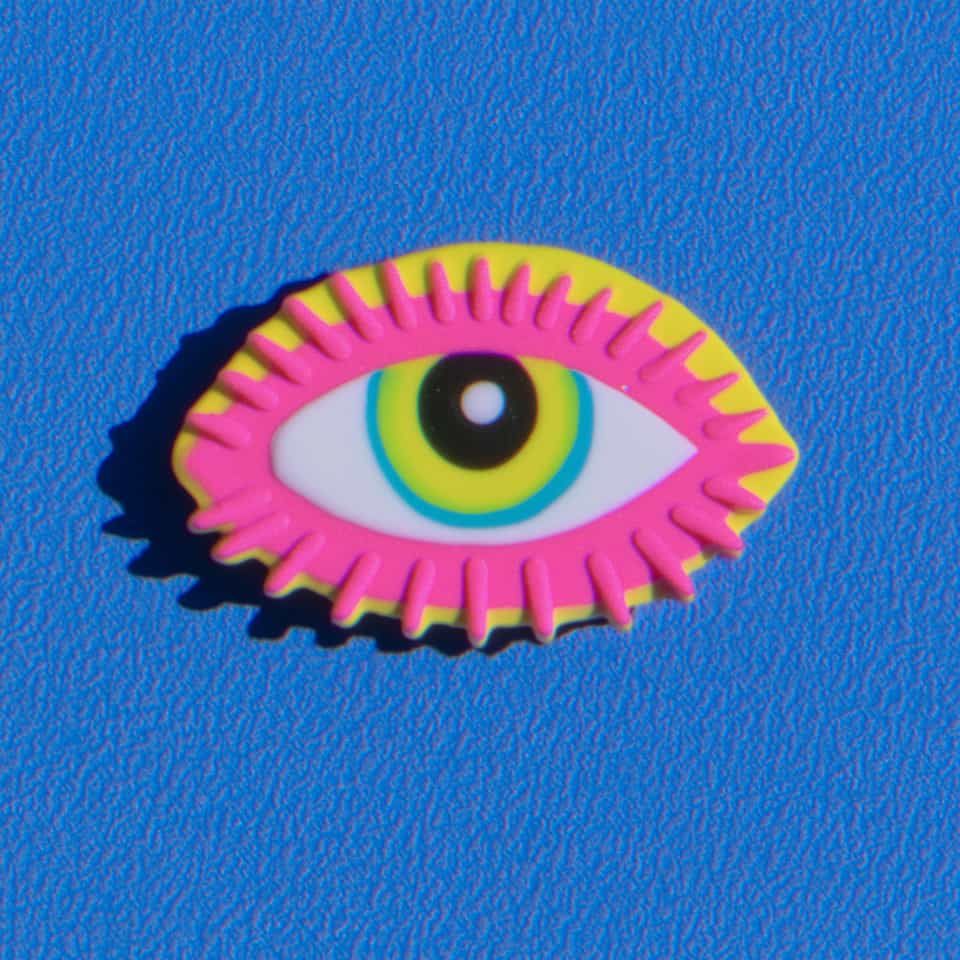
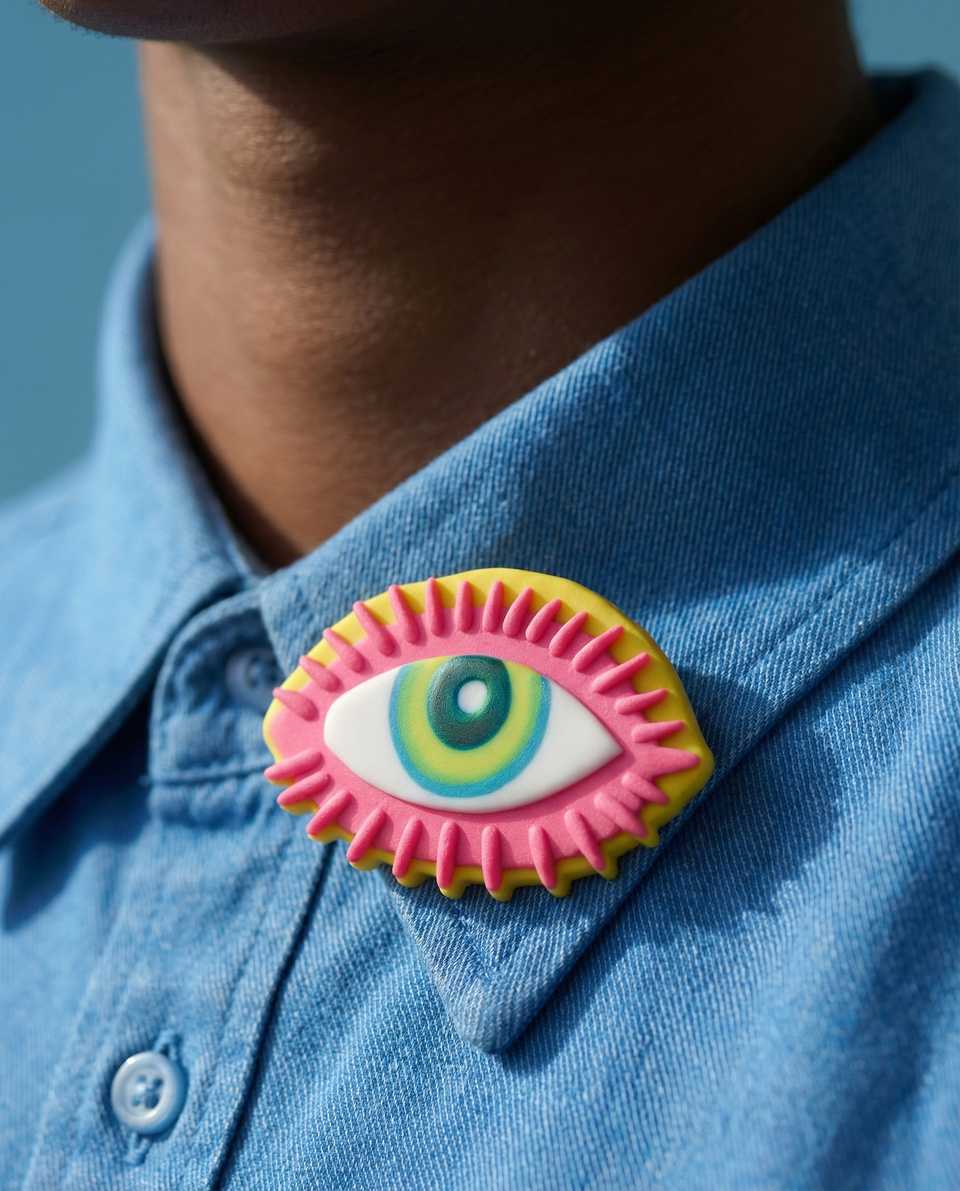
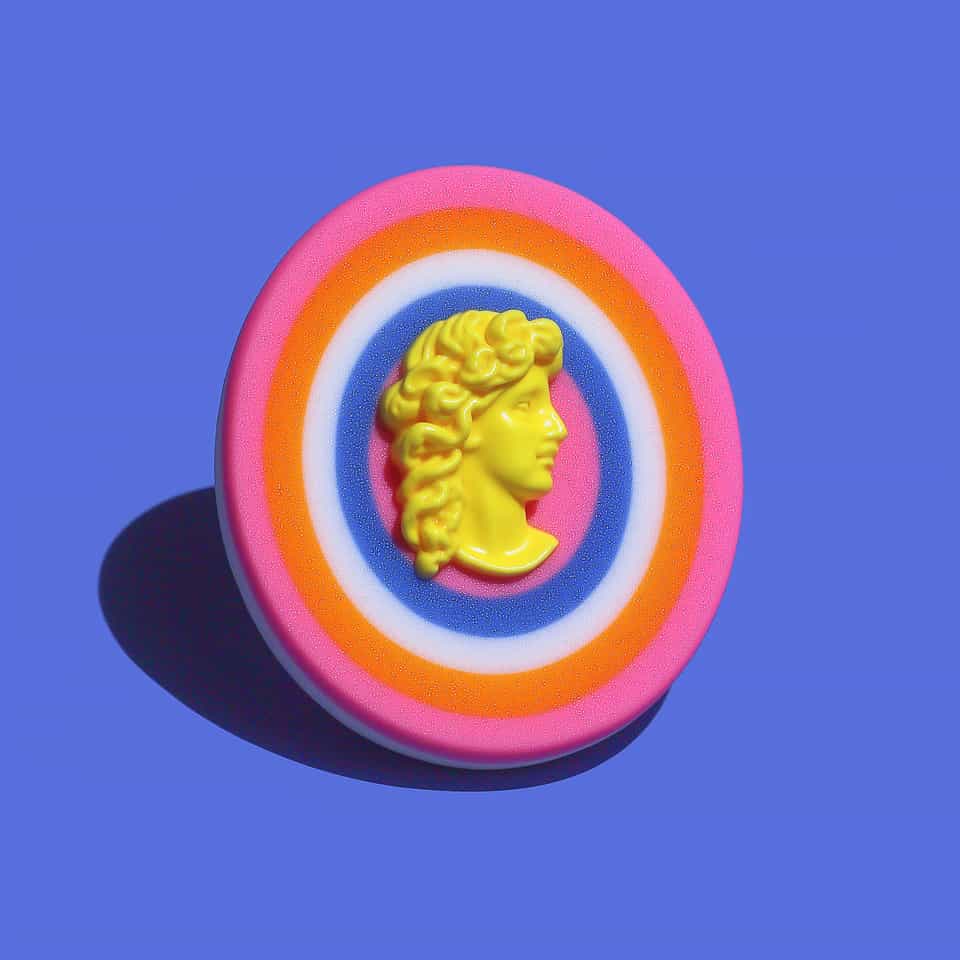
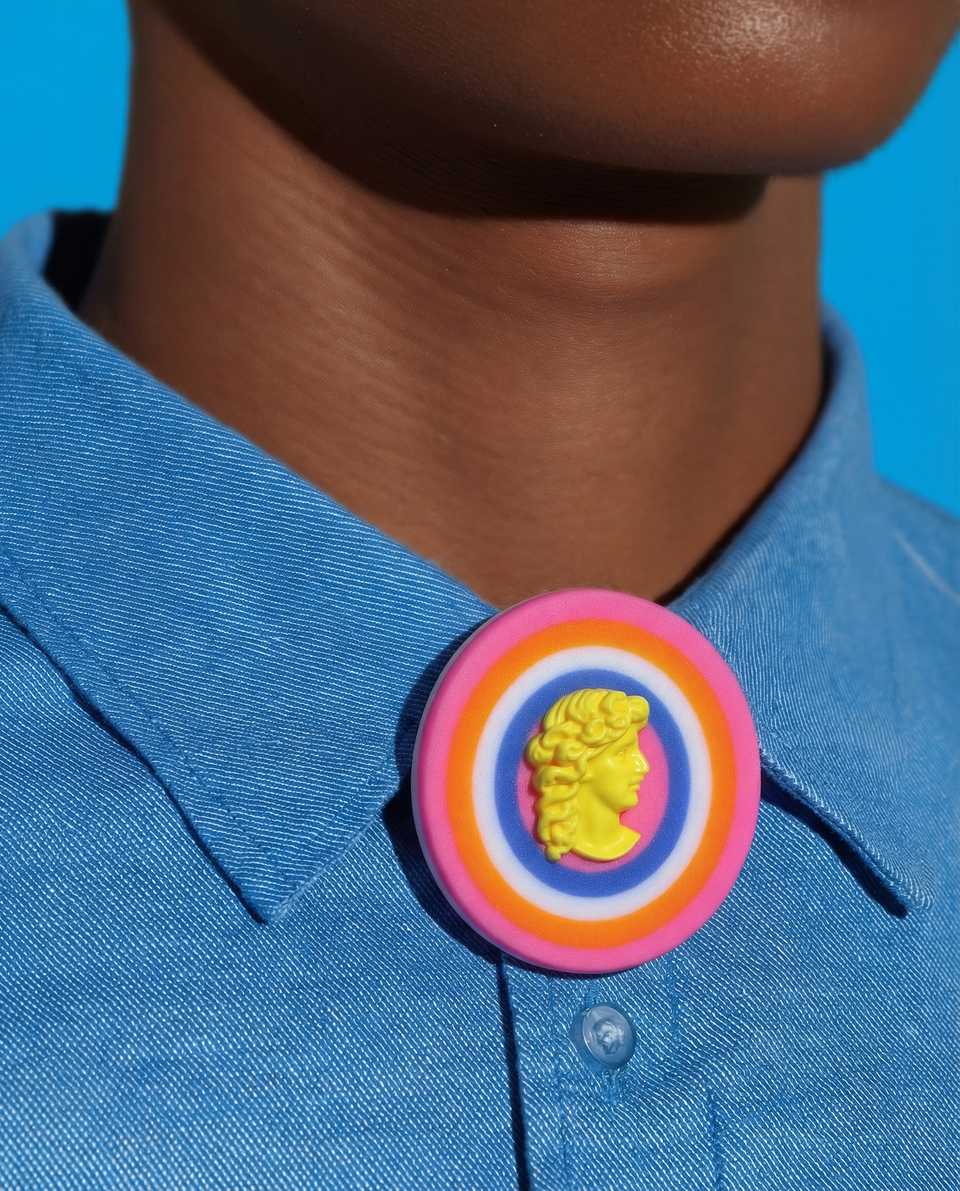
The front of a polymer clay brooch gets most of the attention, but the back does a lot of the practical work. A beautiful eye brooch or floral disc can still hang badly if the pin back is crooked, perched on a curve, or attached to too little surface area.
For many lookbook-style brooches, a common low-complexity path is to build a front that includes a flat rear zone, bake it cleanly, then test a flat-pad finding on the cured back with the adhesive and placement that best fits the finished piece.
Polymer Clay Will Not Bond To Bare Metal Just From Baking
Polymer clay does not reliably bond to non-porous surfaces like metal just because it was baked against them.
That means you have a few attachment options:
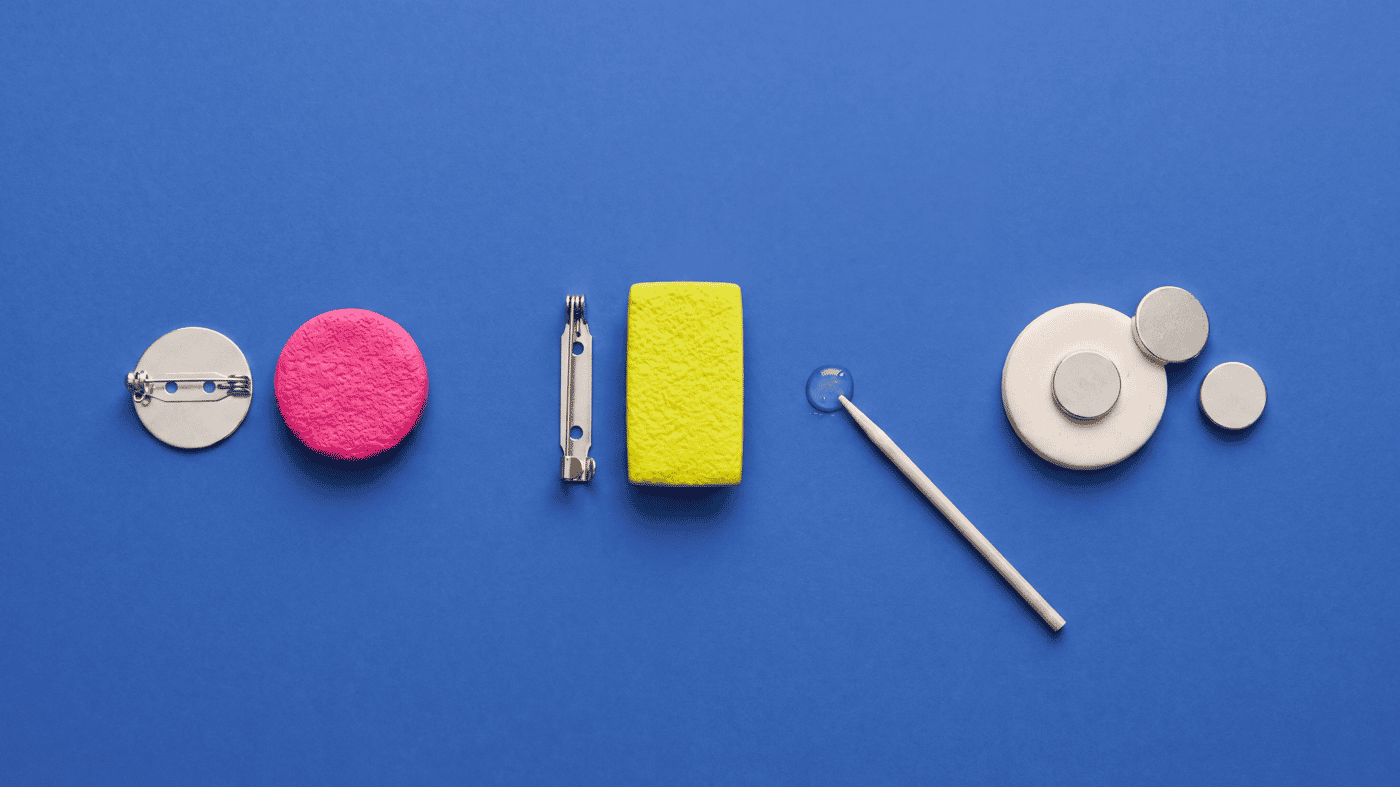
- adhesive attachment after cure for flat pad brooch findings
- mechanical trapping or wrapping when the design is intentionally built around the finding
- a two-bake embed where a thin clay strip locks the finding pad in place during a second bake
Most flat graphic brooches and floral brooch discs will use the first path.
Best Brooch Backs For Flat Clay Fronts
A flat-pad brooch finding is a common default because it gives the adhesive a broad, stable contact area.
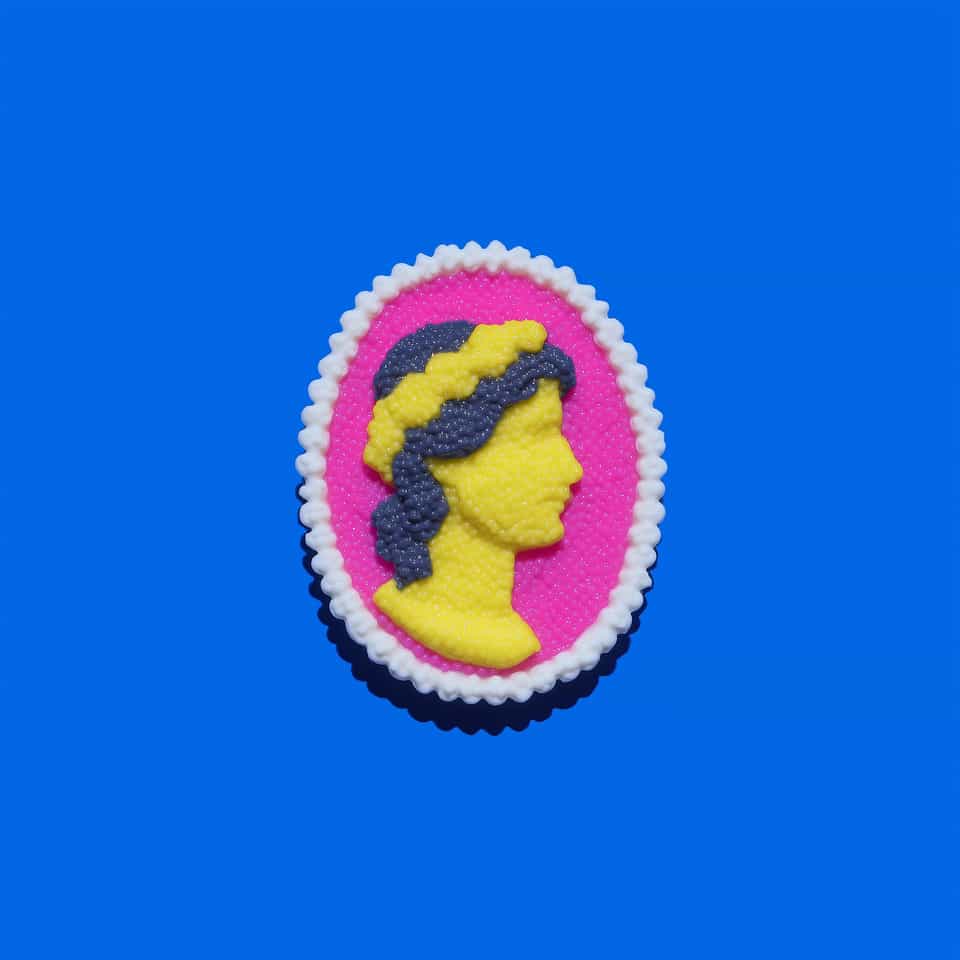
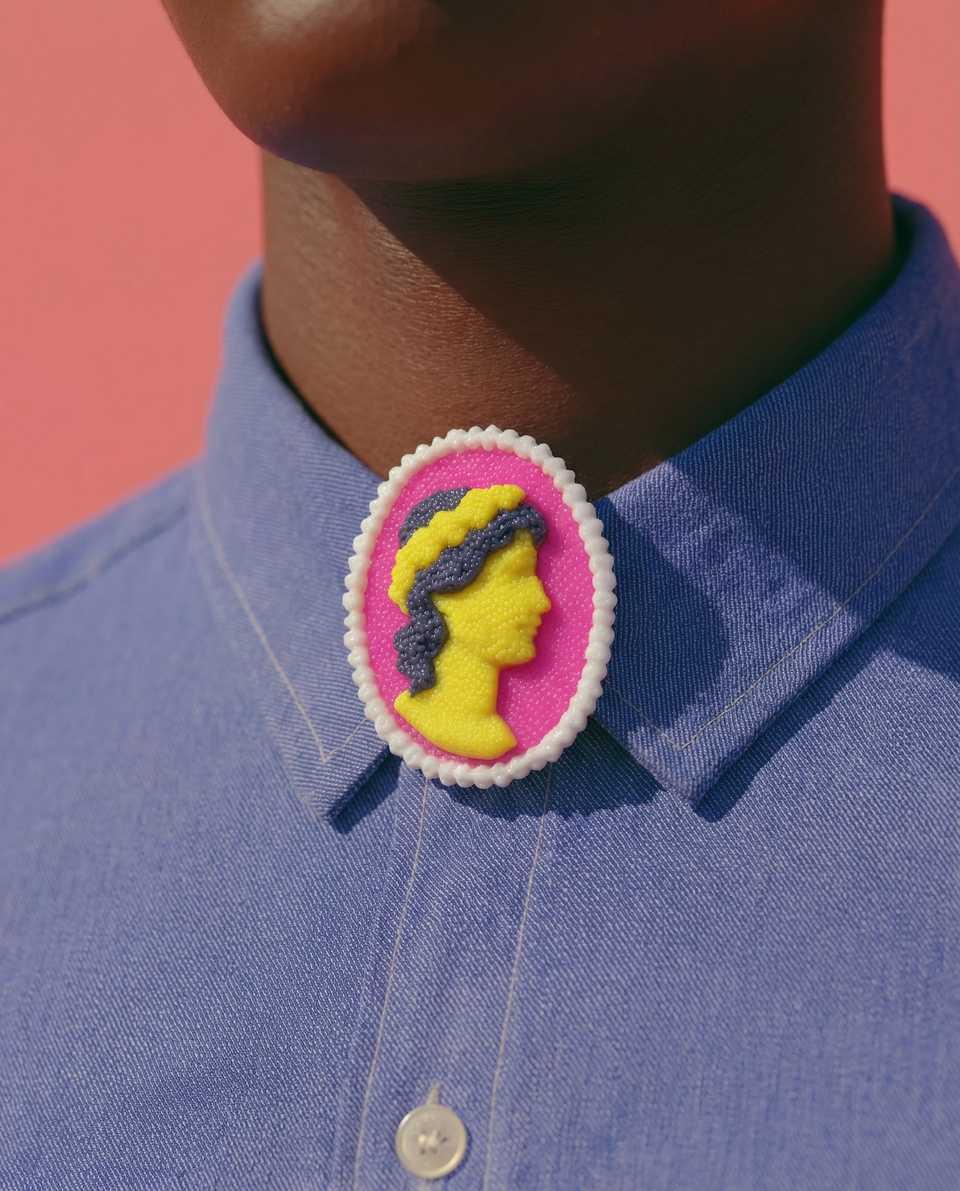
Brooch pin backs with flat pad are a straightforward option to test for eye brooches, cameo discs, floral pins, and other front-heavy clay shapes when the pad size and closure style fit the finished piece.
Design The Back Before You Decorate The Front
The front does not need to be plain, but the back needs one flat contact zone where the finding can sit flush.
If the back is domed, deeply textured, or hollowed unpredictably, you are creating an attachment problem before the brooch ever reaches the oven. Plan the rear contact area while the piece is still only a shape, not after the finished front already looks too good to touch.
Glue After Cure For Most Flat-Pad Findings
Most polymer clay brooches cure cleanest with the front baked first, the piece cooled fully, and the finding attached to the cured rear side last.
This is cleaner for three reasons:
- you can place the hardware after you check the finished balance
- you do not risk shifting the finding while shaping the decorated front
- you can prepare the back specifically for the adhesive bond
Two-part epoxy for jewelry is useful when you want a little working time to get the placement right.
Instant glue for polymer clay findings is useful when the back is already prepared and you want a faster bond.
E6000 is one flexible adhesive some makers test for flat-pad findings on cured polymer clay, alongside product-specific epoxy tests.
Before you glue, prepare the cured back so the adhesive has something to grip. Lightly scuff or sand the contact zone, then wipe both the clay and the metal finding with rubbing alcohol to clear surface oils. A smooth, oily, or unscuffed back is the most common reason a glued brooch back lets go later.
Glue behaves differently depending on the finding's finish, how you prepped the back, and which adhesive you reach for. So when a new finding-and-glue combo is on your worktable, bond a sacrificial cured scrap first, follow the label's mix and cure times, and let it cure fully before you trust it on a finished piece.
Where The Finding Should Sit
Place the brooch back along the balance line, not just wherever it physically fits.
Ask yourself:
- Will the top-heavy part of the brooch try to tip forward?
- Does the finding sit on the widest stable area of the back?
- Will the pin still feel centered once the piece is worn on fabric?
A brooch that hangs straight usually comes from balanced placement, not from stronger glue alone.
When Mechanical Trapping Makes More Sense
If the design allows you to wrap clay around part of the finding or build a recessed hardware channel intentionally, that can reduce reliance on adhesive alone.
This approach is most useful when the shape is thick enough to hide the hardware plan cleanly. For many flat graphic brooches, though, the extra bulk is not worth it and a clean flat-pad back is the simpler solution.
The most durable version of this is a two-bake embed. After the front is baked, lay a thin strip of raw clay over the bar pin's pad (leaving the pin itself clear), optionally brush a thin film of liquid clay between the cured back and the strip so it grips, press the strip down well, and bake again so it locks the pad in place. Pick a finding whose embedded end has a loop or bend rather than a straight bar so it cannot slide straight out. For brooches that will see real wear, this baked-in hold is usually more reliable than glue alone.
Common Brooch-Back Mistakes
- Curved back: the finding only touches at one point and pops off later
- Undersized finding: the brooch rotates or feels top-heavy on fabric
- Bad placement: the piece tilts even though the front looks symmetrical
- Rushing glue-up: the finding shifts before the adhesive is fully set
Attach The Bar Pin Last So You Can See The Real Contact Area
Once the clay is cured and cooled, you can read the actual rear surface: where it sits flush, where it rocks, and how much flat area the pad really has to grip.
Set the finding on that flush zone and hold it square while the adhesive sets. Once the bond reaches the full cure time on its label, do a gentle wear test before a busy day or a sale, not before, so the bar pin sits flush and the back looks finished instead of like a finding glued on as an afterthought.
More guides in this path
Open these when the next decision is material choice, attachment, or finishing.

Earring Findings for Polymer Clay: Posts, Hooks, Jump Rings, and Attachment Planning
Posts can fail when the pad is too small or the back is curved. Jump rings can tear through holes with no margin. Use the back shape, finished weight, and one sample assembly to choose findings without pretending one metal or glue fits every pair.
Best Brooch Backs for Polymer Clay (2026): Pin, Magnet, and Bar Options
Brooch back choice decides whether a polymer clay pin hangs straight, stays closed, and respects the fabric. Compare flat-pad, locking bar, and magnetic backs by pad width, weight, and wear use.
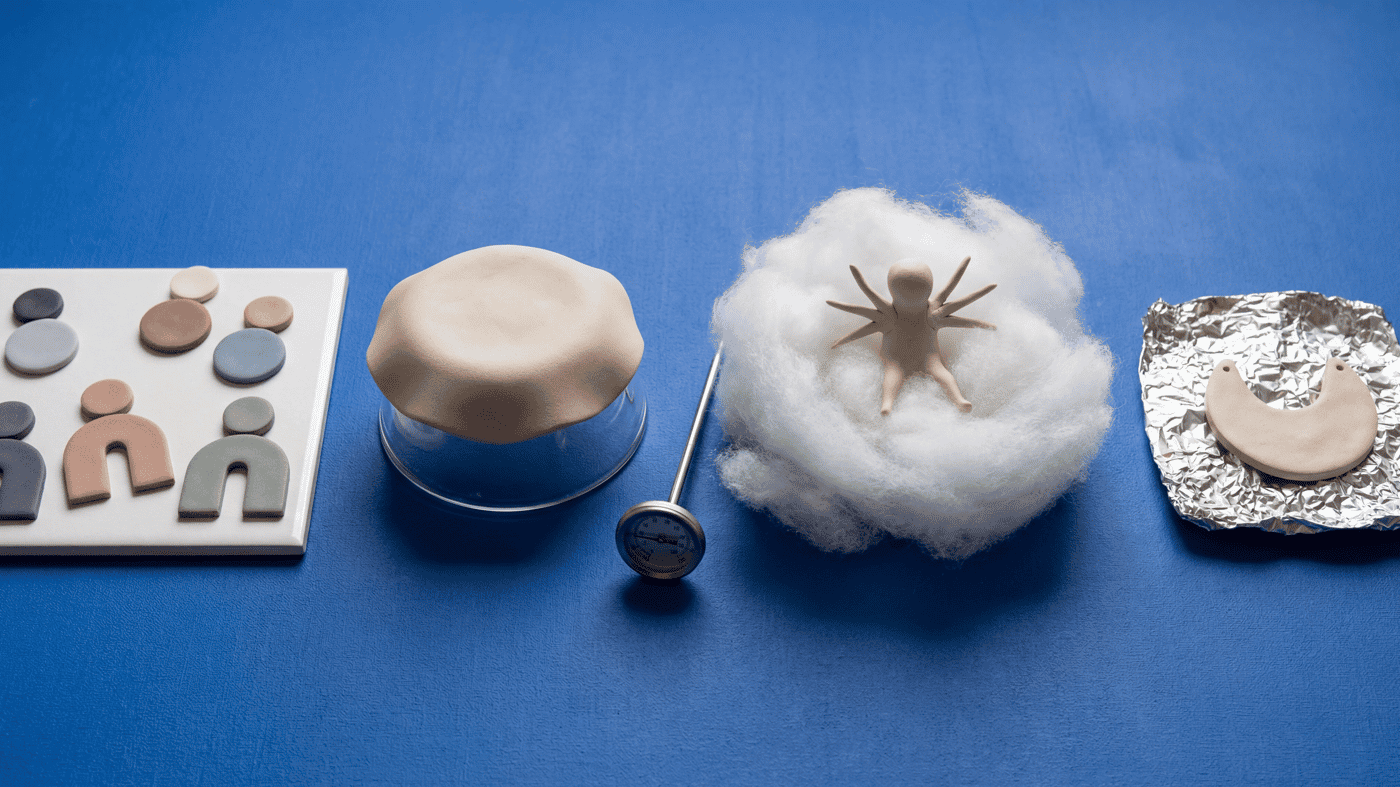
How to Support Polymer Clay During Bake by Shape
Your thin overhang drooped or the hollow body caved because it had no support inside the oven. Compare flat tiles, fiberfill, foil, and armatures by shape before you build another version.
Finished examples with related clay decisions
Each piece shows how a material, attachment, or surface choice changes the final form.