How to make polymer clay terrazzo: chips, slab, cut and sand
Roll thin chips in two to four colours, press them into a light base about 3 mm thick, roll them flush under paper, cut both earrings from the one slab, then bake and sand for the look of stone.
Some links on this page are affiliate links. If you buy through them, we may earn a commission at no extra cost to you. As an Amazon Associate I earn from qualifying purchases. Disclosures

In brief
Key takeaways
- Roll each chip colour into a thin sheet and chop or tear it into irregular chips in two or three sizes. Several colours should fit inside the narrowest part of your cutter
- Roll a light base about 1/8 inch (3 mm) thick, the sheet thickness in Sculpey's terrazzo earring and vase projects, and lightly mark the cutter outlines before the chips go on
- Press each chip down with a fingertip, cover the slab with paper and roll lightly from all four sides. Stop as soon as the surface looks mostly level, because extra passes stretch chips into streaks
- Cut both earrings from the same slab, pressing the cutter straight down with no twist and wiping it between cuts
- Bake by your clay's packet with an oven thermometer beside the pieces, then wet sand from 400 grit up to 1,000 or finer and buff for the honed look of stone
Article contentsOpenClose
To make polymer clay terrazzo, roll two to four chip colours into thin sheets, chop or tear them into small irregular chips, and scatter them over a light base rolled about 1/8 inch (3 mm) thick. Press the chips down with a fingertip, lay paper over the slab and roll until the surface looks mostly level. Cut every shape from that one slab so a pair matches, bake by your clay's packet directions with a thermometer beside the pieces, then wet sand and buff for the honed look of stone.
Real terrazzo is a floor made of marble, glass or stone chips set in a binder, then ground and polished smooth once it has cured. The clay version copies that look with chips of coloured clay set into a plain base, and the same last step, sanding, is what makes it read as stone. The method below follows Sculpey's own terrazzo projects, and adds the decisions those projects leave to you: chip size, spacing, rolling direction and whether to bake the chips first.
What you need for a terrazzo slab
- A light base clay. White, cream or beige shows the chips most clearly. Sculpey's faux terrazzo earrings use Premo Sculpey White as the base. For cream, Sculpey's terrazzo vase mixes a bar of beige with half a bar of white.
- Two to four chip colours. Leftover clay from other projects works well, because each colour only needs a small amount. If you are starting fresh, search Amazon for Sculpey Premo clay colours. Using the same clay for the base and the chips gives you one set of baking directions.
- An acrylic roller longer than your slab is wide.
- Two thickness guides about 3 mm high, or two equal stacks of playing cards, so the base rolls out to one even thickness. For ready-made guides, search Amazon for metric clay thickness guides. The guide to conditioning clay and rolling an even slab shows how to use them.
- A glossy ceramic tile to roll and cut on. Raw clay grips a clean glossy tile, so the slab stays put when a cutter lifts away.
- A tissue blade, the long, thin, flexible clay blade, for chopping chips and trimming straight edges. Hold it by the blunt spine and keep your fingers clear of the edge.
- A sheet of plain paper or parchment to lay over the slab while you roll the chips in.
- A cutter for your shape. Sculpey's terrazzo earrings use circle cutters. For arches, search Amazon for polymer clay arch cutters and compare the outer size and the inner opening.
- A needle tool for hanging holes: search Amazon for clay needle tools.
- An oven thermometer to stand beside the pieces while they bake.
- Wet/dry sandpaper from 400 grit up to 1,000 or finer, a small dish of water and a soft cotton cloth such as denim or muslin.
How to make terrazzo chips from thin sheets or scraps
Make the chips thin, irregular and in two or three sizes. Roll each chip colour into a thin sheet first, as STAEDTLER's FIMO terrazzo jewellery tutorial does, then cut or tear the sheet into pieces. A thin chip presses into the base with little spreading. A thick lump has to squash much further to sit flush, and it stretches and blurs as it goes, in the same way a dot of clay rolled into a sheet distorts as the sheet stretches.
- Condition each colour and match its softness to the base. Let the colours rest until they feel about as soft as the base clay. A chip colour that is much softer than the base spreads further under the roller and smears into it.
- Roll each colour into a small, thin sheet, clearly thinner than the base. You need very little of each: Sculpey's whole pair of faux terrazzo earrings uses small pinches of four colours.
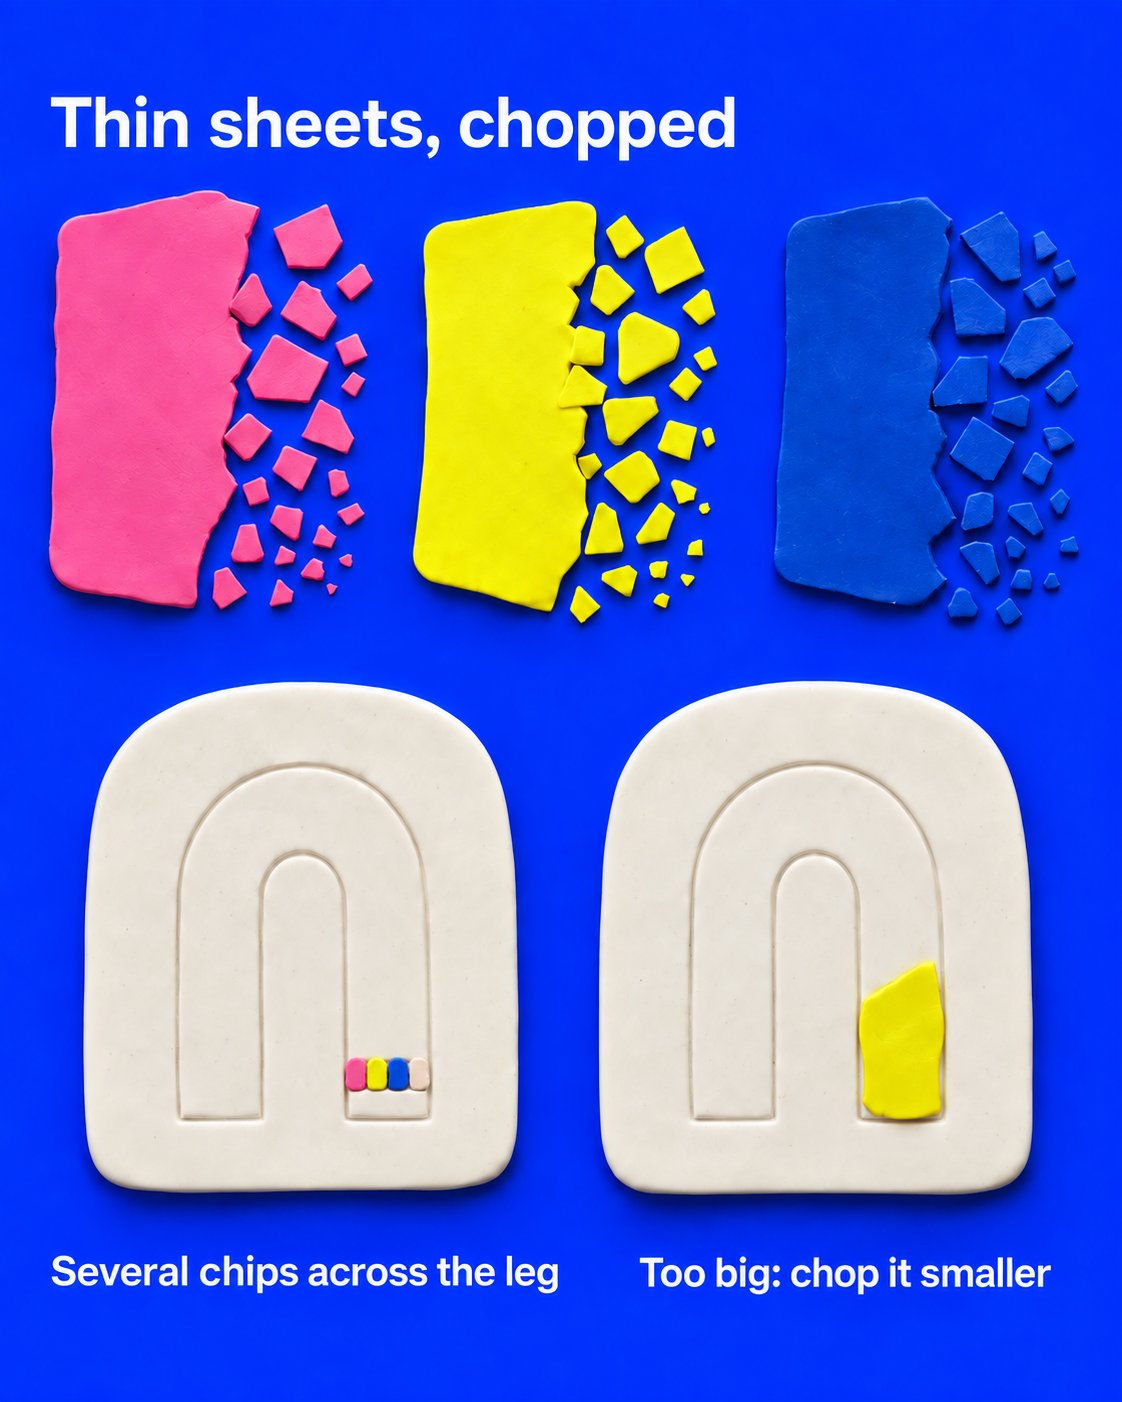
- Cut or tear the sheet into pieces. Chop across it with your tissue blade in random directions for sharp-edged, geometric chips, or tear it with your fingers for softer, rounded edges. Make two or three sizes. A few larger chips give the eye somewhere to land, and small crumbs fill the gaps between them. If every chip is the same size, the surface starts to look like polka dots instead of stone.
- Cut the lightest colour first. Wipe the blade and your fingers before each darker colour, so a smear of navy or black does not ride into a pale chip.
- Check the chip size against the cutter. Lay the cutter over a few chips. Several colours should fit inside the narrowest part of the shape, such as the leg of an arch. If one chip fills it, chop the larger chips smaller. A large pendant or a dish can take bigger chips.
Scraps work too. Sculpey's terrazzo vase chops a small piece of each colour straight into little bits with a blade, and its terrazzo earrings simply pinch bits off each colour and press them onto the base. Those routes are quicker; thin sheets give you more control over chip size and flatter chips that spread less when you roll them in. Keep the offcuts from every terrazzo slab as well. Chopped up, they make ready-mixed chips for the next one.
How thick should the base be, and what colour?
Roll the base about 1/8 inch (3 mm) thick for earrings and small pendants. That is the sheet thickness in Sculpey's faux terrazzo earrings and terrazzo vase, and the Cream Terrazzo Arch Huggie Earrings in the lookbook use a 3 mm base too. Common pasta machines roll about 2.5 mm at their thickest, so stack slabs to a little over 3 mm and roll them down on the tile between your guides until the roller rests on both, so the base is the same thickness everywhere. Make it larger than all the shapes you plan to cut, with room to spare so you can move the cutter to the best-looking area later.
Before any chips go on, press the cutter lightly onto the base where each shape will go, just enough to mark the outline. Sculpey's earring project scores its circles this way so you can see where the finished pieces fall. It also lets some chips run across the marked lines, so the pattern looks random rather than arranged inside each shape.
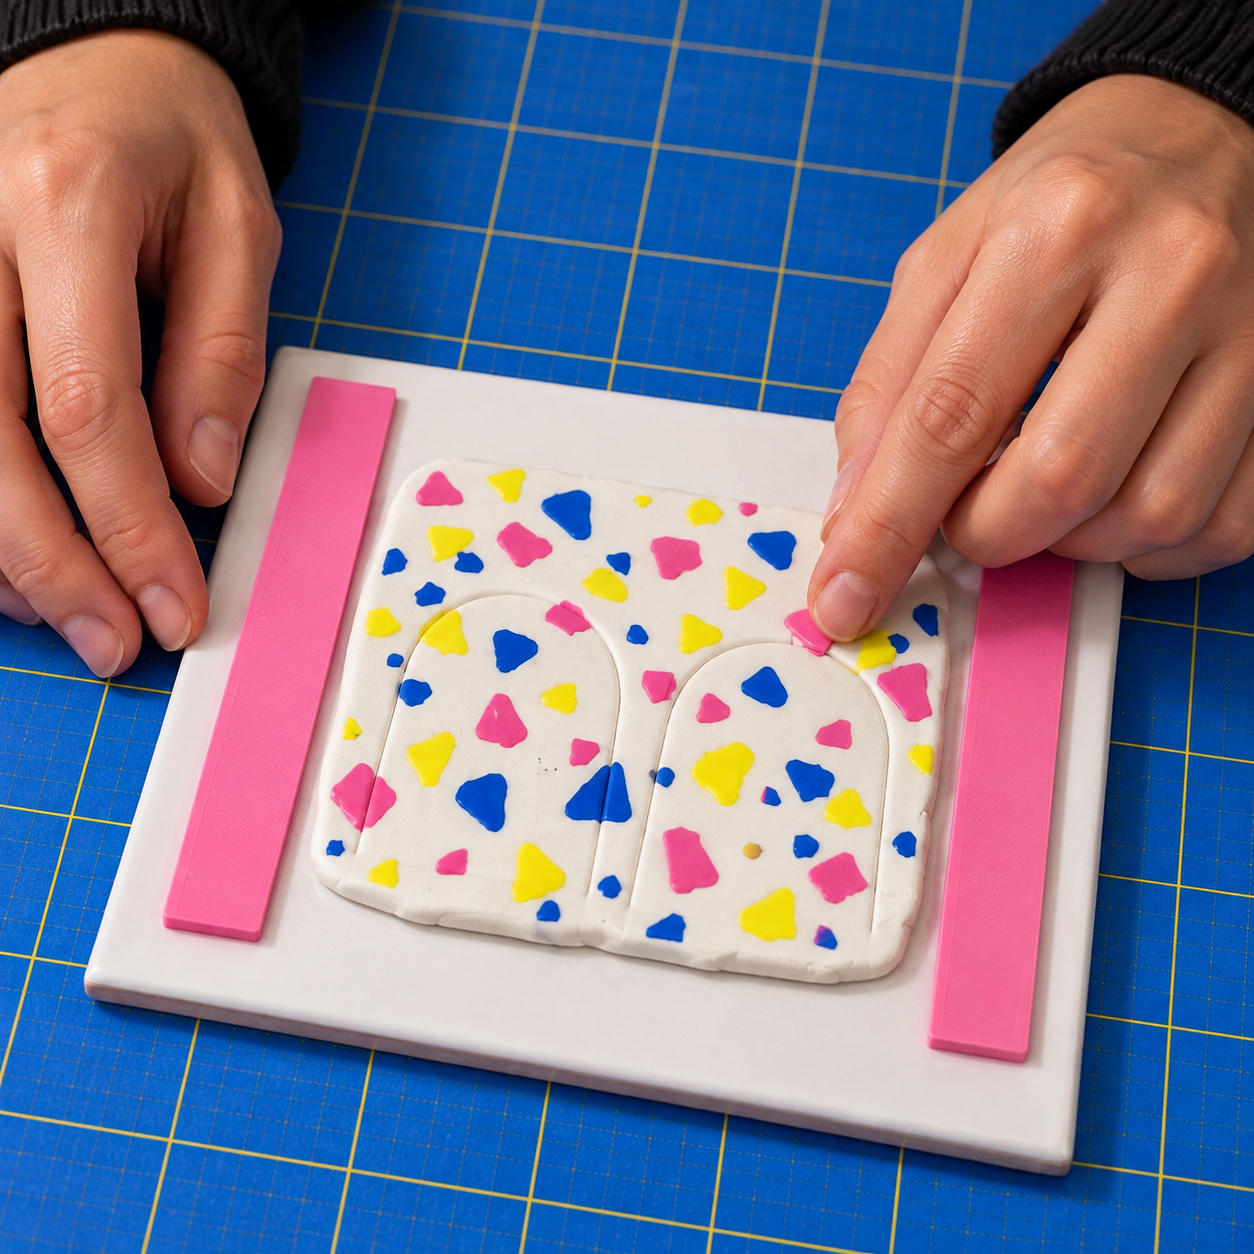
A light, plain base does the job that cement does in real terrazzo: it separates the chips so each one reads on its own. White gives the most contrast. Choose the chip colours against that base:
- Bright and graphic: two or three strong colours on white or cream, such as the pink, yellow and navy chips on a cream base in the terrazzo arch huggies.
- Quiet and earthy: keep one chip colour close to the base in lightness and let one or two colours carry the contrast. Sculpey's faux terrazzo earrings use olive, raw sienna, blush and a grey granite on white.
- Reversed: pale chips on a bright base, like the white flecks rolled into acid yellow in the yellow speckled arch studs.
Lay a few chips of each colour on a corner of the base before you commit. If a colour almost disappears, swap it for a darker or brighter one now, because it will not stand out more once it is rolled in.
How to press and roll the chips flush without streaks
Scatter the chips with gaps of plain base between them, press each one down with a fingertip, cover the slab with paper and roll in light passes from all four sides until the surface looks mostly level.
- Scatter with space between the chips. Chips spread a little as they are rolled in, so leave clear base between them; Sculpey's white granite terrazzo earrings leave space between every piece because they are pressed into the sheet. Spread each colour across the whole slab instead of grouping it in one area, and cover the marked outlines as well as the spaces between them. Sculpey's faux terrazzo earrings press the darkest colours on first and the palest last.
- Press each chip down. Press every chip onto the base with a fingertip so it sticks, as Sculpey's terrazzo vase does before any rolling. A chip that is only resting on top can lift onto the roller or skid across the slab.
- Cover the slab. Lay a sheet of plain paper or parchment over the chips. Sculpey's white granite terrazzo project folds plain paper around the clay before rolling. The paper keeps chips off the roller and stops the roller dragging colour across the base. Cling film laid over the slab does the same job.
- Roll in light passes from each side. Roll across the slab with light, even pressure, from the middle outwards. Then turn the tile a quarter turn and roll again, so that over four passes you have rolled from all four sides, as the white granite project does. Rolling the same way every time lengthens the slab in that direction, and the chips lengthen with it into streaks.
- Stop when the surface looks mostly level. Lift the paper and look across the slab against the light. Sculpey's faux terrazzo earrings stop rolling as soon as the surface looks mostly level: the chips are pressed in and the slab feels smooth under a fingertip, even if a faint outline still shows around some chips. That last unevenness sands away after baking. Every pass beyond this point stretches the chips and softens their edges for very little gain.
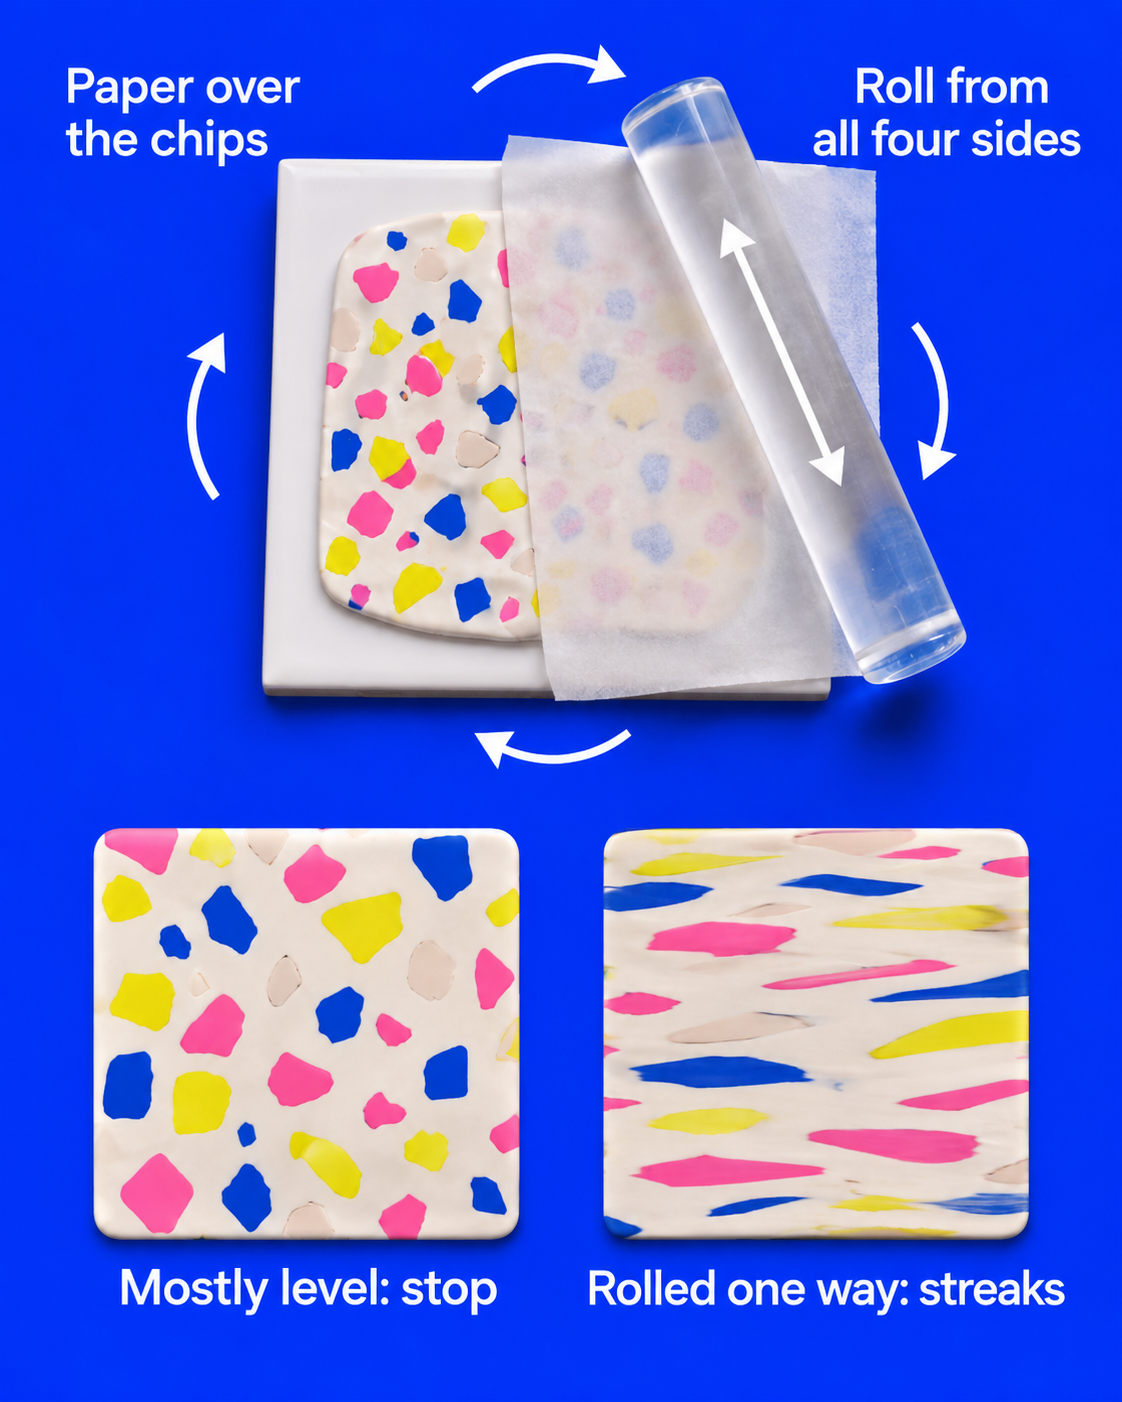
If the slab has to finish at a set thickness, make the last pass with the roller resting on your 3 mm guides. The chips press in and the slab spreads a little wider instead of getting thicker.
If streaks start to appear, stop rolling. Cut your shapes from the least stretched part of the slab and chop the streaked part into chips for the next one. If the slab feels warm and sticky by now, let it rest on the tile for a few minutes before you cut.
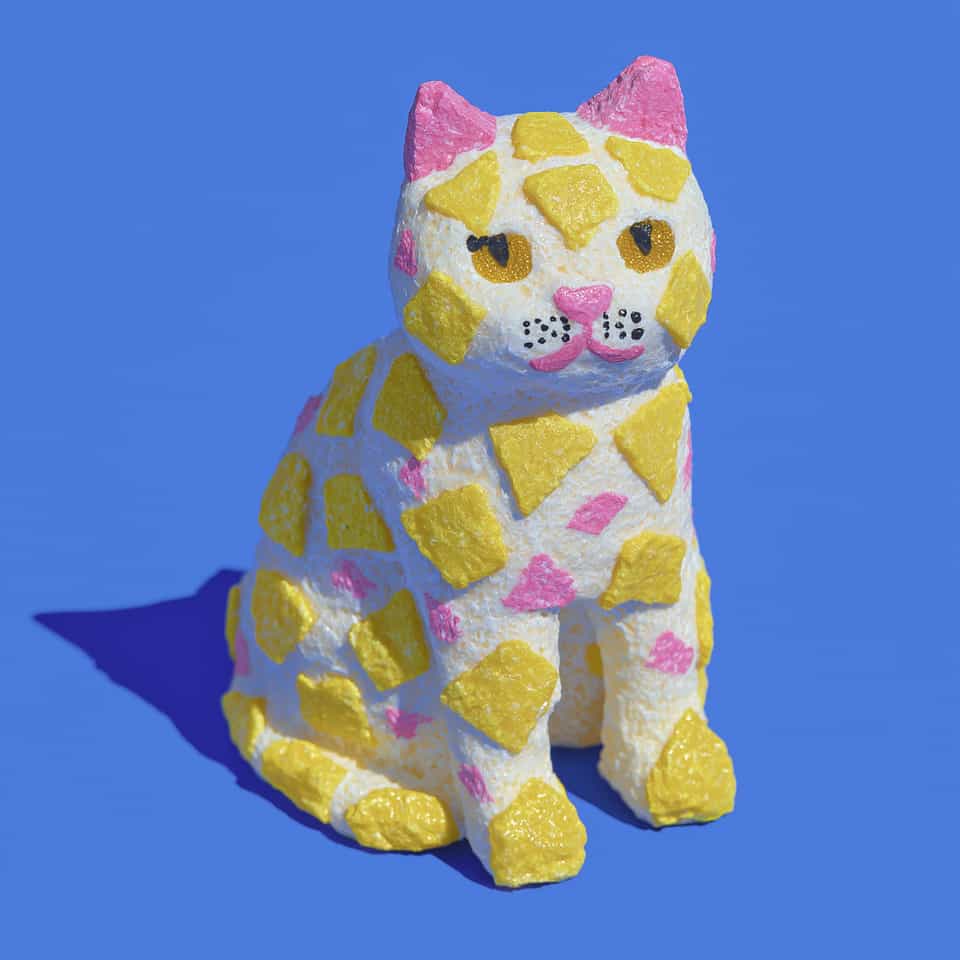
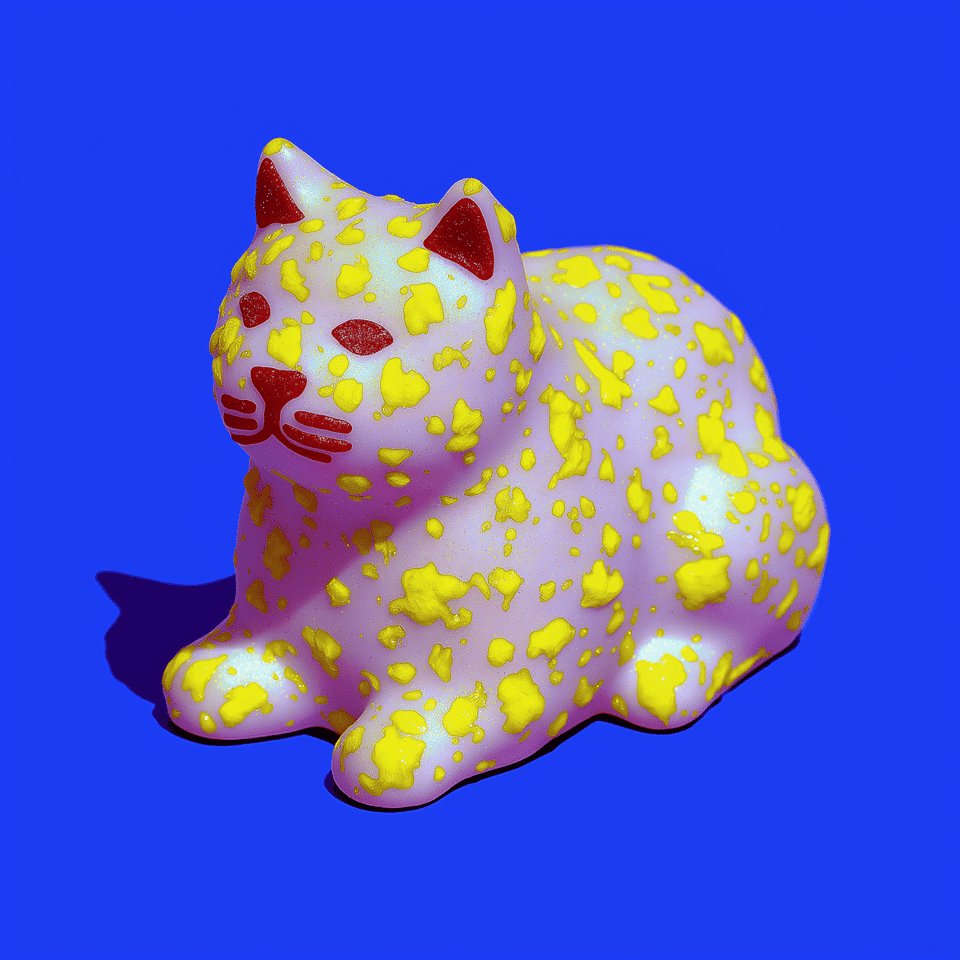
For chips that stay raised above the surface, as on the terrazzo cat figurines in the lookbook, press them on and leave the roller out; the applique and confetti inlay guide covers that raised look.
How to cut a matched pair from one terrazzo slab
Cut both earrings from the same slab, pressing the cutter straight down to the tile and lifting it straight up, and decide where the edges and holes fall before you press.
- Let the slab firm up. Rolling warms the clay. Leave the slab on its tile for a few minutes, or chill it briefly in the fridge, until it is firm but not hard. Clay chilled too far can turn brittle and crack under the cutter.
- Choose where each shape goes. Hold the cutter just above the slab and move it around. For arches, the chips around the inner opening matter as much as those on the outer edge. Pick two areas with a similar mix of colours and chip sizes, so the pair looks as if it came from the same stone. If a large chip sits where the hanging hole or the inner cut would go, move the cutter.
- Cut straight down, with no twist. Press the cutter straight down until it reaches the tile, then lift it straight up. Twisting drags the chips at the cut edge and pulls their colour into the base.
- Wipe the cutter between cuts. Clean the cutting edge before the second cut, so a crumb of dark chip clay caught in it is not pressed into the pale base of the second earring.
- Remove the waste first. Peel the surrounding clay away while the shape stays flat on the tile, then cut any inner opening, such as the inside of an arch, with a smaller cutter. Trim straight edges with the tissue blade.
- Make the hanging holes now. Pierce the holes with a needle tool while the clay is raw. Sculpey's faux terrazzo earrings keep each hole at least 1/16 inch (about 1.5 mm) from the edge, check that the clay does not tear between the hole and the edge, and push the needle through from the back as well so both sides of the hole are neat.
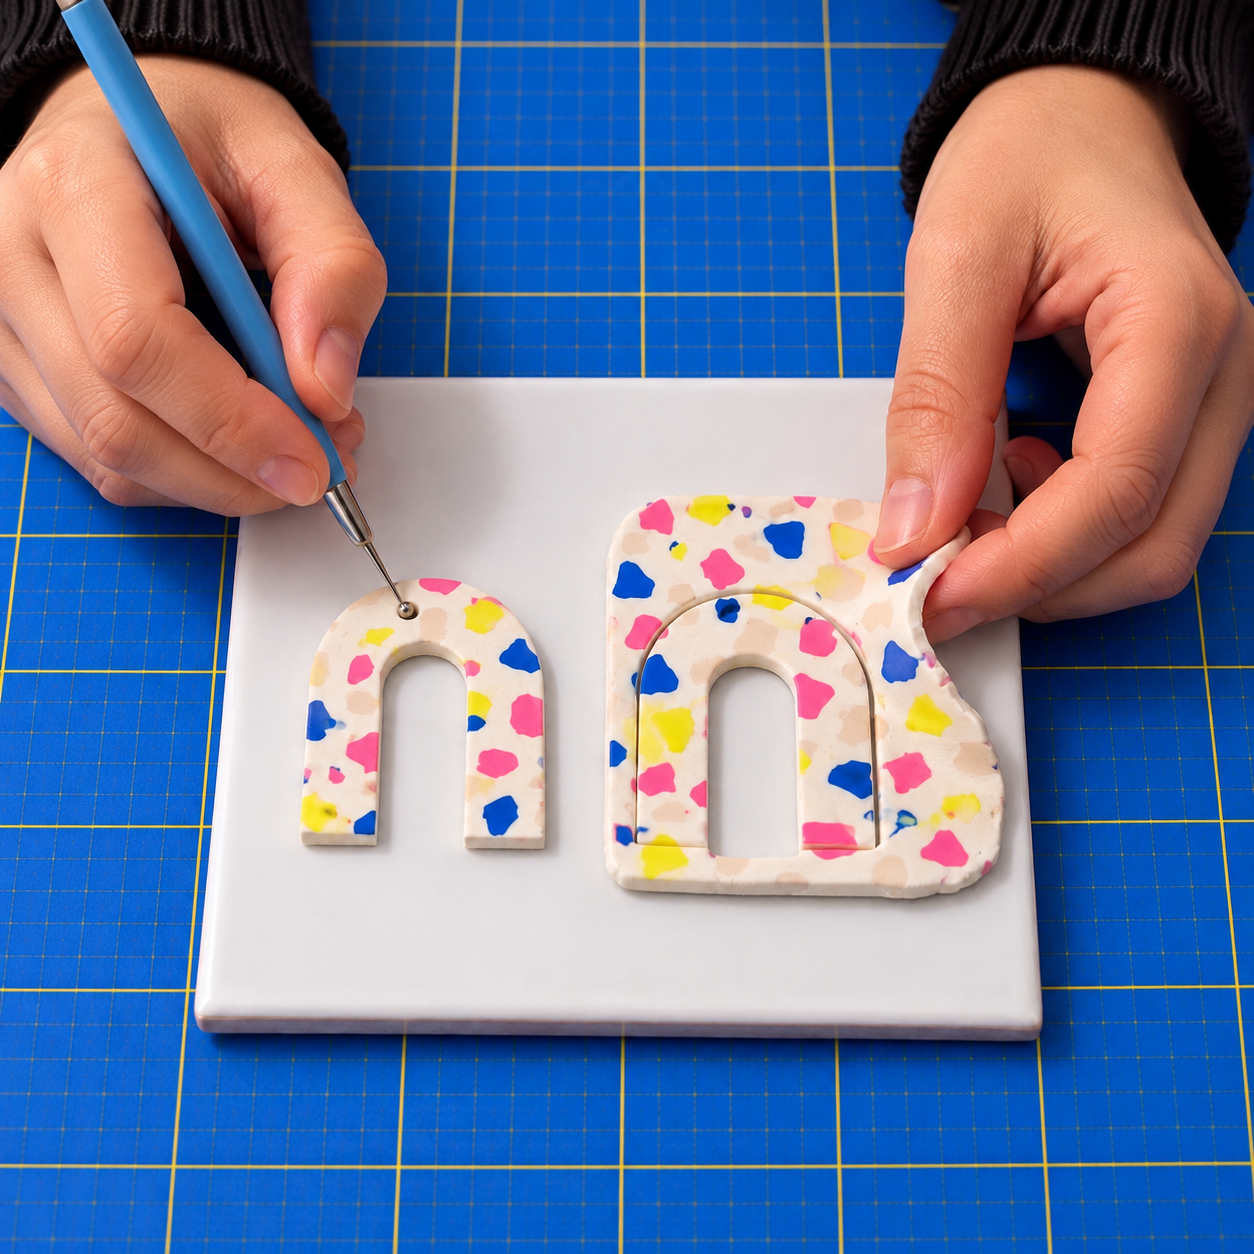
If the cutter grips the clay, the cutter release guide covers a light dusting and when cling wrap suits the shape. To drill holes after baking instead, see the guide to punching or drilling jump ring holes, and for arch proportions and choosing a stud or huggie, the cutout arch earring guide.
Baking and sanding terrazzo for a stone finish
Bake the pieces flat on the tile at the temperature and time on your clay's packet, with an oven thermometer standing beside them, then wet sand the cooled pieces from 400 grit upwards and buff them.
For Premo and Souffle, Sculpey gives 275°F (130°C) for 30 minutes per 1/4 inch (6 mm) of thickness. STAEDTLER gives FIMO Soft and FIMO Professional 110°C (230°F) for 30 minutes. Sculpey notes that a home oven can run 25 or even 50°F away from its dial setting, so set the thermometer where the clay sits and adjust the dial to what it reads. Oven curing needs adult supervision and a lightly ventilated room. The guide to what to bake polymer clay on covers tiles and flat backs.
Sanding is what turns a clay slab into terrazzo. Real terrazzo is ground and polished after it sets, and sanding the baked clay does the same job: it levels any chip that still sits proud, clears a light haze of smeared colour from the surface, and leaves crisp chip edges on a flat face.
- Let the pieces cool completely. Sand only fully cured clay.
- Wet sand from 400 grit. Wet the paper and rub it over the face of the piece in small circles, holding the piece with your fingers close to the area you are sanding. Sculpey starts at 400 grit and works up through finer grits to 1,000 or higher. Stay on each grit until the scratches from the one before are gone, and rinse the dust off the paper when it clogs.
- Sand the edges lightly to take off any burr left by the cutter, keeping the outline intact. The sanding and buffing guide covers holding small pieces and when to stop.
- Buff. Dry the piece and rub it hard with a soft cotton cloth, such as denim or muslin, for a soft sheen.
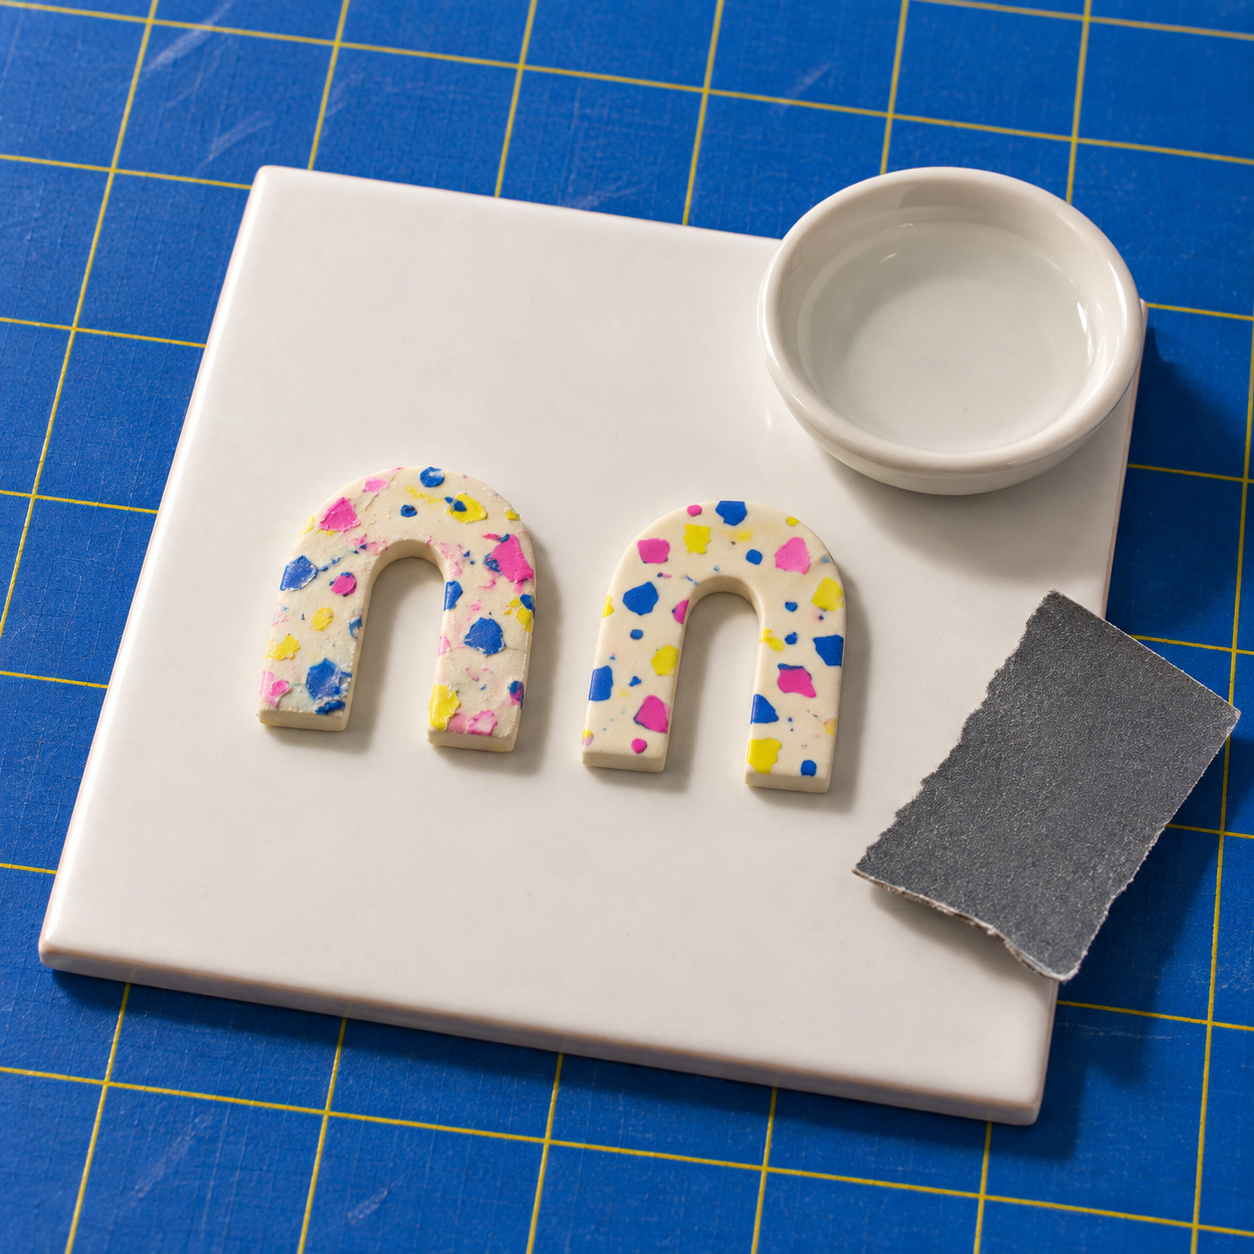
Sculpey asks makers not to wash clay dust down the sink, because water treatment plants cannot remove the fine particles. Sand over a small dish of water rather than under a running tap, and wipe the dish out with a paper towel into the bin when you finish.
Sealing is optional: Sculpey says baked clay does not need a sealer. A sanded and buffed surface with a soft sheen looks like honed stone, while a high-gloss glaze reads more like resin. If you want a coating, the guide to painting and sealing baked clay covers which finishes suit polymer clay.
Can you use baked chips for terrazzo?
Yes. Baked chips cannot smear, so they keep their exact outline and give the crispest, most stone-like edges. The trade-off is that they do not flatten under the roller, so the baked slab needs sanding for them to sit level. The Cream Terrazzo Arch Huggie Earrings in the lookbook are made this way.
- Roll each chip colour into a thin sheet. The terrazzo arch huggies use sheets about 1 mm thick.
- Bake the sheets flat on a tile by the packet directions, and let them cool.
- Chop the baked sheets into chips in two or three sizes with your tissue blade, pressing straight down on the tile.
- Press the chips into the raw base. Scatter them, press each one in with a fingertip, then roll under paper as above until the base clay closes up around every chip edge.
- Bake the slab, then sand. Baked chips keep their thickness, so their edges can stand slightly proud of the base after baking. Wet sanding from 400 grit brings them level.
Two things change from raw chips. Raw clay does not fuse to clay that is already baked, as Sculpey's FAQ explains, so the chips are held only by the base closing around them. Press them in fully, and glue back any chip that comes loose after baking. A thin baked chip lying under the cutter edge can also drag or pop out instead of cutting cleanly, so place the cutter so its edge crosses base clay or small chips where you can.
Firmer raw chips: one bake, crisper edges
If raw chips keep smearing but you want a single bake, make the chips from a firmer clay than the base. STAEDTLER describes FIMO Professional as having a much firmer consistency than FIMO Soft, and both bake at 110°C (230°F) for 30 minutes, so FIMO Professional chips in a FIMO Soft base keep one set of baking directions. The seated terrazzo cat in the lookbook uses FIMO Professional for its chips so their geometric edges stay crisp.
Why terrazzo slabs turn muddy or streaky, and how to fix them
Match the fix to what you can see. Most problems start while the chips are being rolled in, so catch them while the slab is still raw.
| What you see | Why it happens | What to do now |
|---|---|---|
| Chips stretched into long streaks, all pointing one way | The slab was rolled in the same direction every pass, so it lengthened and the chips lengthened with it. | Stop rolling. Cut your shapes from the least stretched area and chop the streaked part into chips for the next slab. Next time, turn the tile a quarter turn between passes. |
| A halo of chip colour smeared into the base around each chip | The chip clay was warmer or softer than the base, or the slab kept being rolled after it looked level. | Stop and let the slab rest or chill before cutting. A light haze sands off after baking. For the next slab, let soft chip colours rest, draw some softness out of them as the soft clay guide shows, or use firmer chips. |
| Grey or dark specks across a white base | Crumbs of a dark colour carried on your hands, blade or roller. | Lift each speck out with the point of a needle tool and smooth the spot through paper. Wipe the blade and your hands between colours, and cut the dark chips last. |
| Chips lifting onto the roller or sliding across the slab | The chips were resting on top of the base, or the roller touched the raw clay directly. | Press each chip back down with a fingertip, lay paper over the slab and roll again lightly. |
| A chip colour that disappears once it is rolled in | That colour is too close to the base in lightness. | Press a few chips of a darker or brighter colour into the gaps and roll them in. Next time, try the chips on a corner of the base first. |
| Chip edges tearing or dragging at the cut | The slab was warm, the cutter twisted, or a large or baked chip sat under the cutter edge. | Rest or chill the slab until it is firm, press the cutter straight down, and move it so its edge crosses base clay. |
| A baked chip loose or missing after baking | Raw clay does not fuse to clay that is already baked, so the chip was held only by the base around it. | Glue the chip back into its hollow with a small dot of glue. The glue guide covers glues makers use on baked clay. Next time, press baked chips in until the base closes around every edge. |
| Raised blisters after baking | Air trapped under a chip or inside the base. | If the piece is still hot from the oven, put on oven gloves and press it flat between two smooth, heatproof surfaces, such as two tiles, until it cools. On the next slab, look across it with a light at a low angle before baking. Slide a needle into the side of any small dome, press the air out and smooth the spot through paper. The conditioning guide covers keeping air out of a slab. |
Supplies
Supplies mentioned here
Quick links to the materials and tools that fit this article. ClayBake tools stay on our own catalog.
Acrylic roller
Rolls the chips into the base in light passes. Choose one longer than your slab is wide.
Tissue blade set
Long, thin clay blades for chopping chip sheets and trimming straight slab edges.
Premo Sculpey White
A white base that lets every chip colour show. Sculpey uses it as the base of its faux terrazzo earrings.
Wet/dry sandpaper assortment (400 to 3000)
Covers the 400 to 1,000 grit steps Sculpey suggests for wet sanding, plus finer sheets for a smoother face.
More guides in this path
Open these when the next decision is material choice, attachment, or finishing.

Sanding and Buffing Polymer Clay: Pressure and When to Stop
Smooth rough edges on baked clay with wet/dry paper and water. Support small details, remove the scratches from each grit, then hand-buff for a soft sheen.
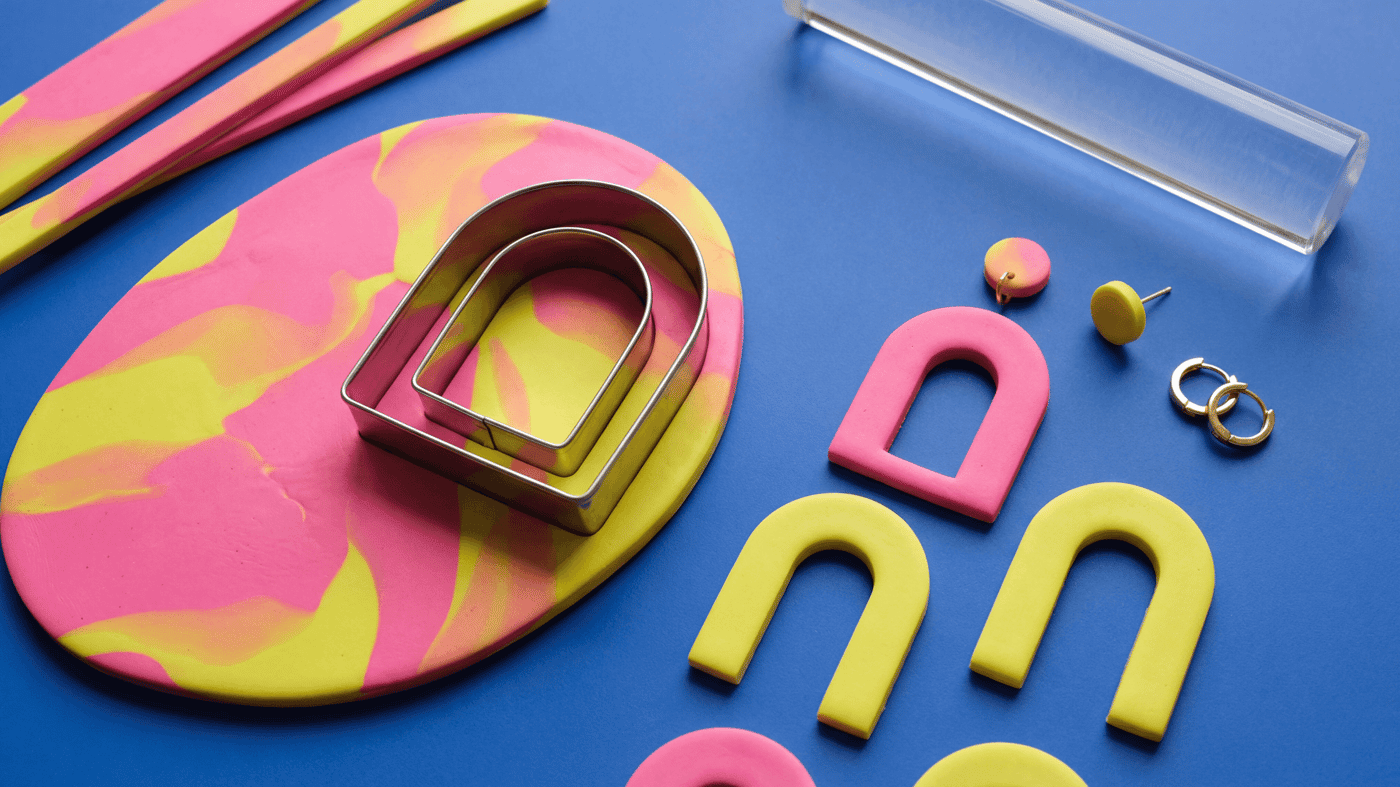
Polymer Clay Cutout Arch Earrings and Hoop Drops
Cutout arches and hoops work best when the wall width is even, the inner opening matches the outer curve, and the hardware choice is made from the finished front view.
How to condition polymer clay and roll an even slab for cutters
Get every clay colour to the same softness, roll each layer to its measured thickness on a tile, and let warm clay firm up before you cut.
Finished examples with related clay decisions
Each piece shows how a material, attachment, or surface choice changes the final form.