Painting baked polymer clay: which paint to use and whether to seal it
Painted details on a baked piece can smudge, rub off or leave a glaze sticky at the very last step. See which paint grips baked clay, how to brush small details cleanly, and when a coat is worth adding.
Some links on this page are affiliate links. If you buy through them, we may earn a commission at no extra cost to you. As an Amazon Associate I earn from qualifying purchases. Disclosures

In brief
Key takeaways
- Do every bake before painting, because Sculpey says rebaking is safe only on unpainted, unglazed pieces
- Test your paint on a wiped, baked offcut of the same clay, then wipe the cooled piece with isopropyl alcohol, away from heat or flame, so acrylic can grip
- Match the brush load to the method: a little paint on a fine tip for marks and highlights, a loaded brush for grooves before a barely damp cloth wipes the raised surface clean, and a nearly dry brush dabbed straight down through a printed mask
- Coat painted areas where fingers or fabric will rub, using two or three thin water-based coats over fully dry paint, and add hardware once the finish cures
Article contentsOpenClose
The paint to choose for baked polymer clay is water-based acrylic, brushed onto clean, fully cooled clay and left to dry right through. The compatible finish is a clear water-based coat that has passed a test on a baked offcut, brushed on thinly where the paint will be rubbed; bare clay needs no coat. Let that finish cure, meaning harden for the full time on its label, before a jump ring or pin goes on.
Does painted polymer clay need a sealer?
Mostly where the paint will be rubbed. The brush-on glazes clay makers sell work like thin clear varnishes, and sealer is the looser word makers use for any clear coat. Bare baked clay needs none. Sculpey's general advice is to seal painted details so they do not wear, while makers who have tested paints and finishes on polymer clay note that paint in the low, recessed areas of a design does not need a coat. The fingertip check below settles it for your piece.
- Paint in a groove or recess. A filled recessed line, or a dot down inside a narrow groove, sits below the surface fingers pass over.
- Paint on a flat or raised face. Paint or mica there, including a highlight dot in a broad facet, gets rubbed. If your fingertip passes over a dot in the check below, give it a thin coat.
To find the rubbed areas, hold the piece the way it will be worn or handled and run a fingertip across the side you will paint. Do this before cleaning, so skin oil stays off cleaned clay. Paint on the areas your fingertip rubs over is paint to coat. For an even glossy look, such as the optional gloss on the Faceted Gem Earrings, coat the whole front; for protection alone, coat the rubbed areas. For sheen on bare clay with no coat, see the sanding and buffing guide.
What paint works on baked polymer clay?
Water-based acrylic, brushed onto clay that has finished baking and cooled completely. Sculpey warns that paint on warm clay can change consistency and grip badly, so wait until it feels cool all over.
Finish every bake before you open the paint: Sculpey says rebaking is safe only on unpainted, unglazed pieces.
Choose brush-on artist acrylic paints (search Amazon) and try your paint on a baked offcut of the same clay first. The same paint can behave differently on different clays. Sculpey notes that nail polish and spray paint contain solvents that soften clay over time, so keep both off polymer clay.
Acrylic sits on top of baked clay without soaking in, so it can wear off a handled face, and a varnish will not hold down paint that is already peeling.
Getting the baked surface ready for paint
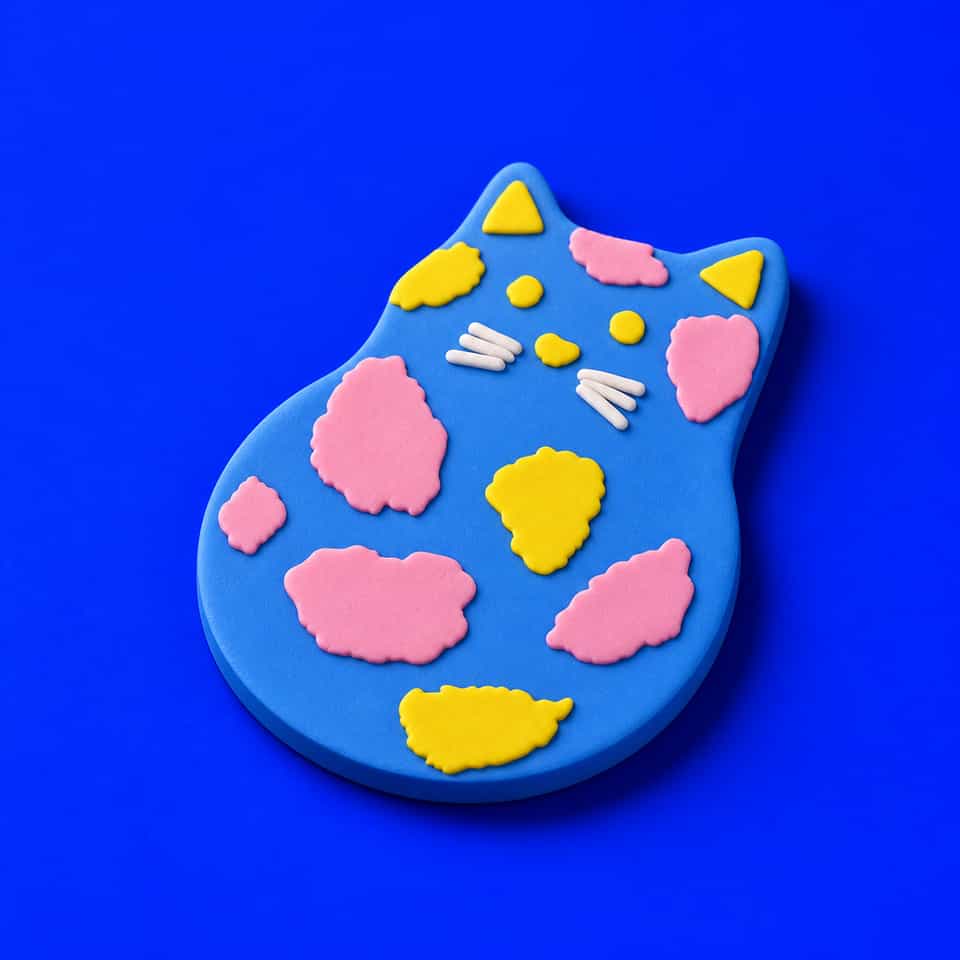
Test your paint on an offcut, then wipe the cooled piece with alcohol. Baked clay can carry an oily film that stops acrylic gripping, and Sculpey clears it with rubbing alcohol; use the isopropyl kind. The Blue Spotted Cat stencil method starts with this wipe too. Isopropyl alcohol is flammable, so wipe and let it evaporate away from a hot oven or open flame.
- Test on a baked offcut. Wipe a baked offcut of the same clay with alcohol, let it dry, brush on one small stroke of your paint and leave it overnight. If the paint pulls into beads as you brush, or rubs off under a firm fingertip the next day, the surface is too smooth. Keep the offcut for the finish test.
- Wipe the piece with alcohol. Dampen a cloth or paper towel with isopropyl alcohol and wipe every surface you plan to paint, edges included. From then on, hold the piece by the back. In the UK, surgical spirit contains oils that can stop paint sticking, so use isopropyl alcohol.
- Sand if the paint did not grip on the offcut. Sculpey's fix is to sand the cleaned piece very lightly with 400 or 600 grit fine wet/dry sandpaper, away from fine raised detail. A few light strokes that take the shine off are enough. Remove all the dust and wipe with alcohol again.
- Let it evaporate completely. The clay is ready when it looks evenly dry, with no darker damp patches.
- Tape over any glue spot. If a pin back or finding will be glued on later, press low-tack tape over that patch now, so paint and finish never reach it. Keep alcohol off the tape.
Once you have chosen a finish, use the same offcut to test it: brush thin coats over the dried stroke and press a fingertip on the coat after 24 hours. If it is still tacky, that paint and finish pairing does not work on that clay.
Three ways to paint details on baked clay
Choose by where the paint goes, because each method loads the brush differently. Set out the paint on a dish, a paper towel and a pot of rinsing water first.
Filling marks and painting highlights
Use a fine liner brush, which has long, thin bristles that come to a point, or a dotting tool, a handle with a small ball on its tip. Mix the paint on the dish, with a drop of water if it is stiff, until it is about the consistency of cream.
- Steady your hand. Set the piece flat with the mark facing up and rest the side of your painting hand on the table.
- Load only the tip. Dip just the point of the brush or the ball of the tool into the paint, then touch it once on the rim of the dish so nothing hangs off it.
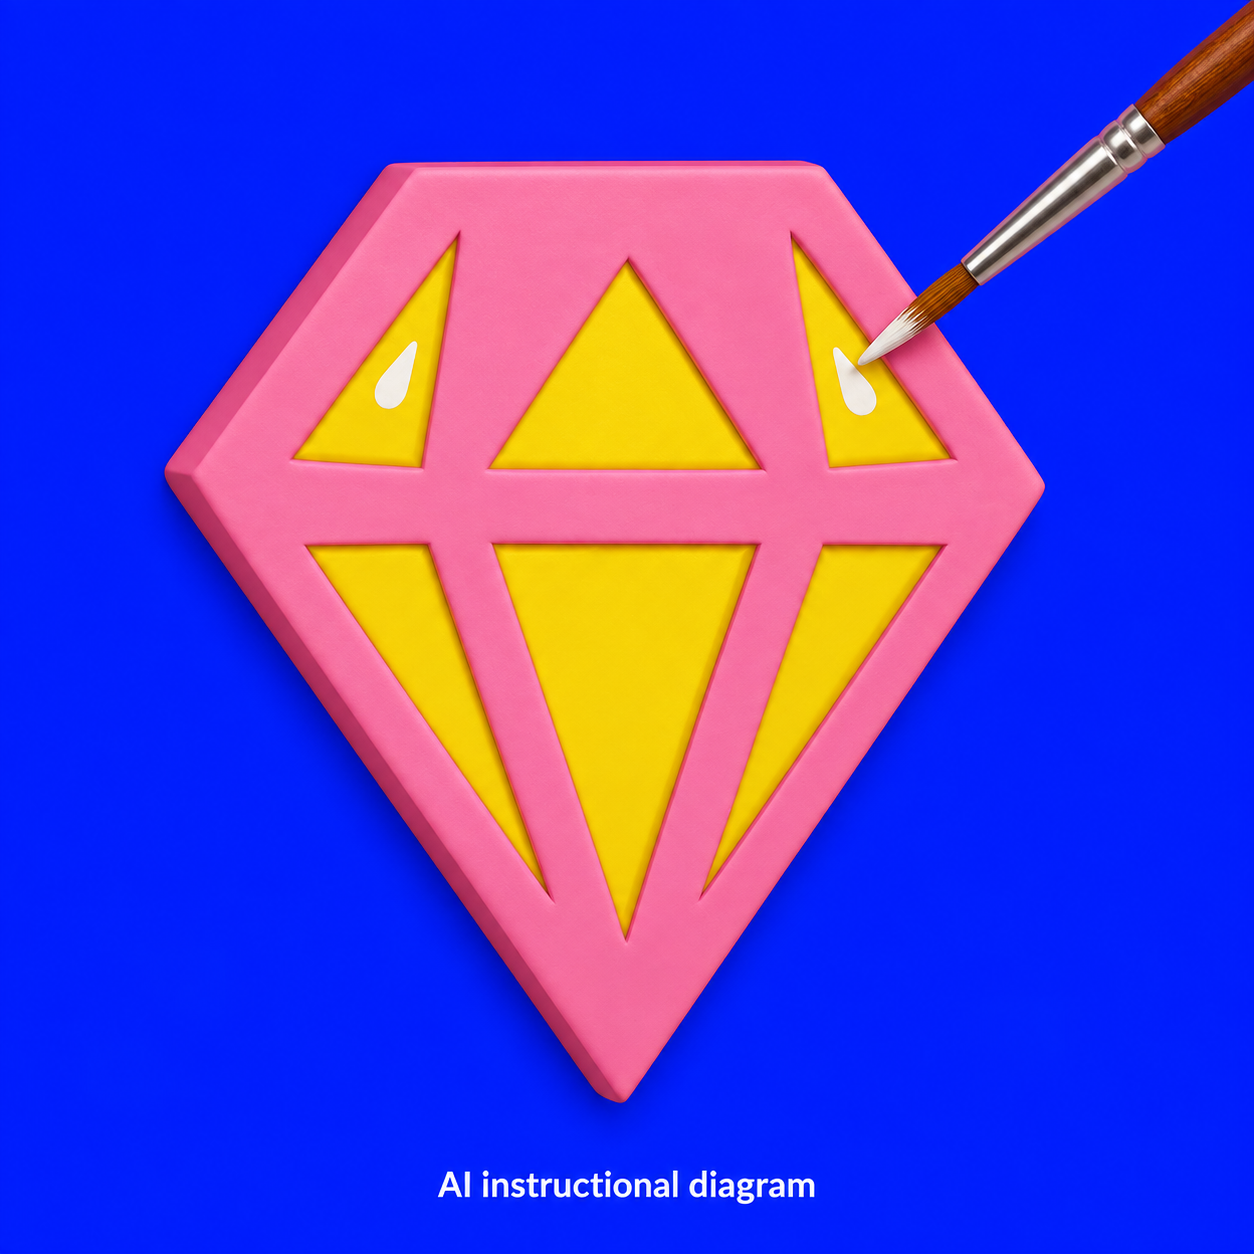
- Touch the paint in. For a pressed mark such as an eye or nose, touch the tip into the middle. If the paint sits in a peak, nudge it out to the edges with the tip. For a whisker line, draw the tip along the groove in one steady stroke. For a highlight, set the tip down where the round end of the teardrop goes, then draw a short stroke towards the facet's top corner as you lift.
- Look, then leave it. Look straight down. The paint should sit inside the mark or facet with clean clay all round it. One careful pass beats going back over wet paint. If the colour looks thin once dry, add a second small touch on top.
- Clean a slip while it is wet. Lift stray paint off the clay with a clean brush dampened in water and blotted on the paper towel.
The Faceted Gem Earrings kit places small highlights inside a couple of the upper facets with a fine liner brush, using white acrylic paint (search Amazon). The Blue Spotted Cat's pressed face marks can be painted the same way after baking.
Filling grooves, then wiping the raised surface clean
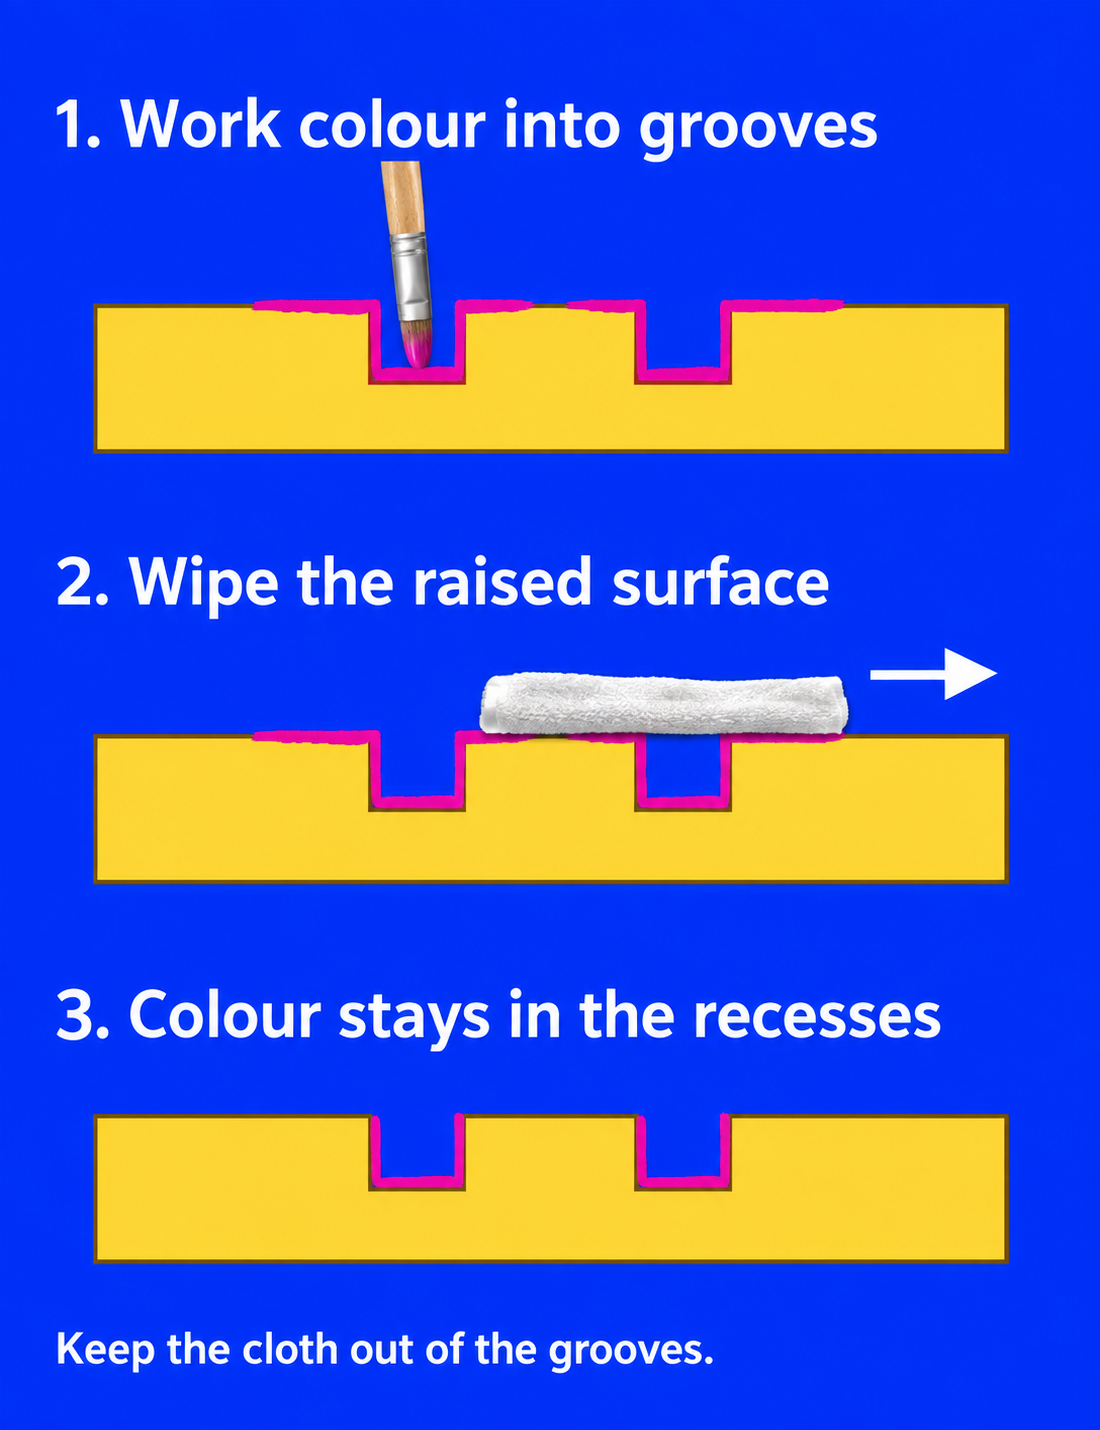
This method leaves colour in the recessed lines of a pressed relief and clean clay on the raised surface. Sculpey describes wiping the raised areas with a slightly damp sponge before the paint dries; a barely damp cloth works the same way.
- Wring out a cloth. Wet a soft cloth or sponge and squeeze until no more water comes out. A wet cloth floods shallow grooves and lifts the paint back out. Fold it into a flat pad over one fingertip.
- Paint a small area. Choose a patch small enough to wipe while the paint is still wet. With a small soft round brush, dab paint into the recessed lines until it reaches the bottom of each groove. Paint on the raised surface around them is fine for now.
- Wipe before the paint dries. Pass the pad lightly over the raised surface, keeping the cloth on top so it does not dip into the grooves. Turn to a clean part of the cloth once it picks up colour.
- Check the lines. Tilt the piece towards the light. A good result shows clean raised clay and a full, sharp line of colour in every groove. If a groove looks pale or empty, the cloth was too wet or pressed too hard: brush paint back in and wipe again with a drier cloth. Move on patch by patch.
- Clear paint that dried on the raised surface. Rubbing alcohol lifts dried acrylic paint, so lift a dried smear carefully with a cotton bud barely damp with isopropyl alcohol, keeping it out of the grooves. Make the next patch smaller.
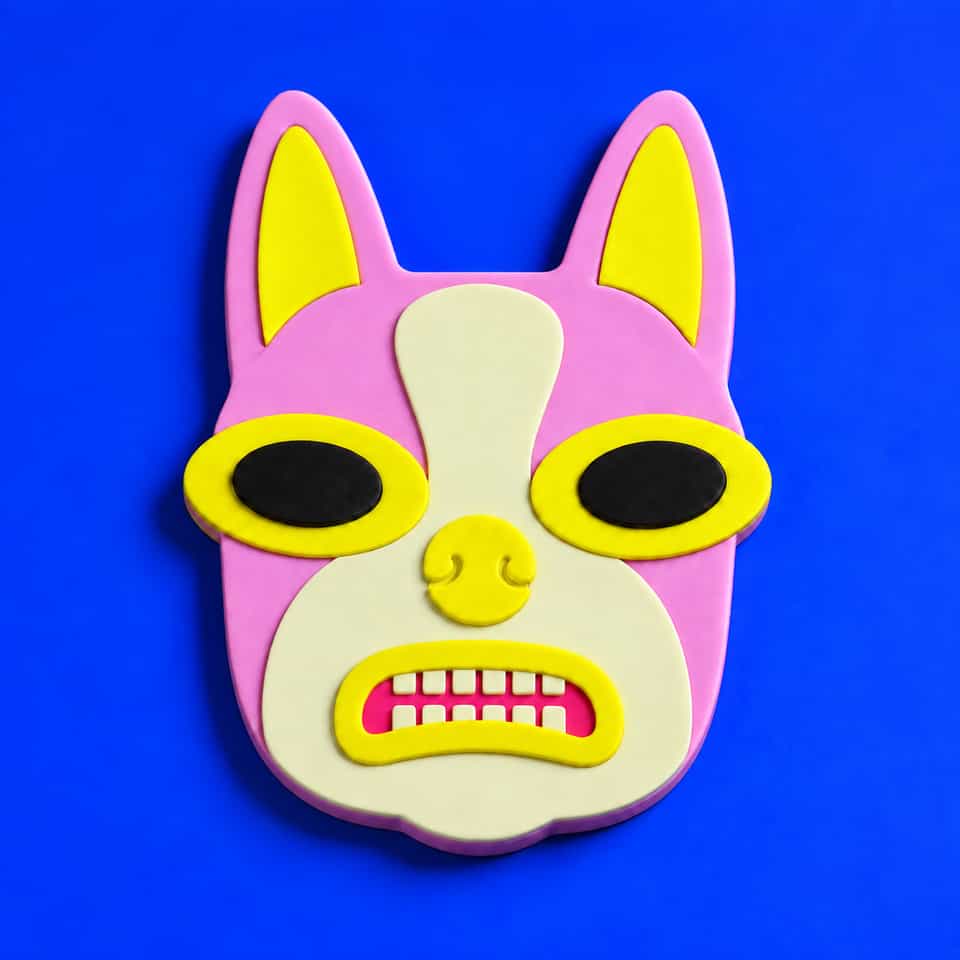
The Boston Terrier Wall Mask kit's one-colour relief face can be left plain or have its recessed lines filled this way.
Stencilling through a printed mask
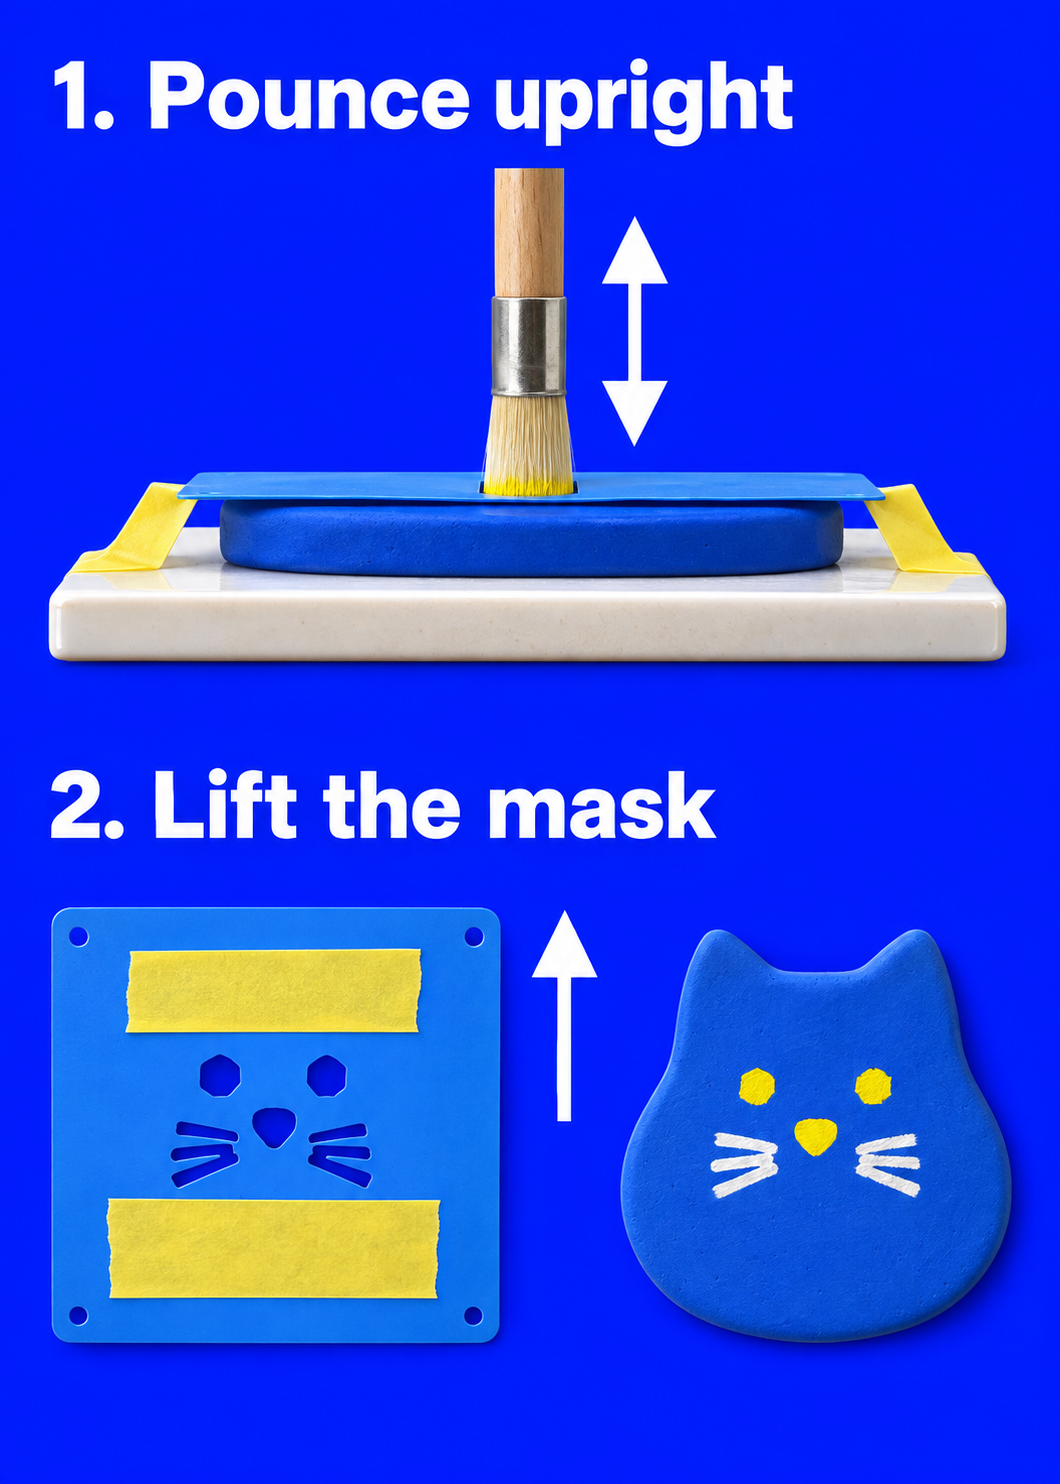
A printed mask is a thin sheet with openings in the shapes you want to paint. This nearly dry pouncing method follows Plaid, the paint maker, and the Blue Spotted Cat kit guide.
- Line up the mask. Lay it so each opening sits over its matching part of the body. The Blue Spotted Cat guide lines the ear mask up with the blue ears and seats the face mask over the face; its spot sheet has free-placement openings, so you choose where each spot goes, using the kit's placement map as a guide.
- Tape it flat. Tape the mask's edges with low-tack tape to bare clay or to the tile, never over painted colour. Cover openings you are not painting in this colour with more tape, and hold the mask flat with your other hand's fingertips close to the opening.
- Load, then blot. Dip the tips of a stencil brush, a short round brush with a flat end, into the paint. Dab it on the paper towel until the marks it leaves look pale and patchy and you have a nearly dry brush.
- Pounce straight up and down. Pouncing means holding the brush upright, tapping it straight down onto the opening and lifting it straight up, never brushing sideways. Cover the whole opening, right up to its edges.
- Add a second light pass. With the mask still taped, reload lightly, blot again and pounce a second light layer over the first. A loaded brush pushes paint under the mask.
- Lift the mask and check. Lift it straight up. The painted shape should match the opening with a crisp edge. If paint crept under, clean the stray mark off the clay and wipe the back of the mask straight away.
- Wait before the next colour. As the kit guide does, let each colour reach the recoat time on its paint label before the next mask touches it; if the label gives none, leave it overnight, which Golden says lowers the chance of colour lifting. Keep tape off painted colour.
The Blue Spotted Cat kit paints its plain baked body through printed masks for the ears, spots and face, then finishes with a thin water-based varnish. Use small stencil brushes (search Amazon) for eyes and spots.
Whichever method you used, let the paint dry completely before any finish goes over it. Thick acrylic can feel dry in under an hour and still be soft underneath, and Golden, the paint maker, says overnight drying lowers the chance of colour lifting.
Choosing a water-based finish: gloss, satin or matte
Pick the sheen, then a water-based finish in that sheen; Sculpey's finishing guidance starts with water-based glazes and varnishes.
- Sculpey's glazes. Sculpey Gloss Glaze and Sculpey Satin Glaze are water-based. Sculpey's Gloss Glaze product page calls for thin coats, 30 minutes between coats and 24 hours to air dry.
- For FIMO pieces. If your piece is FIMO, Staedtler's water-based FIMO gloss varnish is made for it and dries transparent.
Sculpey also lists water-based Varathane polyurethane among water-based options; it is written for wood, and Rust-Oleum, its maker, warns it can discolour over white or pastel paint, so coat a painted offcut in your palest colour and compare it with an uncoated patch in daylight for any yellow or grey tint. The polymer clay sealer guide compares more finishes.
Sculpey explains that matting particles sink to the bottom of the bottle, so a finish that is not stirred can dry shiny; stir it slowly and thoroughly without shaking. Golden adds that a satin or matte coat lightens dark colours, and the flatter the finish, the more it lightens them. Then test your choice on the painted offcut from the preparation steps.
How to put a finish over paint without lifting it
Use thin coats over fully dry paint, in this order.
- Start with fully dry paint. Touch dry is not enough.
- Work in a dry, well-ventilated room. Sculpey says damp air is the most common reason a finish stays sticky, and its Satin Glaze page suggests drying pieces somewhere clean and well ventilated.
- Stir slowly, do not shake. Shaking fills the finish with bubbles that dry into the coat.
- Load a soft brush from a small dish. Pour a little finish into a small dish, dip the tip of a soft synthetic brush and wipe one side on the dish edge. Any paint the brush lifts stays in the dish and out of the bottle.
- Rest the piece on its bare back so wet finish never touches the tile.
- Lay the first coat in single strokes. Start at one edge and draw the brush across in one smooth stroke, then lay the next stroke beside it. Do not go back over an area you have left: Liquitex, the acrylic maker, explains that going back over a coat drags half-dry varnish into wet and dries cloudy, and Sculpey's Satin Glaze page says to go over painted areas very carefully on the first pass so the paint does not smudge. If you are coating only part of the front, stop at a groove or an edge so no shiny patch ends mid-surface.
- Check for pooling. Tilt the piece towards the light. A thin coat shows an even wet sheen with no drips at the edges. If finish has pooled in a groove, clear it with the point of a fine tool before it dries, keeping the point off the paint on the groove floor. Clear any finish from jump-ring holes with a pin before it dries.
- Build two or three thin coats, waiting the label or product page time between coats.
- Peel off any glue-spot tape once the last coat is dry to the touch, pulling it slowly back over itself.
- Let it cure. Leave the piece untouched for the full label or product page time.
Finish types to skip on polymer clay
Skip oil-, alcohol- and solvent-based finishes and aerosol glazes. Sculpey warns that oil- and alcohol-based finishes, enamels, solvents, shellacs and petroleum-based glazes damage polymer clay, cure badly, peel or turn brittle, and advises against aerosol glazes, which can stay sticky because the propellant reacts with the clay.
Baked clay still holds its plasticiser, and some finishes soften when they touch it. That is how a varnish that dries hard on wood can stay tacky on clay. Look for the words water-based on the label, then test it on an offcut.
Where do wax and resin fit?
Wax gives smooth bare clay a soft buffed sheen; resin is a separate process.
Wax dries white on texture or in grooves, so keep it to smooth surfaces. Picreator, which makes Renaissance Wax, says to apply it thinly and test first. Rub a thin film onto the bare clay with a soft cloth, let it dry for a few minutes, then buff with a clean soft cloth until the sheen is even. Wax wears with handling and can lift paint or mica, so keep it off painted areas.
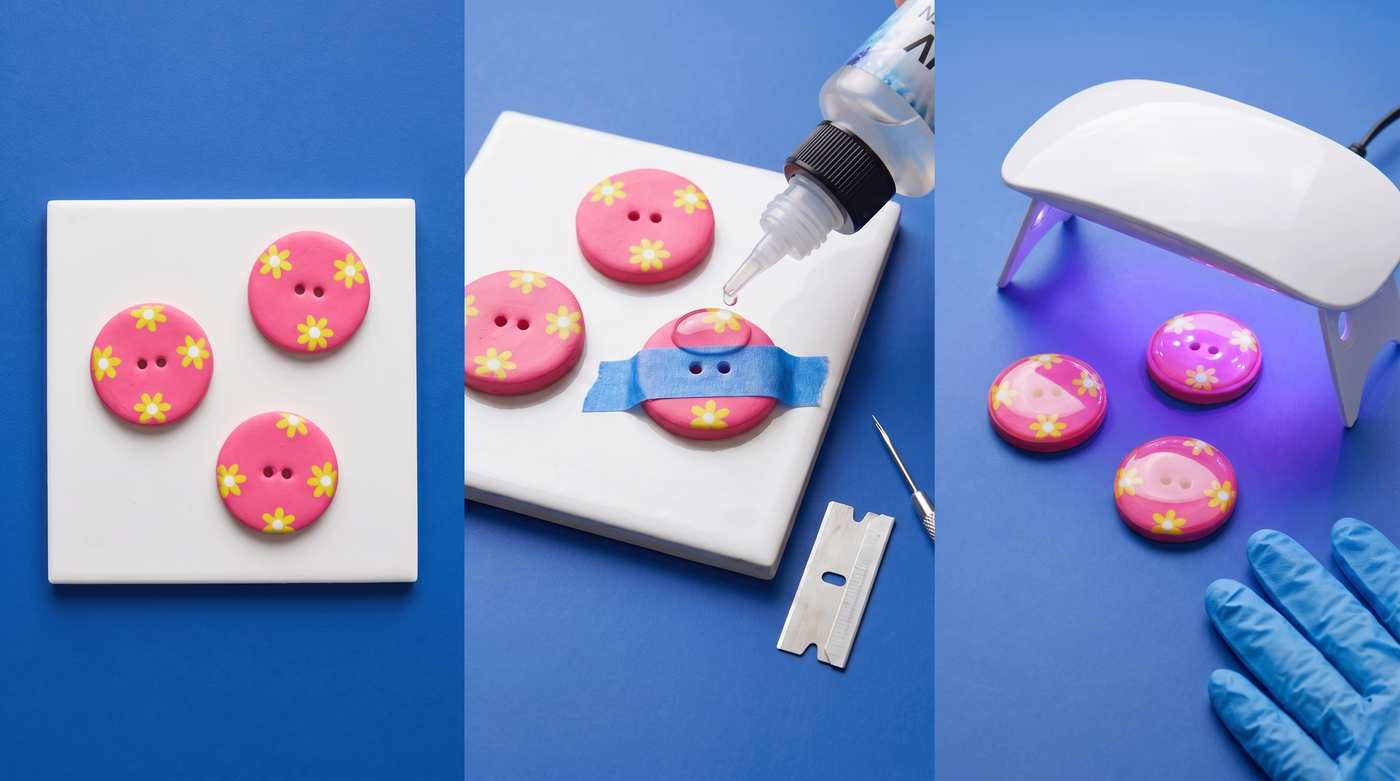
Resin is a clear liquid that sets into a thick, glassy layer, with its own instructions and safety steps. UV resin can stay sticky over paint or varnish. Before doming a painted piece, read the resin doming guide.
When to add earring hardware or a pin
Once the finish has cured for its full label time, so pliers and fingers do not mark it. The jump ring guide helps you choose rings for clay earrings.
Glue a finding such as a brooch pin onto the bare patch you taped off. Glue holds to the top layer it touches, so a pad glued onto paint or glaze is only as strong as that coating. Prepare the bare patch as your adhesive's label directs before gluing; the brooch pin guide covers that.
Paint and finish problems and how to fix them
| What you see | What to do |
|---|---|
| Finish still sticky after its drying time | Damp air, a thick coat or a finish that reacts with the clay. If only slightly tacky, a thin coat of a varnish made for polymer clay can help. On an unpainted piece, isopropyl alcohol can take a thin layer off; on a painted piece it lifts the paint too. A very sticky piece is often quicker to remake. Next time, test on an offcut and coat in a dry room. |
| Finish dried cloudy or milky | Moisture, dirt or oils, a thick coat, or reworking a half-dry coat. Clean before coating, brush thin coats in a dry room, and leave wet areas alone once passed. |
| Bubbles in the finish | A shaken bottle or a thick coat. Stir gently and brush thin coats. |
| Paint smeared or lifted under the finish | The paint was not fully dry, or the brush went back and forth. Let paint dry fully and lay the first coat in single strokes. |
| Paint rubs or peels off | An oily or too-smooth surface, or paint on warm clay. Clean with alcohol, sand lightly and repaint. A coat will not hold down peeling paint. |
| Stencil paint crept under the mask | The brush was too wet. Dab more paint off, pounce straight down, and clean the bleed and the back of the mask at once. |
| Finish filled the grooves | Thick coats pool in recesses. Brush thinner coats, and clear the groove with a fine tool before the finish dries, keeping the point off the paint on the groove floor. |
| Finish turned yellow | Long direct sunlight can yellow a finish, Sculpey notes. Display the piece out of strong sun. |
Supplies
Supplies mentioned here
Quick links to the materials and tools that fit this article. ClayBake tools stay on our own catalog.
Sculpey gloss glaze
A water-based gloss glaze from Sculpey for painted faces that get handled. Sculpey's product page calls for thin coats, 30 minutes between coats and 24 hours to air dry.
Sculpey Satin Glaze (1 fl oz)
Sculpey's lower-sheen water-based glaze. Sculpey's page for it says to let the paint dry completely first and to go over painted areas very carefully on the first pass.
Isopropyl alcohol (99%)
Wiped over cooled baked clay on a cloth or paper towel, it clears the oily film that stops acrylic gripping. It is flammable, so use it away from a hot oven or flame and let it evaporate completely before you paint.
More guides in this path
Open these when the next decision is material choice, attachment, or finishing.

Sanding and Buffing Polymer Clay: Pressure and When to Stop
Smooth rough edges on baked clay with wet/dry paper and water. Support small details, remove the scratches from each grit, then hand-buff for a soft sheen.
Do You Need a Sealer for Polymer Clay? Compatible Finish Options
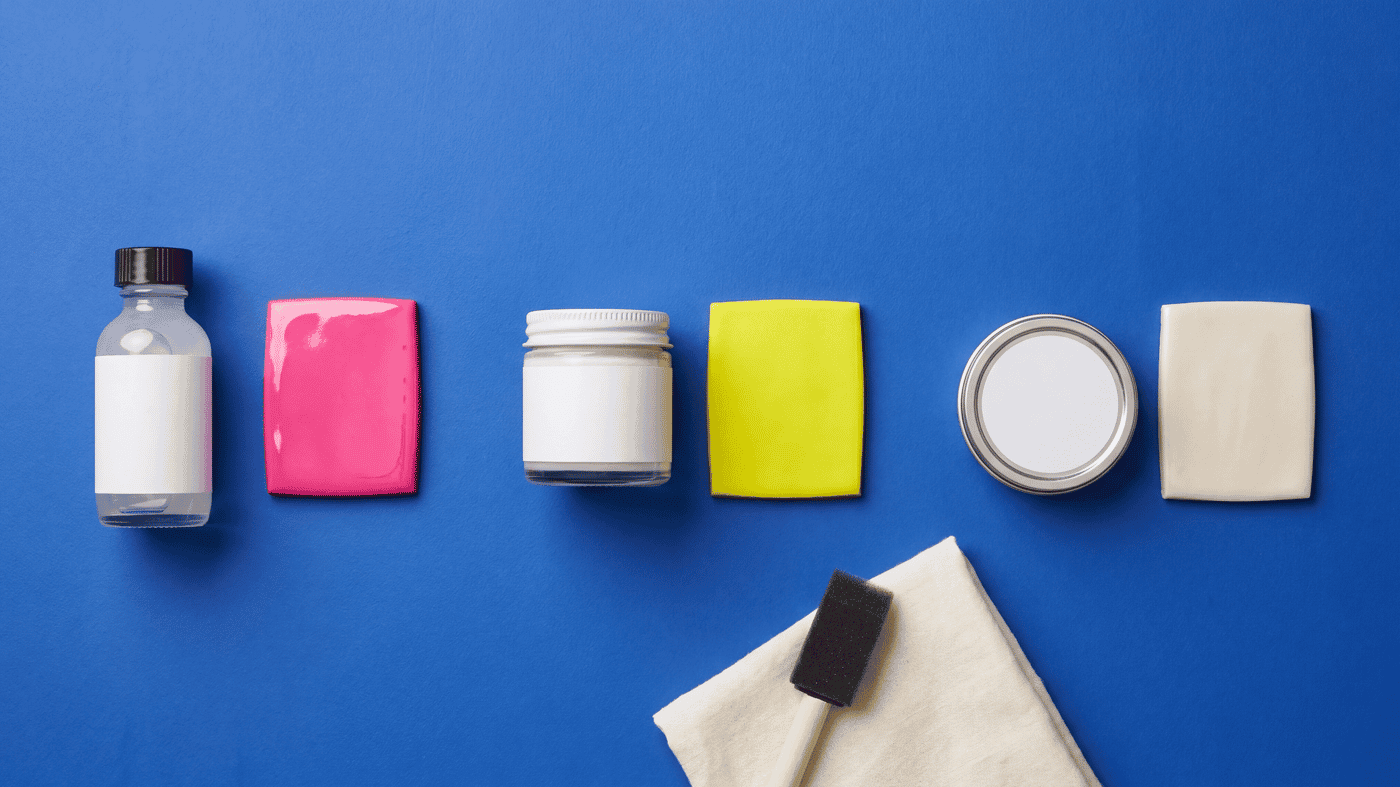
Leave a good cured surface bare, or choose one documented water-based finish, test it on the same clay line, and follow the current product label.
Resin on Polymer Clay: Label-First UV and Epoxy Checks
Bake and cool the clay first, then use the exact resin maker's instructions for compatibility, PPE, lamp or mixing requirements, layer depth, and cure.
Finished examples with related clay decisions
Each piece shows how a material, attachment, or surface choice changes the final form.