Cut 8-Bit Pixel Polymer Clay Earrings: Staircase Guide
True 8-bit pixel earrings and brooches need stepped-edge silhouettes that look like deliberate pixels from a distance, not softened curves. This guide covers grid-based templates, blade-cut checks, and keeping the staircase crisp through cure.

In brief
Key takeaways
- 1Draw the silhouette on a pixel grid where every edge step is one full pixel. Diagonal cheats break the 8-bit read
- 2Transfer the design to a reusable acetate template so step counts stay consistent across pairs and across batches
- 3Chill the slab for 15 to 20 minutes before cutting. A warm slab lets the blade drag through corners and round them off
- 4After cure, sand only the front and back faces. Edge sanding rounds the staircase corners and erases the pixel read
If your pixel edges look rounded instead of sharp, the problem is often how the corners are cut or how warm the slab is when you cut them. True 8-bit pixel art has a specific visual grammar: every edge moves in whole-pixel steps and every corner reads as a square turn. When the corners soften, the piece stops reading as 8-bit.
This is a different technique from pixel slab layering. There, the design comes from stacked color blocks. Here, the design comes from cutting one slab in stepped edges that follow a pixel grid. Both are valid, but the failure modes are different and the build paths do not interchange.
Draw The Silhouette On A Pixel Grid First
Every clean pixel staircase silhouette starts as a grid drawing where each edge step follows your planned pixel unit.
Open graph paper or a pixel art app and draw the silhouette at the resolution you want, often something like 16 by 16 or 24 by 24 pixels for a stud-size piece. Color in only the squares that belong to the silhouette. The boundary between filled and empty squares becomes your cutting path.
Decide the pixel size in physical units. For a 16 by 16 grid at a 20 millimeter finished width, each pixel is 1.25 millimeters. That number is what you will hold to during cutting, so write it on the template.
Resist the temptation to "smooth" the silhouette in the drawing stage. A heart shape with diagonal half-pixel slopes is not 8-bit anymore; it is a cleaned-up vector shape. Stay on whole pixels even if the silhouette looks chunky on the screen, because the chunky read is the point.
Transfer The Template To Acetate For Repeatability
Cutting freehand against graph paper is how step counts drift between pieces. A reusable template fixes this.
Print or trace the silhouette onto acetate at the planned finished size, then cut it out cleanly with a craft knife along the staircase edge. The acetate stencil becomes a stable template that you can lay on the clay slab and cut around with a tissue blade.
Acetate stencil sheets are useful here because they hold their shape across many cuts and let you produce a matched pair or a small batch from one template.
Mirror the template if the design needs a left and right pair. Do not flip a single template back and forth in the cutting stage; cut against a dedicated mirrored stencil so both pieces get the same edge discipline.
Chill The Slab Before Cutting
Warm clay drags during straight cuts. The blade pushes through it instead of slicing cleanly, and that movement rounds every corner slightly.
Roll a test slab to the thickness you want for the finished piece, then slide it onto a ceramic tile and rest it in the fridge briefly. The slab should feel firm to a fingertip but not so cold that it cracks under the blade.
A chilled slab cuts with much less drag, which keeps the corners crisp. If your kitchen is warm or your hands run hot, the chill window may need to be longer. Test a corner cut on a scrap before cutting the full silhouette.
Use A Tissue Blade For Straight Pixel Edges
The whole technique depends on clean straight cuts at consistent angles. A craft knife cannot match what a tissue blade does on a slab.
A polymer clay tissue blade gives you a long thin edge that can cut a full pixel run in one stroke. Press the acetate template firmly against the slab, then bring the blade down vertically along the template edge in clean motions.
For each step in the staircase, lift the blade fully between cuts. Do not drag the blade through a corner from one direction to another; that motion rounds the inside corner and is the single most common reason 8-bit pieces stop looking 8-bit. Think of it as four small moves: blade straight down, lift it clear, slide to the next step, straight down again. The lift is the part people skip, and it is the part that keeps your corners square.
Sculpey Premo holds these cuts well because the firmer body resists drag. Softer lines like Fimo Soft can also work, but they often need more chill time and a lighter touch with the blade.
Verify Pixel Counts Before Lifting The Pieces
Once the cuts are done and before you separate the silhouette from the surrounding slab, count the steps on each side against the template.
This is the cheapest place to catch a mismatch. If the template shows seven steps down the right side and your cut shows six steps, you can re-cut a step now while the slab is still flat and chilled. Once the silhouette is lifted and the surrounding slab is gone, repair gets harder and may be cleaner as a fresh test.
For a mirrored pair, lay both pieces side by side on the tile and compare step counts down each silhouette. The pair has to match step for step, not just look similar at a glance.
Skip The Edge Sanding Or Sand Only The Faces
Edge sanding is how 8-bit silhouettes lose their corners after cure.
If a cured pixel earring has rough faces from the slab surface, sand only the front and back flat faces with fine grit, working in straight strokes. Do not run sandpaper or a polishing cloth along the staircase edge, because the abrasive will round every corner uniformly and the silhouette will read as a softened blob instead of a pixel staircase.
If a corner picked up a small clay smear during cutting, clean it with the tip of a sharp blade rather than sandpaper. A precise corner cut after cure preserves the 90 degree angle; sanding does not.
Choose A Custom Acetate Template Or A Pre-Made Pixel Cutter
A custom-cut pixel silhouette gives you control over the planned step pattern. A pre-made cutter locks you into one design.
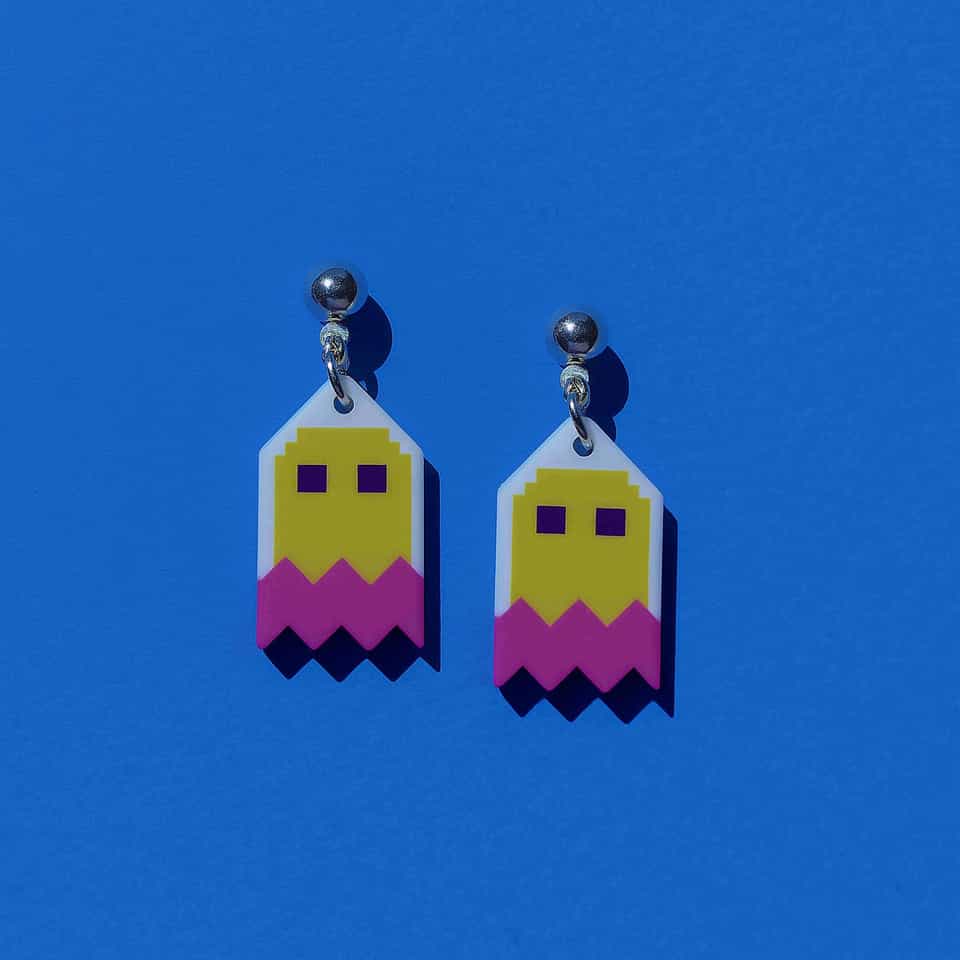
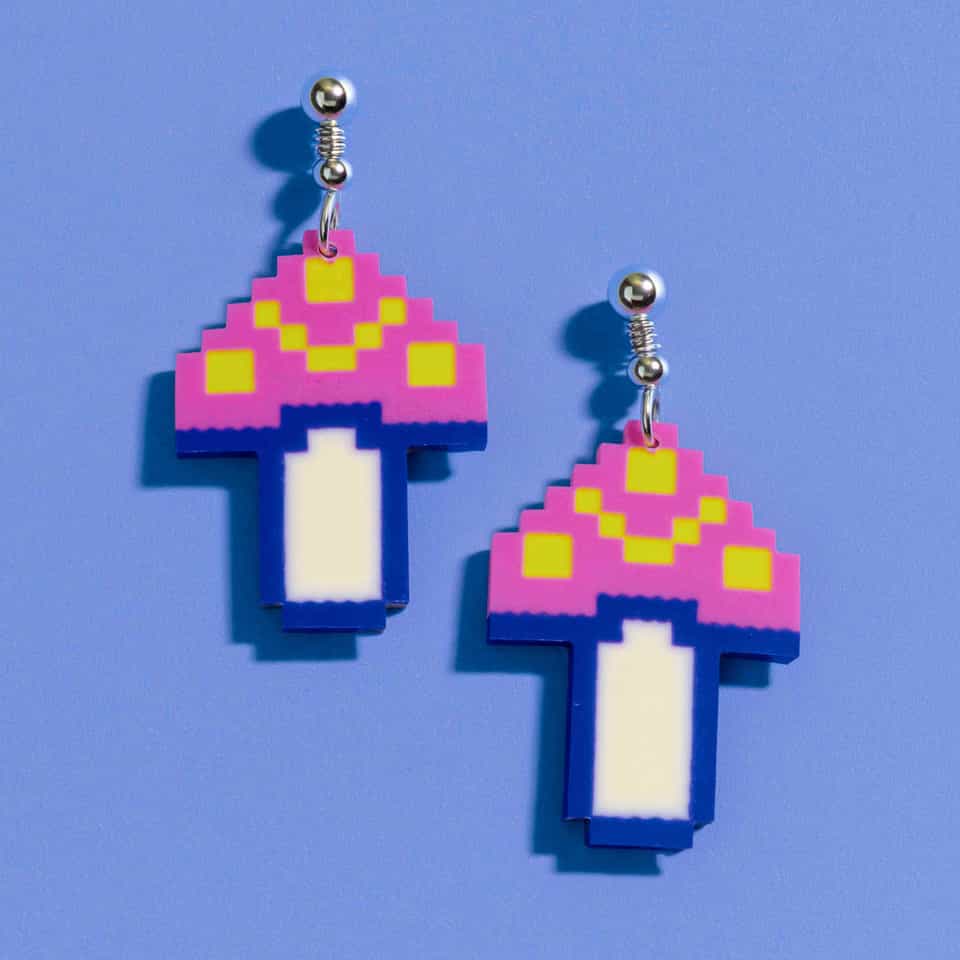
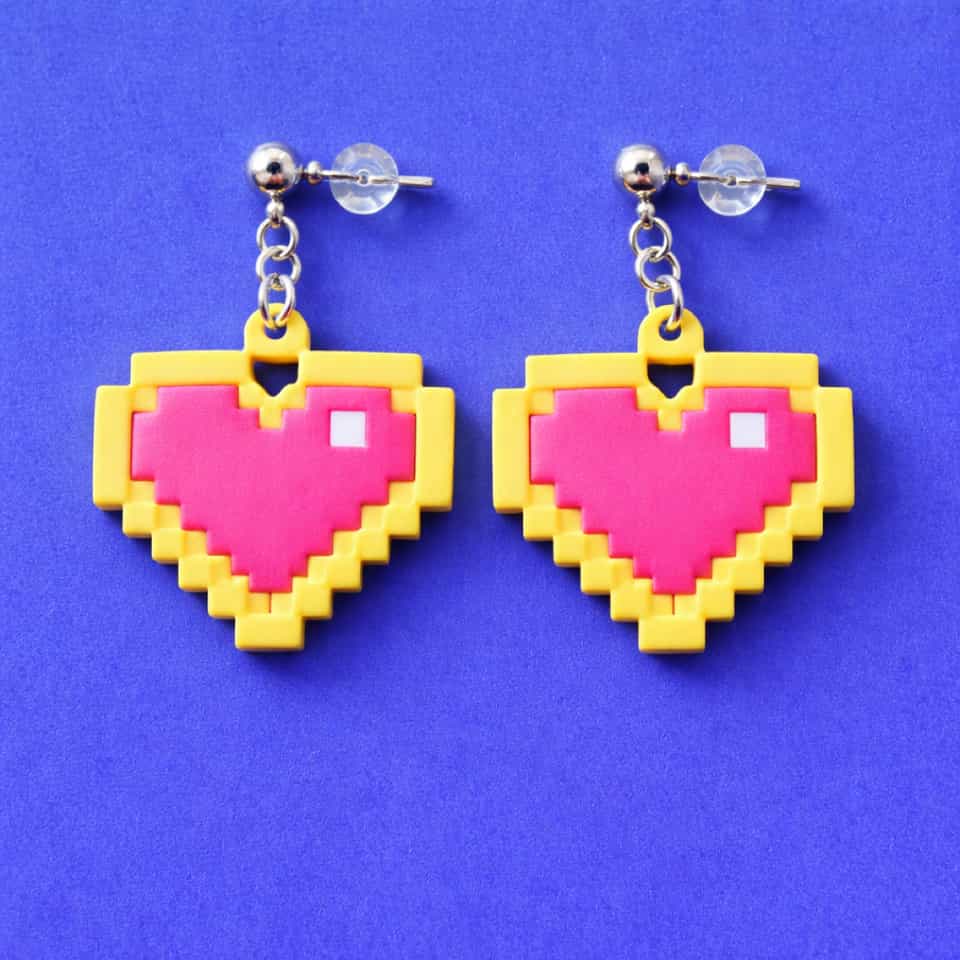
Pre-made pixel cutters in heart, mushroom, and ghost silhouettes exist and are useful when you want to batch one pattern repeatedly. The acetate template approach is more flexible and lets you cut any silhouette from any pixel art reference, which matters if the lookbook piece has a custom shape that no commercial cutter sells.
Both approaches require the same chilled slab and same vertical blade discipline. The cutter automates the path but does not save bad cutting habits.
Plan Hardware To Land On Whole-Pixel Positions
A jump ring hole punched at a half-pixel position breaks the grid logic of the piece.
If the design has a hanging point, place it at a clean grid intersection on the template. For a top-mounted hole, that often means picking a pixel near the top center of the silhouette and piercing through that pixel center while the slab is still raw. Marking the hole position on the template before cutting saves guesswork.
Finish The Faces, Leave The Staircase Edges Alone
Cure the silhouette flat on a tile, follow your clay line package instructions, and verify the tray temperature with an oven thermometer.
The flat bake protects the staircase profile because nothing presses into the edges during cure. Some makers add a thin sheet of parchment under the piece to prevent any tile-finish marks on the back face, which can reduce the need for back-side sanding later.
Finish the front face with a matte or satin coat if the design calls for it, and leave the staircase edges untreated. Heavy gloss on the edges can pool at the corner intersections and visually round them, which fights everything the technique was trying to achieve.
Pieces This Technique Is Built For
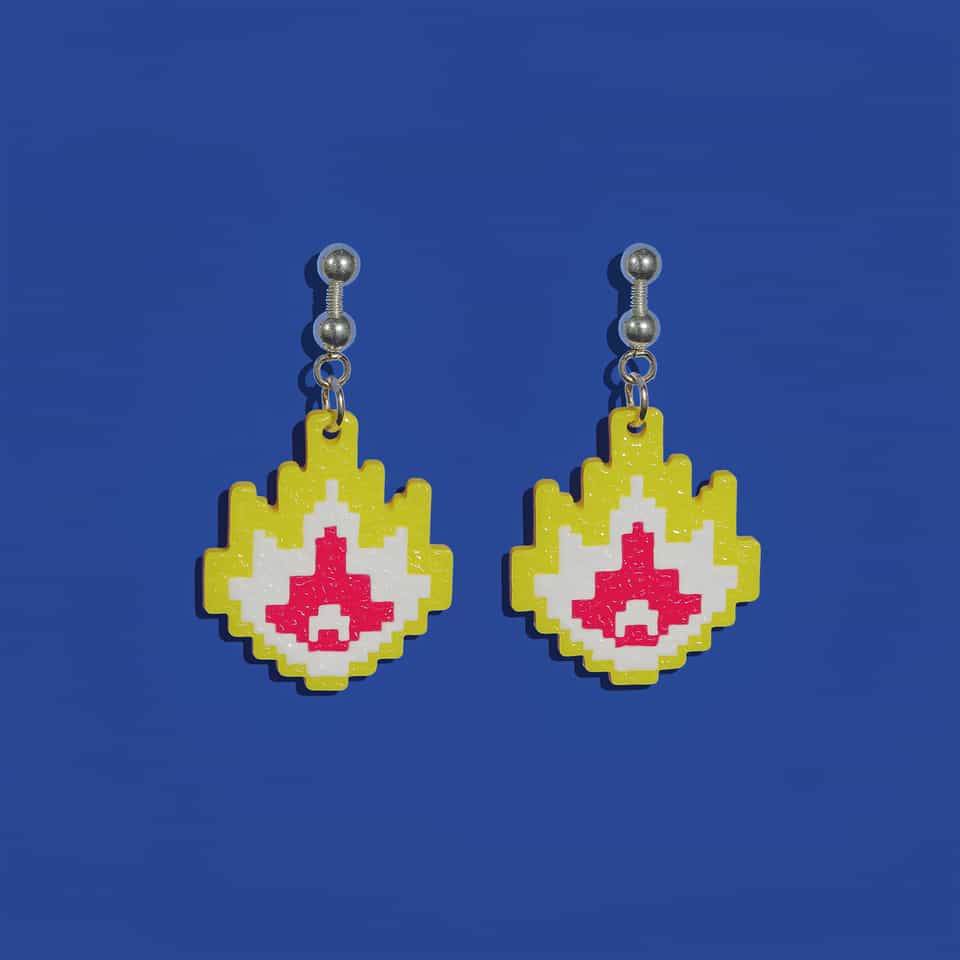
True 8-bit silhouettes, pixel-edge earrings, retro game charms, and staircase-cut brooches share one rule: every cut sits on the grid and every hardware mark lives on a whole-pixel position.
Pieces this approach was built for:
- true 8-bit silhouette earrings (hearts, ghosts, mushrooms, sprites)
- retro game pixel brooches with stepped outlines
- pixel jewelry where the silhouette edge is the design feature, not the front surface pattern
If you want the stacked-block version of this look, the pixel slab layering and mirrored pairs guide breaks down color registration. For cleaner curved silhouettes, the cutout arch earrings guide covers the same blade discipline.
More guides in this path
Open these when the next decision is material choice, attachment, or finishing.

Best Polymer Clay Cutters: Top 10 for Clean Shapes (2026)
A practical 2026 cutter guide built around shape families, cleaner release, merchant-fit checks, and maintenance habits that are easier to verify than hype specs.
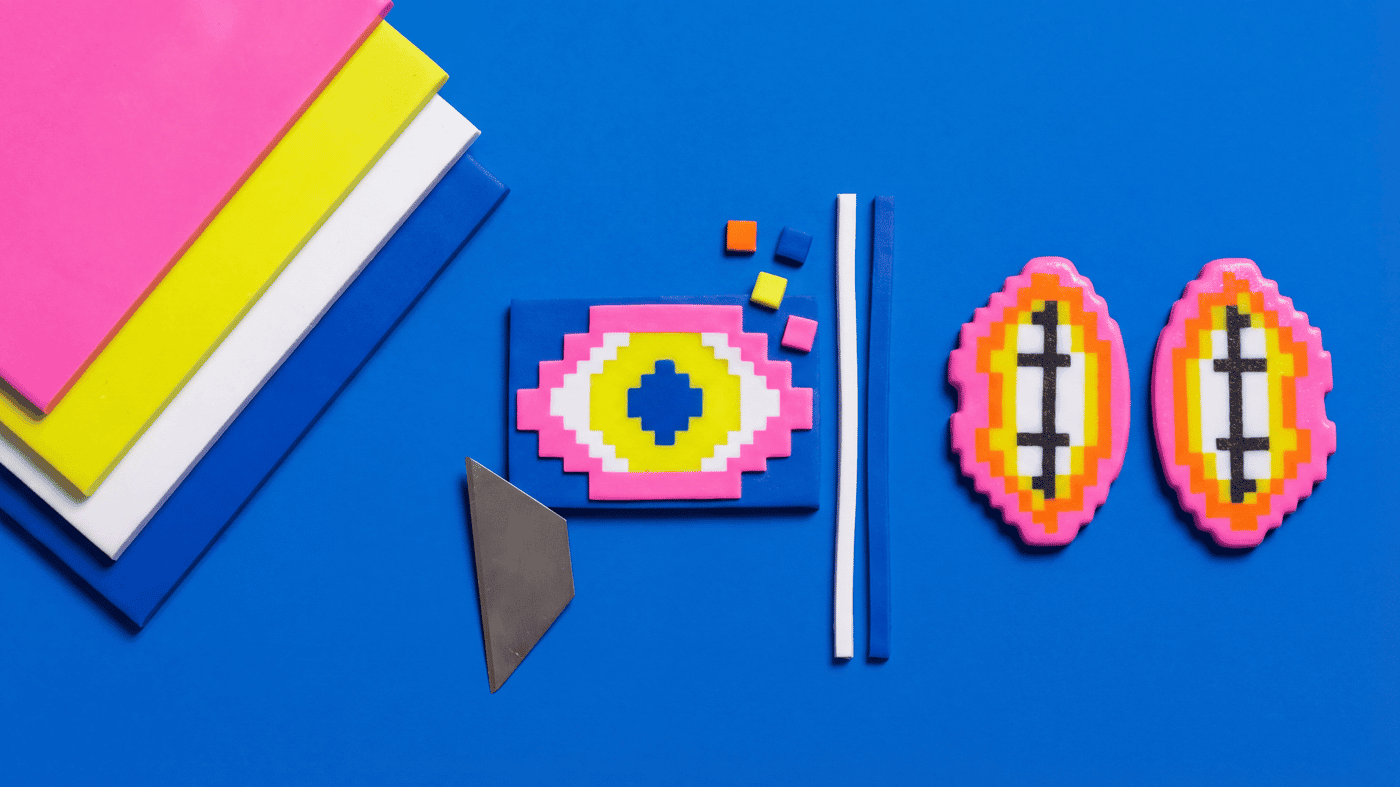
Polymer Clay Pixel Slabs, Stepped Layers, and Mirrored Pairs
Graphic lips, eyes, mushrooms, and badge-like brooches are often easier to build as flat or gently domed pixel slabs. This guide covers crisp staircase edges, stacked layers, and ways to keep left and right pieces matched.

Best Earring Posts for Polymer Clay Jewelry
Choose flat-pad, loop-top, titanium, stainless steel, and decorative posts based on the shape, weight, and baked back of your polymer clay earrings. Then try one sample pair before making a full batch.
Finished examples with related clay decisions
Each piece shows how a material, attachment, or surface choice changes the final form.