Polymer Clay Bead Grid Tutorial: Cross-Stitch Pixel Patterns
A regular grid of small clay beads can look like cross-stitch when the bead size, spacing, and color placement stay disciplined. This guide covers bead rolling, grid jigs, and how to keep the inlay flat and aligned through cure.

In brief
Key takeaways
- 1Sketch the grid pattern on graph paper at finished scale first. Bead diameter and grid count are one decision, not two
- 2Roll matched bead diameters using a bead roller or weighed pinches. One fat bead breaks the whole row visually
- 3Place a printed grid under a clear glass tile so row and column lines stay visible through the base slab while you set beads
- 4Press the grid in with one or two light passes of an acrylic roller. Bake flat with no weight resting on the beads
You laid out a tidy grid of clay beads, but after the bake a couple of rows look lumpy and the cross-stitch effect is gone. Almost every time, the problem started before the first bead went down. Here is the setup that keeps the grid reading clean: consistent diameter, visible grid lines, and base softness that grabs without swallowing the beads.
Choose Beads Or Square Pixels First
Round beads and square pixels solve different visual problems, so decide which one your reference calls for before you invest in the build.
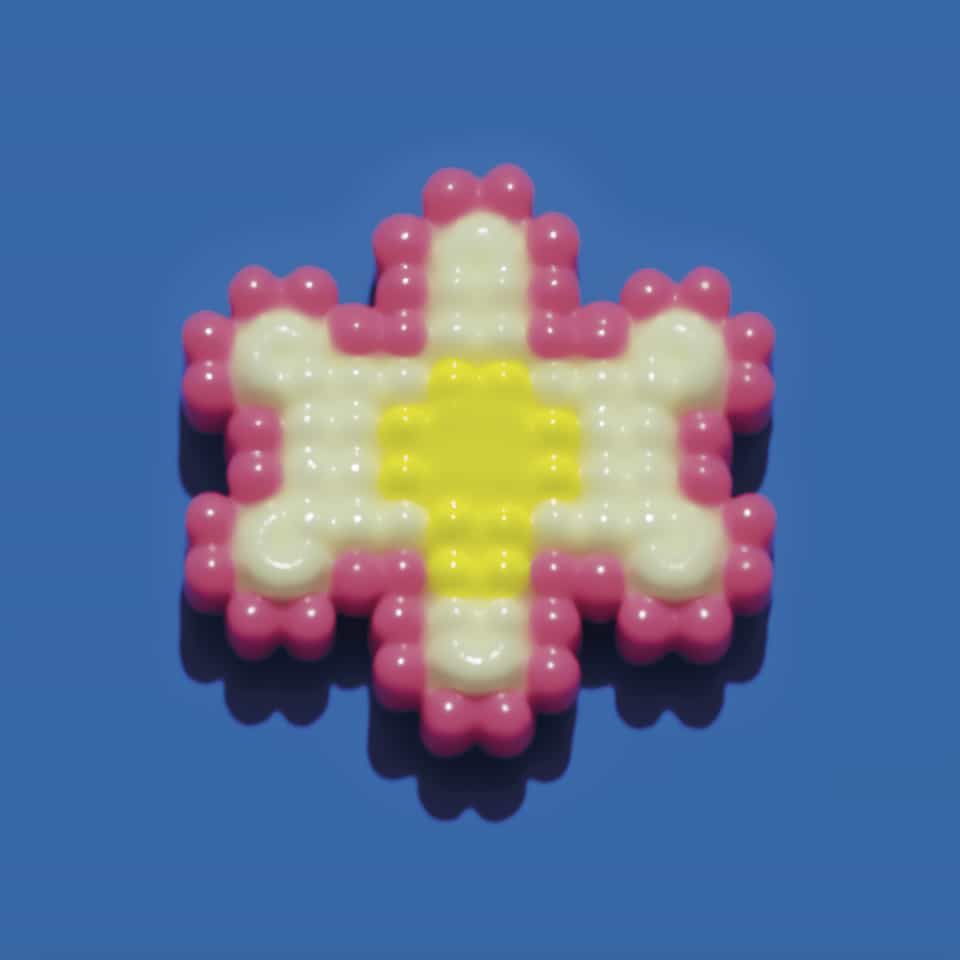
- Choose beads if the reference shows clearly round dots with visible base color in the diagonal gaps between rows. Beads give a softer, more tactile grid that catches light like beadwork or tile mosaic.
- Choose pixel cuts if the reference shows squares butted edge to edge with no gap. Square pixels give a sharp graphic grid like real cross-stitch, covered in the pixel slab layering and mirrored pairs guide.
Decide The Grid Math Before You Roll Any Beads
Sketch the full pattern on graph paper at the finished face size before you roll a single bead. The grid count sets how small each bead has to be, so the math comes first.
The bead diameter and the grid count are linked: one decides the other. A low-count grid can use larger beads with visible gaps, while a higher-count grid needs smaller beads and more disciplined spacing.
Sketch on graph paper, color in the squares for each bead color, and count how many beads you need per color. This sounds like overhead, but it is a practical way to make sure you do not run short on a niche color halfway through assembly.
Roll Matched Beads, Not Approximate Ones
The grid pattern reads as cross-stitch only when the beads are visually identical in size.
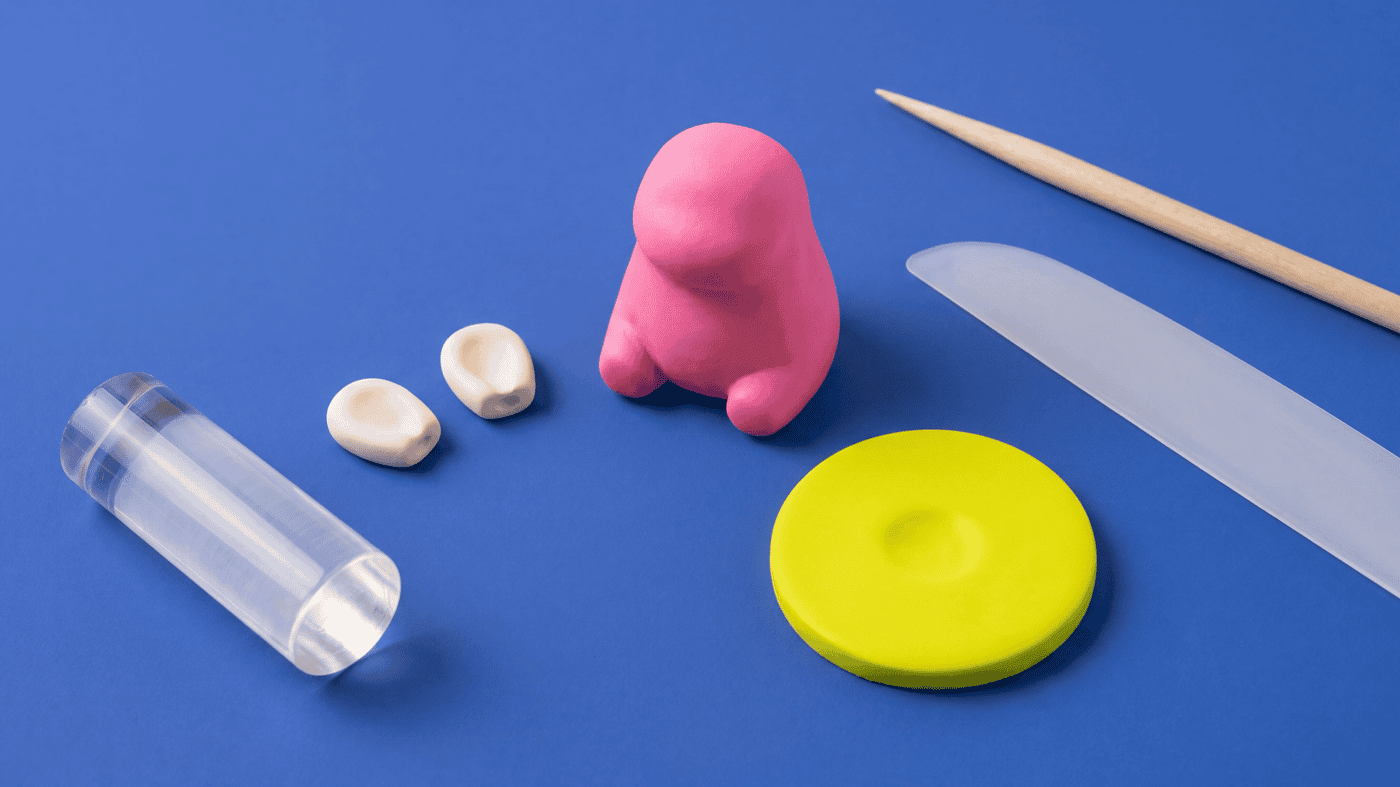
Pinch or weigh matched amounts of conditioned clay first. A digital jewelry scale at 0.01 gram resolution helps for small bead counts where one fat bead breaks the row visually. For larger counts, pinching against a sized template (a small punched hole in cardstock, for example) gets you close.
Roll each ball with the same pressure and the same number of strokes between your palms. If one bead ends up visibly fatter or taller than the others, the whole row reads off. A bead roller makes this faster and tighter when you need 25 to 50 matched beads.
A bead roller speeds this up and tightens the diameter tolerances, especially when you need 25 to 50 matched beads for a single button or pendant face.
Use A Visible Grid Guide Under A Glass Tile
Eyeballing rows and columns at small scale is how grids drift. A visible guide fixes the problem.
Print a graph at the bead spacing you decided on, slide it under a clear glass tile, then place the base slab on top of the glass. The grid lines show through the slab and give you placement targets for each bead.
A pixel assembly grid works for this if you do not want to print custom graphs, though a custom graph matching your bead spacing is a precise option.
Drop beads onto the grid intersections one row at a time, working from one corner across so you do not have to reach over placed beads. If the pattern is symmetrical, build outward from the center instead so any drift shows up at the edges where it is easier to correct.
Get The Base Slab Softness Right
The base needs to grab beads without swallowing them. That window is narrower than it sounds.
Roll the base color into an even slab, lay it on the glass over the grid, and let it rest briefly. A freshly conditioned slab can be too soft and let beads sink at different depths depending on placement pressure. A slab that has rested too long can become too firm, making beads pop off after a light press.
Test on a corner of the slab before committing the full grid. Press one bead in lightly. If it bonds and stays at the same height as a fingertip-test bead pressed elsewhere on the slab, the softness is right. If it sinks unevenly or bounces back, adjust the rest time and try again.
With firmer lines like Premo or Kato, where beads can pop off a too-firm base after cure, brush a very thin film of liquid polymer clay across the base before placing the beads. The film bakes into the join and holds the beads without you having to soften the base so much that it swallows them.
Press The Grid With An Acrylic Roller, Not Fingertips
The final seating press is what locks the bead grid into the base. A roller distributes pressure evenly across the whole grid; fingertips press one bead at a time and create depth variation.
An acrylic roller with very light pressure, one or two passes only, seats the entire grid into the base at the same depth. Heavy rolling crushes the bead profile and turns the grid back into a textured slab.
Some makers prefer a piece of parchment between the roller and the beads to reduce drag. That is worth testing if your clay is on the softer side.
Cure It Flat And Keep Hardware Off The Bead Pattern
Cure the assembled grid flat on a tile and follow your clay line package instructions, then verify the real tray temperature with an oven thermometer.
Cure the grid with nothing resting on the beads. Even a sheet of cardstock on the top row will flatten one side of those beads, so leave the surface fully clear during bake. If the oven has known hot spots, a loose foil tent above the piece evens out the heat without contacting the beads.
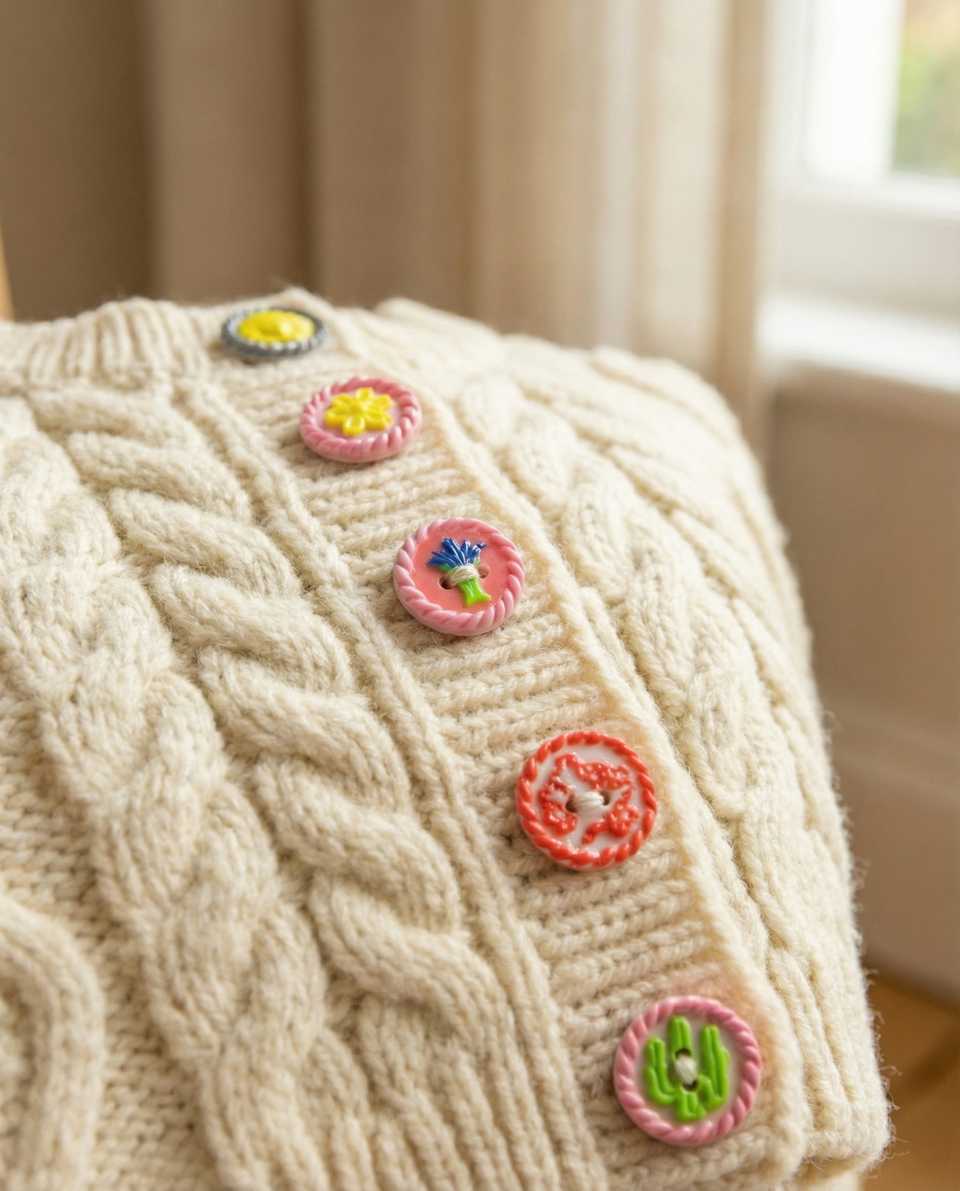
Plan hardware placement so it lives on the back or in a clean margin, not through the bead grid. A button hole punched through the grid breaks the pattern; a button hole punched in an unbeaded margin keeps the picture intact.
Finish The Surface Without Filling The Gaps
The visible base color between beads is part of the cross-stitch read. Heavy gloss or a thick sealer pools in those gaps and erases the grid.
Many bead grid pieces look best with a matte or soft satin finish, or no topcoat at all. If you want gloss for protection, apply the thinnest possible coat and check that the gaps stay visible after cure. Test on a scrap with the full bake plus finish stack before applying it to a finished piece.
Settle Grid Count, Bead Diameter, And Base Softness Before The First Row
Three numbers decide whether a bead grid, cross-stitch pattern, dot grid, or pixel-bead inlay reads clean: grid count, bead diameter, and base softness. Lock all three before the first row goes down.
Pieces where this matters most:
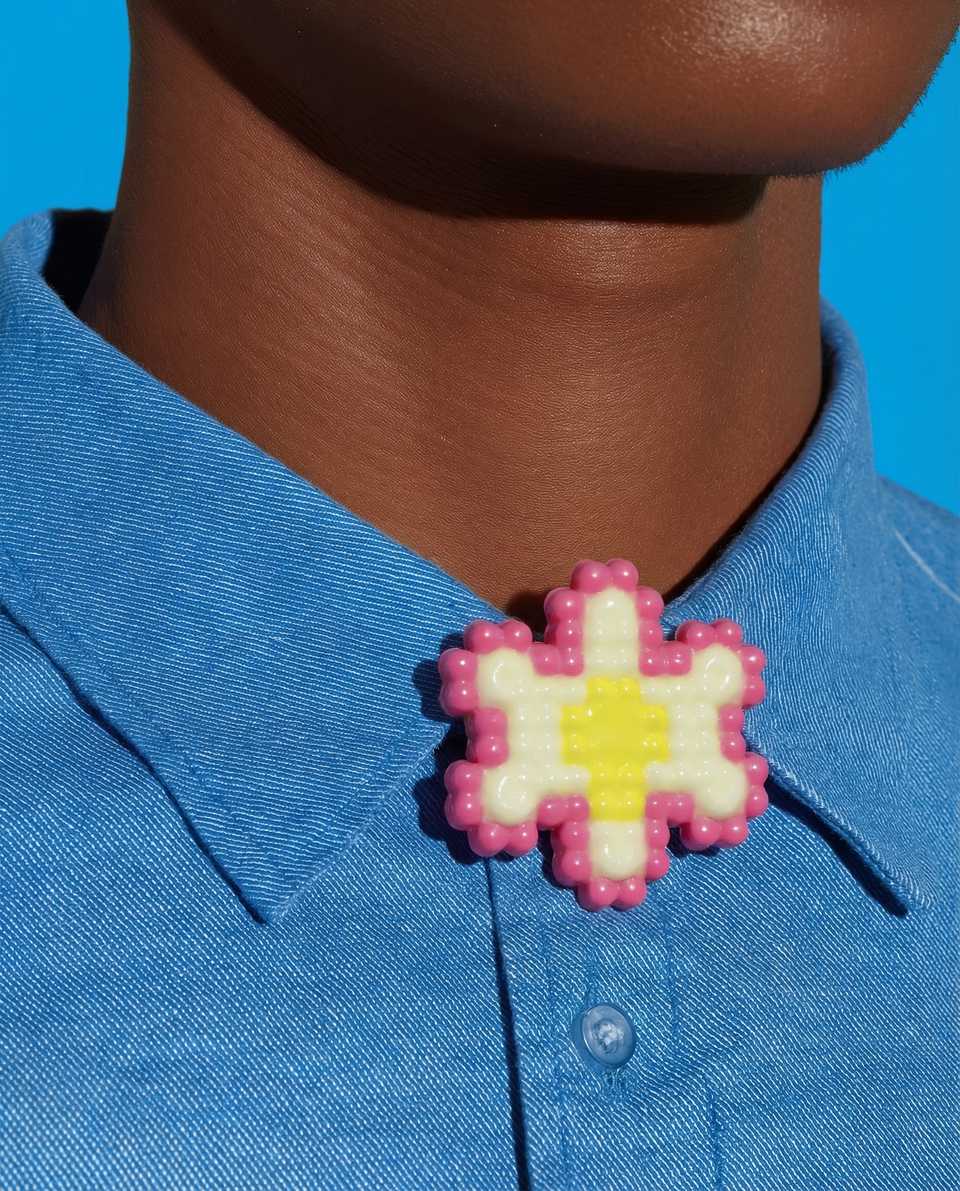
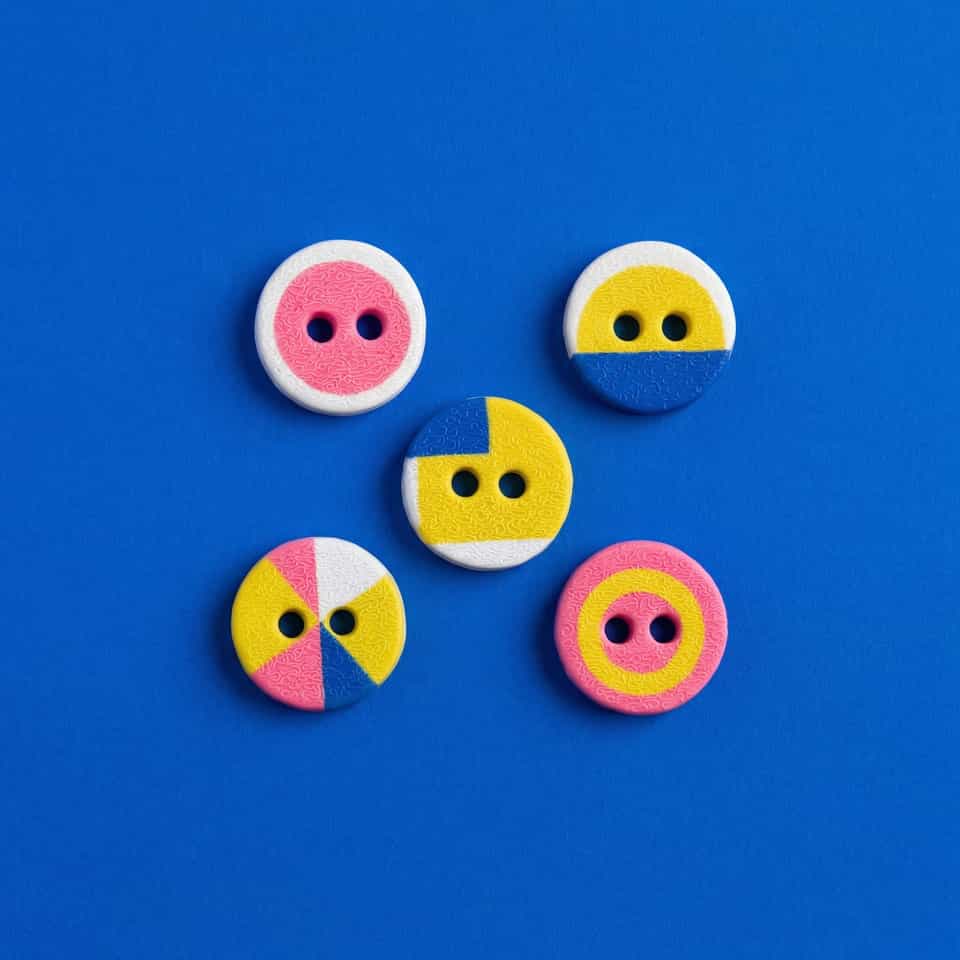
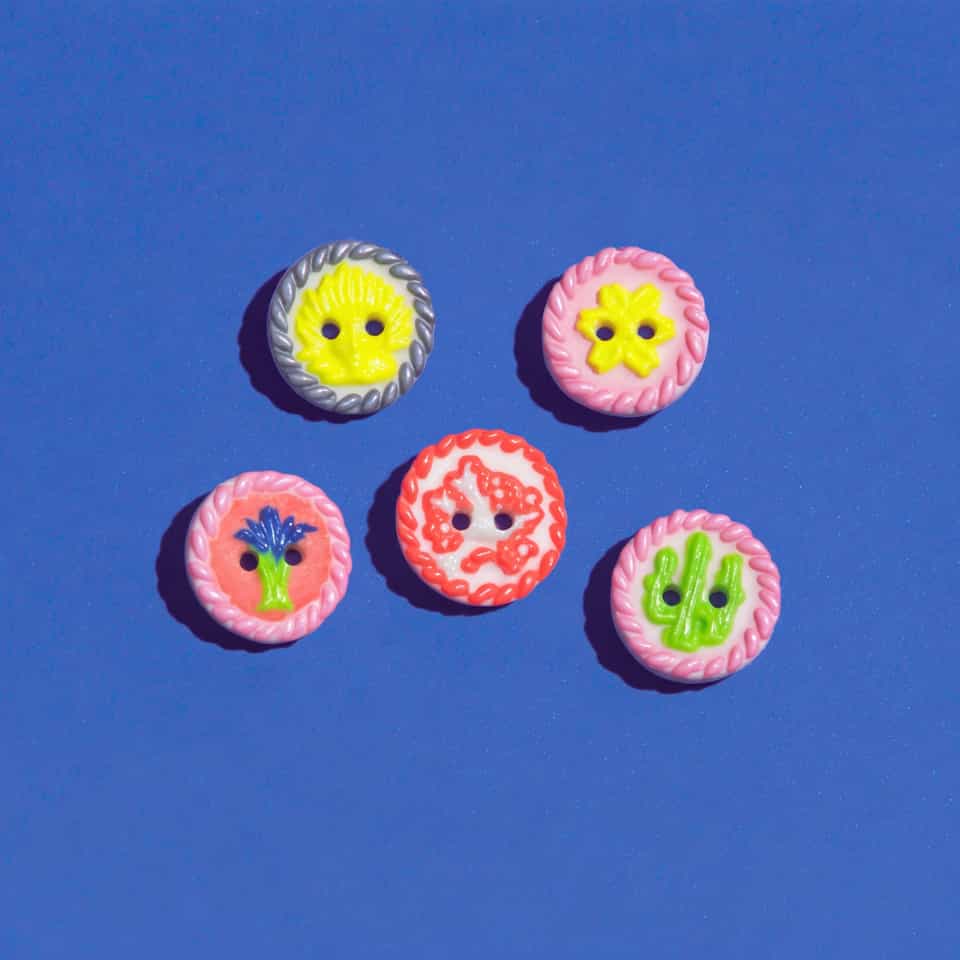
- cross-stitch style polymer clay buttons and pendants
- dot-grid earring drops where the grid math is the design
- any inlay piece where regular spacing of round elements does the visual work
Next, read the pixel slab layering and mirrored pairs guide for the cut-block alternative, and the surface applique and confetti inlay guide for less regular placement patterns.
More guides in this path
Open these when the next decision is material choice, attachment, or finishing.
Polymer Clay Assembly: Build Order and Join Planning
Your layered piece warped or the join cracked because you added fine detail before the big masses were stable. Solve large footprint and mass first, then features, then details. Decide the bake support before you start so nothing shifts in the oven.
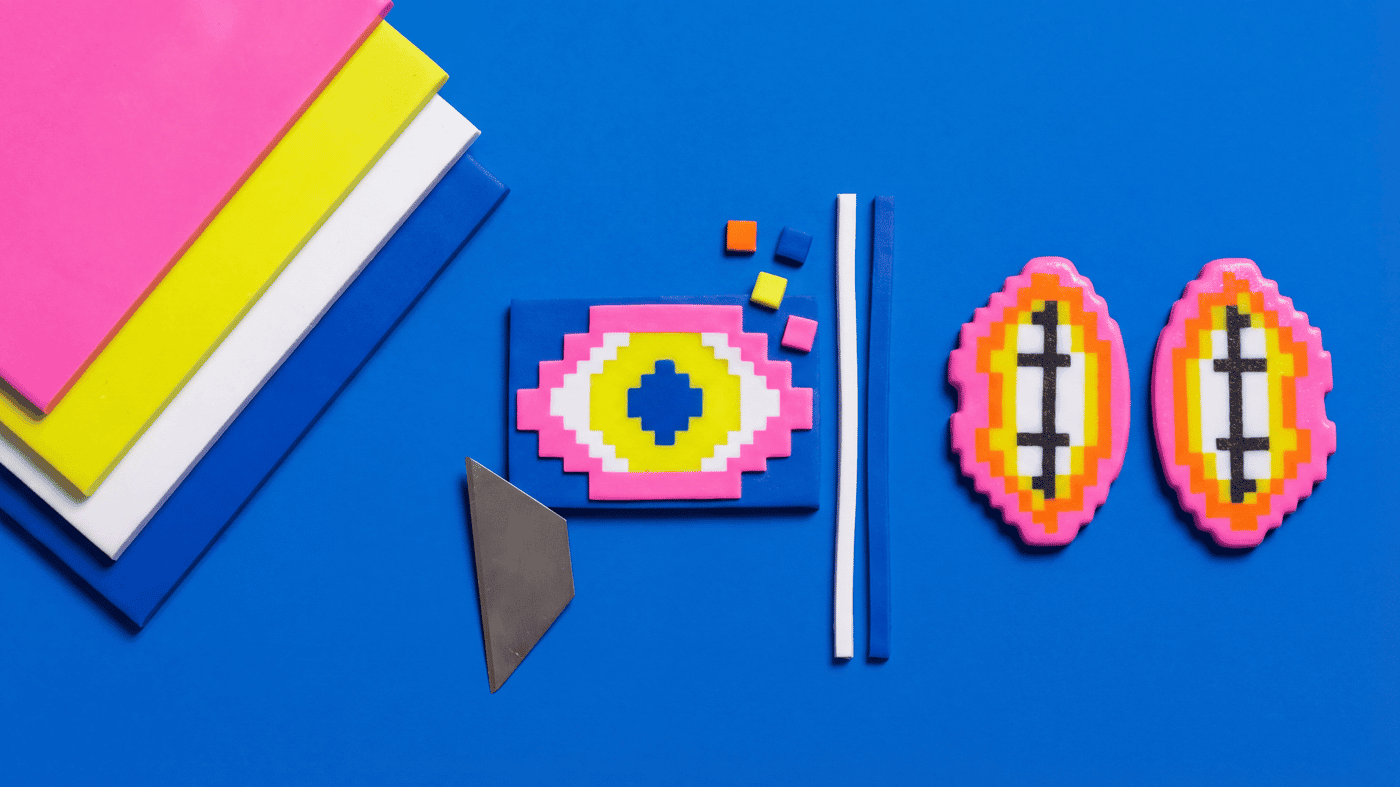
Polymer Clay Pixel Slabs, Stepped Layers, and Mirrored Pairs
Graphic lips, eyes, mushrooms, and badge-like brooches are often easier to build as flat or gently domed pixel slabs. This guide covers crisp staircase edges, stacked layers, and ways to keep left and right pieces matched.

Polymer Clay Surface Applique and Confetti Inlay Guide
If an inspiration piece looks like it was built from placed petals, dots, lips, stars, or tiny cut motifs, this is usually the technique family you need. Learn when to applique, when to press pieces flush, and how to keep flat builds crisp instead of lumpy.
Finished examples with related clay decisions
Each piece shows how a material, attachment, or surface choice changes the final form.