In brief
Key takeaways
- 1Pick one mid-tone, one accent, and one light or pearl color so the marble lines stay distinct rather than collapsing into a muddy gray
- 2Twist into a rope first, then fold across the long axis and roll perpendicular to the fold so the marble spreads without smearing into stripes
- 3Stop folding at two or three passes and use the arm's length test as the stop signal rather than a fixed number
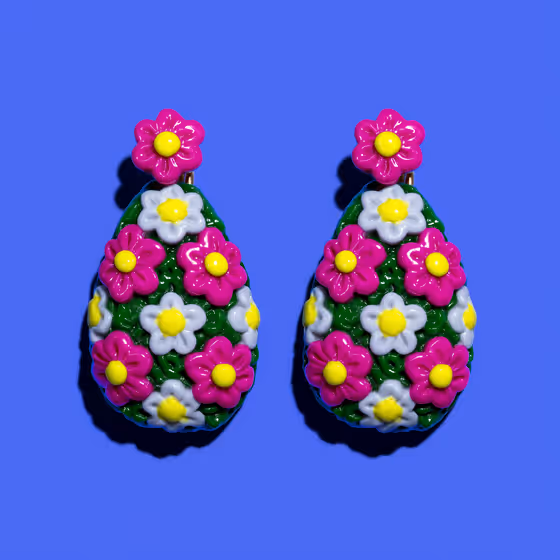
- 4Roll to 2 mm for earring slabs and 3 mm for buttons or pendants, then rest the slab 5 minutes before cutting so it does not tear under the cutter
- 5Bake flat on a tile per the package directions, verify the real tray temperature with a thermometer, and finish with light wet sanding if the marble looks dull after cure
Marbling is the fastest way to make a polymer clay slab feel intentional and saleable. One conditioned color block plus two minutes of folding gives you a custom palette that cutters love. The catch is that most first attempts come out muddy gray instead of cleanly veined, and the fix has nothing to do with talent.
The fix is mechanical: how many times you fold, which direction you roll, and how you pair your colors. Get those three right and a beginner can pull a clean three-color marble on the first try. By the end of this guide you will have a step-by-step build, three variations to keep your shelf from looking repetitive, and a clear answer for the muddy slab fear that stops most people from trying again.
Why Marbling Earns Its Place In The Polymer Clay Starter Pack
Marbling turns a single color block into a custom palette in under five minutes, with no extra tools beyond a roller and a blade.
The technique is forgiving for beginners because the first fold already looks like progress. You do not need a steady hand, a perfect cutter set, or a finishing rig. You need three conditioned logs, a controlled twist, and the discipline to stop folding before the colors blend into one. That last part is what trips most people up, and it is the only thing this guide really asks you to internalize.
A clean marble slab also photographs well, which matters if you sell on Etsy, post to Instagram, or pin to Pinterest. The slab itself is a content asset before you ever cut into it. Photograph it on a tile, then cut your earrings, and you have already created two pieces of content from one session.
Maker reference
Maker reference only. Verify brand instructions, seller details, dimensions, and safety guidance for your own setup.
Affiliate note
Some links in this article are affiliate links. If you buy through them, we may earn a small commission at no extra cost to you. As an Amazon Associate I earn from qualifying purchases.
What You Need Before You Start
A practical first marbling kit is three colors of polymer clay, a tissue blade, an acrylic roller, a smooth work surface, and an oven thermometer. Everything else is optional.
Color choice matters more than tool choice. Pick one mid-tone, one accent, and one light or pearl. Avoid pairing two saturated colors of similar value because they read as one new color rather than as marble. A blush pink, a warm terracotta, and a cream or pearl is a reliable starter palette. A thin thread of metallic like Premo 18K Gold can add a bakery-window glow without muddying the mix.
Materials And Tools
- Polymer clay, three colors. Good defaults are Sculpey Premo Blush, Premo Pomegranate, and Premo Pearl, or a FIMO Soft trio of Flesh Light, Indian Red, and White, or a Sculpey Souffle set in Cinnamon, Cherry Pie, and Igloo. Premo and Souffle are common beginner picks because both condition smoothly and hold marble lines without going muddy fast.
- An optional metallic accent for thread effects. A small amount of Premo White Pearl or Premo 18K Gold twisted in late gives the slab depth without changing the base palette.
- A long flat blade. A tissue blade or thin flexible clay blade slices the rolled slab cleanly without dragging the marble lines.
- An acrylic roller or pasta machine. A clear acrylic roller is enough for a first slab. A pasta machine speeds slab evenness on later batches but is not required to start.
- A smooth work surface that doubles as a bake surface. A 6x6 inch ceramic tile is ideal because the marbled blanks never have to move from raw to cured.
- An oven thermometer. Oven dials drift. Verify with a separate oven thermometer before trusting the dial. The oven thermometer guide goes deeper on placement.
- Optional finishing kit. 400 to 2000 grit wet/dry sandpaper, a soft buffing cloth, and a water-based satin sealant if the marble looks dull after cure.
- Optional clay cutters. Simple shapes first. The beginner clay cutters guide covers what to buy if you do not already have a set.
For the conditioning step that comes before any of this, see the conditioning polymer clay guide. Under-conditioned clay is the single most common reason a first marble fails, and it is worth the extra five minutes.
Step By Step: A Clean Three-Color Marble
Six steps from raw block to baked blank, with a check-yourself cue at each stage.
Read all six steps before you start. Each one has a maker action, a why-it-matters note, and a check that tells you whether to keep going or move on. The check is more important than the count.
Step 1: Condition Each Color Separately
Action. Warm and fold each color in your hands until it bends without cracking. Roll each color into a thin log about 1 cm thick and 6 cm long. Keep the logs separate.
Why it matters. Under-conditioned clay tears at the edges during the twist. Tears create muddy fold lines because air gets pulled into the marble. Conditioning each color to a similar softness also keeps the marble lines balanced; if one color is soft and one is stiff, the soft color overruns the stiff one and the marble looks lopsided.
Check yourself. Bend each log into a U shape. The surface should stay smooth, with no cracks. If you see cracks, condition that color longer before moving on.
Step 2: Stack And Twist Into A Single Rope
Action. Place the three logs side by side. Press lightly so they stick to each other along their length. Now lift the combined log, hold one end in each hand, and rotate one hand forward while the other stays still. Roll the twisted log gently on the tile to seal the seams.
Why it matters. The twist sets the directional grain. Without a twist, the colors stay in stripes and the marble looks like a flag. With a twist, the colors spiral around the rope, which is what gives the slab its veined look after rolling.
Check yourself. The rope should look ropy from every angle, with all three colors visible. If one color disappeared during the twist, the logs were not pressed together evenly. Unroll, restack, and retwist.
Step 3: Fold Once, Then Roll Across The Fold
Action. Fold the rope in half, end to end. Press the two halves together gently. Then lay the rope on the tile and roll it lightly across the long axis with an acrylic roller. The slab should flatten into an oval roughly the size of your palm.
Why it matters. Rolling perpendicular to the fold spreads the marble lines outward without homogenizing them. Rolling along the fold smears the colors into stripes. This is the move that separates a clean marble from a striped slab.
Check yourself. Look at the slab from above. You should see veined lines that curve and cross, not parallel stripes. If you see stripes, your roll direction was wrong. Lift the slab, rotate it 90 degrees, and roll again.
Step 4: Repeat With Intention, Not Habit
Action. Fold the slab in half, twist it once, and roll across the new fold. Most makers stop at fold two or three for a bold marble. Fold four is the muddy zone where the colors collapse into one new gray-pink-brown.
Why it matters. This is the single biggest beginner mistake. Most first attempts go muddy because the maker assumed more folds would mean more pattern. The opposite is true. Each fold halves the spacing of the marble lines. After three or four folds the lines are spaced too tightly to read as marble; they read as a new solid color.
Check yourself. Hold the slab at arm's length. If you can still count the three colors, keep folding. If you cannot, stop. Trust the arm's length test more than any number you might have read in a tutorial. Different clay lines, different slab sizes, and different fold pressures change the count.
Step 5: Roll To A Target Thickness And Rest
Action. Roll the slab to your target thickness. Use 2 mm for everyday earring slabs and 3 mm for buttons, pendants, or trinket-dish builds. Then let the slab rest on the tile for 5 minutes.
Why it matters. Warm clay tears under sharp cutters. A short rest lets the slab settle and firm up so it cuts cleanly without dragging the marble lines. Rest is also when the slab loses any tension from the rolling, which means it stays flatter through cure.
Check yourself. Press a fingertip lightly into a corner. The slab should feel firm but not cool to the touch. If it feels warm and soft, give it another 5 minutes. If you are working in a hot kitchen, slide the tile into the fridge for 3 to 5 minutes instead.
Step 6: Cut Shapes, Smooth Edges, And Bake
Action. Press a clay cutter straight down without rocking. Lift the cutter and peel away the surrounding scrap. Smooth any raw edges with a soft fingertip or with a piece of cling wrap stretched over the cutter rim. The cling wrap technique guide covers that move in detail. Transfer each blank to the ceramic tile.
Why it matters. Rocking the cutter drags the marble lines and crushes the edge profile. A straight press gives a clean cut that reads sharp at any size. Cling wrap over the cutter softens the cut edge slightly without smearing the surface, which is useful for earrings that will sit close to skin.
Bake. Cure at the manufacturer's temperature on the tile. Sculpey Premo cures at around 130 C for 30 minutes per 6 mm of thickness, but every line is different. Verify the real tray temperature with an oven thermometer before baking a full batch. If the blanks need any support to keep their curve, see the bake support guide. A baked slab cannot be re-rolled, so cut and inspect first.
Check yourself. After cure and full cooling, the marble lines should still be crisp under raking light. If they look dull, the bake was likely too hot or the colors were too close in value. The light wet sanding step in the next section often brings them back.
Common Mistakes And Specific Fixes
The five most common marbling failures all have mechanical fixes. None of them require more talent.
If your first slab did not turn out, work through this list before throwing the clay back into the scrap jar. Most fixes are one variable away from a clean result.
The slab looks muddy and gray
Cause. You folded too many times. Each fold halves the marble line spacing, and after fold four the lines blur into one new color.
Fix. Start over with fresh logs and stop at fold two or three. Use the arm's length test as your stop signal, not a number.
The marble lines look like wide stripes
Cause. You rolled in only one direction, parallel to the fold instead of across it.
Fix. Lift the slab, rotate 90 degrees, and roll again. The next pass spreads the marble across the long axis instead of along it.
The slab tears at the edges when cut
Cause. The clay was still too warm, the cutter was dull, or you rocked the cutter on the way down.
Fix. Rest the slab 5 minutes (or chill 3 minutes), dust the cutter with a tiny amount of cornstarch, and press straight down without rocking. A sharper thin-walled cutter helps too.
The colors blend too quickly
Cause. Your colors were too close in value, or you conditioned the clay too aggressively before stacking.
Fix. Pick three colors with stronger value contrast (one light, one mid-tone, one dark), and condition just enough that each log bends without cracking. Over-conditioned clay is softer and blends faster under the twist.
The marble looks dull after baking
Cause. Cured polymer clay reads matte by default, especially on Souffle. The marble lines are still there; the surface just is not catching light.
Fix. Light wet sand from 400 to 1500 grit, then a soft cloth buff, then an optional thin satin sealant. The finishing techniques guide covers the full path. The finish compatibility guide covers which sealants pair with which clay lines.
The back of the earring shows seam lines that ruin the front
Cause. The marbled slab is thinner than you think, and the seam from folding shows through.
Fix. Trim the back layer with a tissue blade, or laminate a thin solid backing slab onto the marbled slab before cutting. The backing slab also adds a clean place to position the earring post or jump ring.
Three Variations That Earn Shelf Space
Once you have one clean marble slab, three small changes give you three distinct looks. Each one uses the same fold logic but produces a different surface.
Variation 1: Stacked Marble
Instead of twisting the rope, stack thin sheets of each color in alternating order: blush, cream, terracotta, cream, blush. Press the stack lightly so it sticks. Fold once, then roll across the fold. Skip the twist entirely.
The result is bold horizontal banding that reads almost agate-like. This variation is best for trinket dishes, larger pendants, and anywhere you want the bands themselves to be the design feature. Cut the dish or pendant from the slab so the banding sweeps across the front.
Variation 2: Pulled Marble
Roll a thin marbled sheet using the standard six-step method, but stop at fold two for a looser pattern. Then drag a needle tool through the surface in long curves, pulling the marble lines into hooked motifs. Vary the curve direction so the slab does not look like one repeated pattern.
The result reads as deliberate brushwork rather than as a folded marble. This variation is best for statement earrings, pendants, and brooches where you want the marble to look painted. Cut the final shape after the pulls are done so the curves center on the visible face.
Variation 3: Tile-Cut Marble
Cut the finished marble slab into 1 cm tiles using a tissue blade. Reassemble the tiles onto a thin backing slab in a mosaic pattern, rotating each tile so the edge-on stripes face different directions. Press the tiles flush, smooth the seams with a fingertip, and cut the final shape.
The edge-on stripes become the hero. This variation is best for bold collar pieces, brooches, and statement earrings where you want the marble to read as a graphic mosaic rather than as a flowing slab. The collar necklaces guide covers the assembly side of larger flat pieces.
How To Use Marbled Slabs Without Wasting Them
One marbled slab can produce a full earring set, a brooch, and a pile of scrap that becomes the next slab. The trick is in how you cut.
Pair marbled slabs with simple cutters first. Arches, hoops, rectangles, and circles let the marble itself do the visual work. Avoid intricate cutters for the first three slabs because the marble lines fight against busy silhouettes and the result reads cluttered.
Save your scrap pieces in a sealed jar. A jar of marble scrap consolidates into a future slab when you knead it together. Scrap-blend slabs often look the most interesting because they carry every color you have ever marbled, in unpredictable combinations.
Photograph the slab before you cut into it. The slab itself is a reusable asset for social and Pinterest content, and once you cut, the photograph is the only record. Lay the slab on a tile near a window, photograph from directly above, and crop tight. Two minutes of staging gives you Pinterest pin material before you ever assemble a finished piece.
FAQ
How do you marble polymer clay without overmixing?
Stop folding early. Most beginners fold four to six times and lose contrast. Aim for two to three folds and check at arm's length. If you can still count the colors, keep going. If you cannot, stop. The single biggest beginner mistake is treating marbling like color mixing rather than like controlled layering.
What colors marble best in polymer clay?
Pick one mid-tone, one accent, and one light or pearl. Avoid pairing two saturated colors of similar value because they read as one new color rather than as marble. A blush pink, a warm terracotta, and a cream or pearl is a reliable starter palette. A thin thread of metallic like Premo 18K Gold can add a bakery-window glow without muddying the mix.
Can you marble Sculpey clay?
Yes. Sculpey Premo and Sculpey Souffle both marble cleanly. Sculpey III tends to crack when folded if the block is cool, so condition it warm first. Souffle gives a softer matte marble that is easy on the eye for everyday earrings. Premo holds sharper line contrast and is a common first choice when the marble lines themselves are the design feature.
Why does my marbled clay turn muddy?
There are three common causes. You folded too many times, you rolled in only one direction so the fold lines smeared, or your colors were too close in value. The fix is mechanical, not artistic. Pick contrasting values, fold two or three times, and roll across the fold rather than along it.
How thick should marbled clay be for earrings?
Roll to 2 mm for everyday lightweight earring slabs and 3 mm for buttons, pendants, and trinket-dish builds. Thinner than 2 mm tends to crack under cutter pressure or warp during the cure. If your earrings keep feeling too heavy on the ear, swap to a smaller silhouette before you swap to a thinner slab.
Do you sand marbled polymer clay?
Sanding is optional but often worth it. Light wet sanding from 400 to 1500 grit, then a soft cloth buff, brings out the marble lines and gives a soft satin glow. A thin water-based satin sealant is optional after that. See the finishing guide for the full path. If the marble already looks dull straight out of the oven, sanding is usually the issue, not the bake.
What To Make Next
The next two guides build directly on the marbling skills you just practiced.
Read the Skinner blends, gradients, and ombre slabs guide next. Skinner blends use the same fold logic as marbling, but they aim for a smooth gradient rather than veined lines. Once you understand both, you can pair gradient slabs with marbled accent strips for layered earring builds that read more deliberate than either technique alone.
Then read the faux bakelite swirl guide. Faux bakelite is a sister technique that uses similar fold logic but targets a translucent vintage look. The fold count and slicing direction differ from marbling in interesting ways, and the side-by-side comparison sharpens your sense of when to fold and when to twist.
Pinterest pin description draft: Marbling polymer clay is the fastest way to make a slab feel intentional. Pick one mid-tone, one accent, and one pearl. Twist into a rope, fold two or three times, then roll across the fold. Stop while you can still count the colors. This beginner tutorial walks through six steps, three variations (stacked, pulled, tile-cut), and the fix for muddy slabs. Includes materials list, baking notes, and a finishing checklist for shelf-ready earrings.
Take the next step
Continue the series with the next guide in this path.