guides5 min read
Polymer Clay Cutout Arch Earrings and Hoop Drops
Cutout arches and hoops work best when the wall width is even, the inner opening matches the outer curve, and the hardware choice is made from the finished front view.
Open the guide

Lookbook view
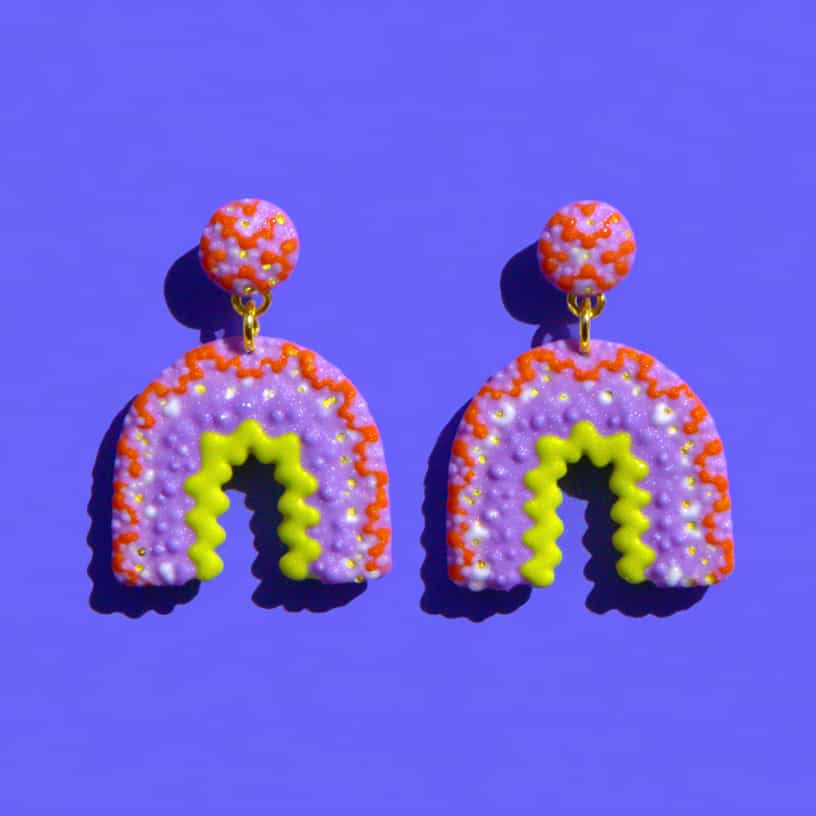
Styled context
Treat this as a starting point for a test piece, not a finished spec. AI may help explore design directions, organize notes, and draft parts of this guide. Clay brands, ovens, glues, finishes, and hardware behave differently, so check product instructions and test on scrap before making a batch. Measurements, spacing, and timing are estimates from the reference images. Test them on scrap before making a batch. Some product links on this page are affiliate links. If you buy through them, we may earn a commission at no extra cost to you. Check listing details, dimensions, materials, and fit before you buy. As an Amazon Associate I earn from qualifying purchases. Full disclosures
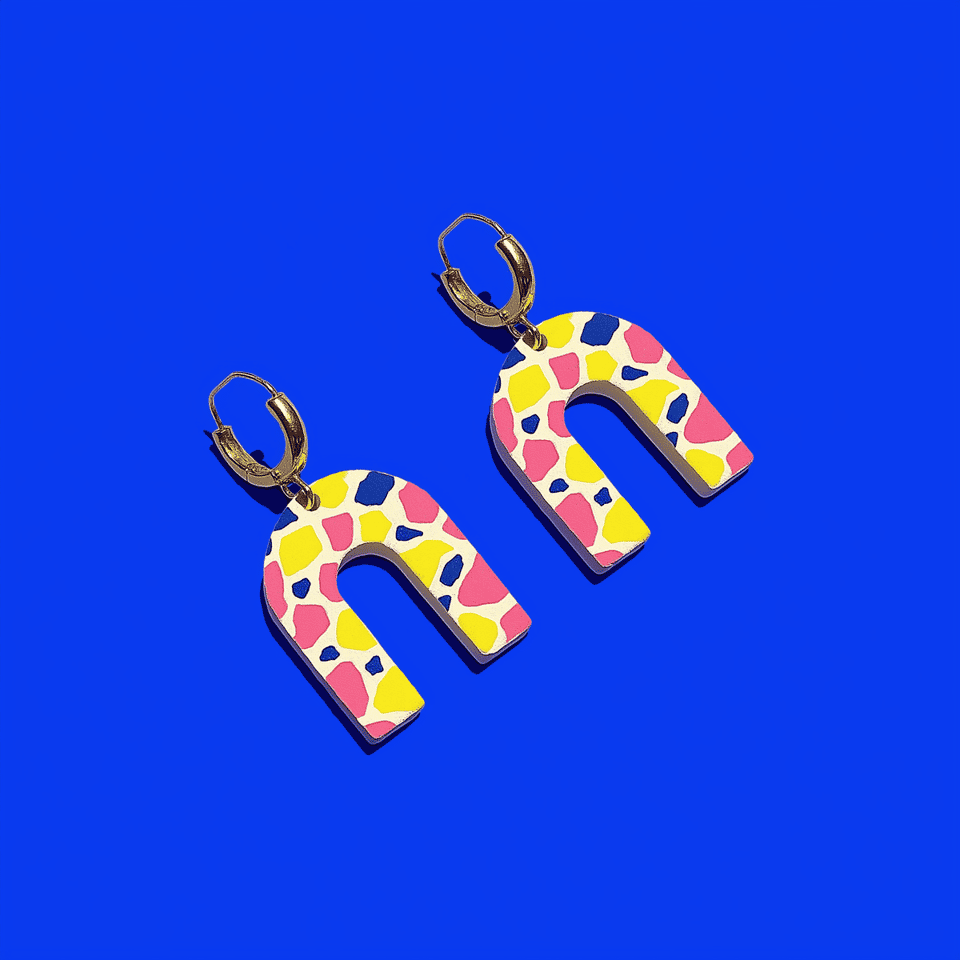
This pair is an upside-down U arch in two bright colors: a hot-pink outer band with a single acid-yellow band nested just inside it, following the same curve, with the center of the U left open. The whole front carries a fine, fabric-like pebbled matte texture, and the legs of the arch are rounded so they sit soft against the jaw. Each arch hangs from a polished gold huggie hoop (or a gold ball stud) through a top hole and a jump ring. There are a few proven ways to lay in the pink-and-yellow band, so pick the one your tools suit, then make a matched mirrored pair, bake flat, round the edges, and assemble the hoops after cooling.
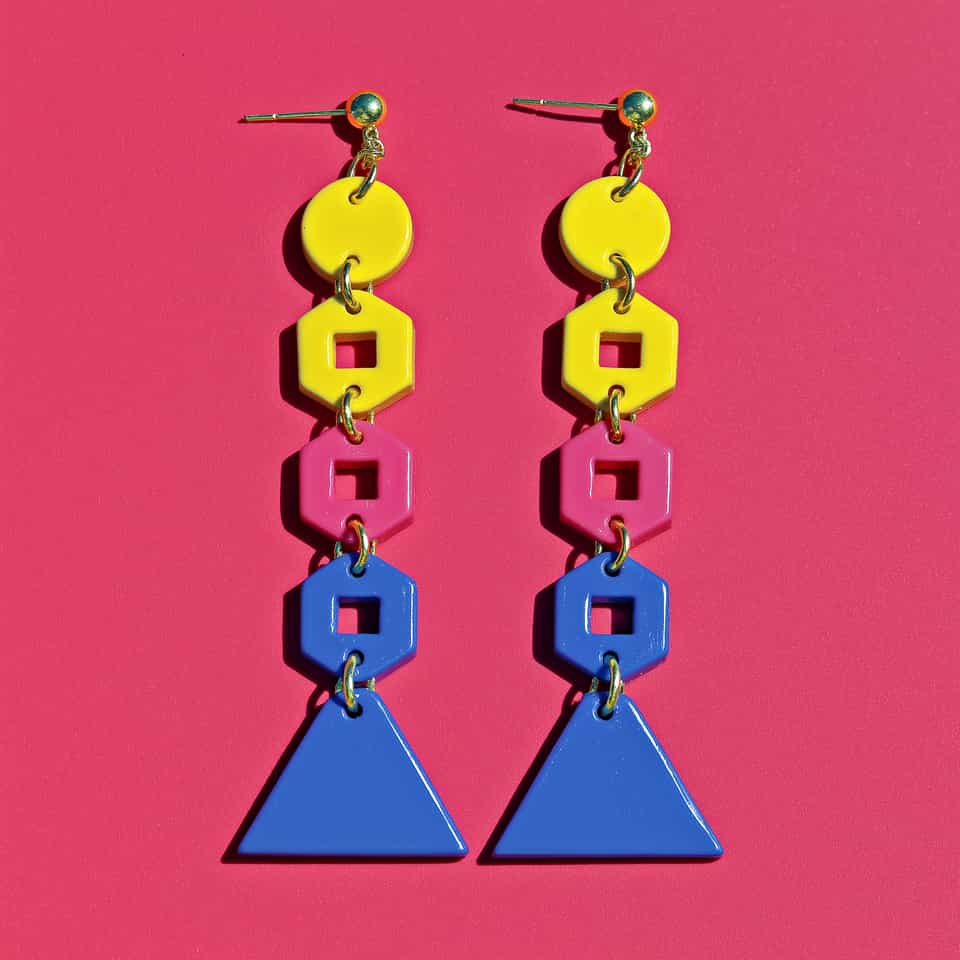
A matched pair of inverted-U arch drops. Each arch is a bold hot-pink outer band with a narrower acid-yellow band nested inside along the same curve, and the middle of the U is open. The front has a fine, non-reflective pebbled matte texture across both colors, and the arch legs are rounded. Each piece hangs front-forward from a small polished gold huggie hoop in the product and main lifestyle shots, and from a gold ball stud with a jump ring in the second lifestyle shot.
Slab construction with a nested two-color arch. Roll even pink and yellow slabs, then lay in the yellow band by one of several proven methods (cut-and-insert a matching yellow arch into a pink window, build a two-color striped slab and cut the arch from it, or stack a thinner yellow arch onto a pink base), weld the seam, press a fabric-like pebble texture for the matte surface, cut both arches as a mirrored pair from one slab, pierce matched top holes, bake flat, round the edges, then connect gold huggie hoops with two pliers.
Condition both colors until smooth, then roll a hot-pink slab and a yellow slab to the same even thickness using slab-height guides or a pasta machine setting. Keeping one consistent thickness is what keeps the finished pair light on the ear and helps it bake flat without warping.
Pattern option A, cut and insert (most controlled): lightly dust a larger arch cutter with cornstarch and cut the outer pink arch. Cut a window in its center with the smaller arch cutter, then cut a matching yellow arch and seat it into that window so the curves line up. Wipe both mating edges with a damp swab to clear cornstarch, then press and burnish the seam so the raw clay welds into one piece.
Pattern option B, striped slab then cut: lay a band of yellow along a band of pink, press and roll them together until the seam closes and the slab is one even thickness, then cut the whole arch across the two-color slab so the yellow reads as a stripe following the curve. Cut both earrings from the same slab area so the bands match.
Pattern option C, stacked layers: cut a full pink arch as the base, then cut a thinner, narrower yellow arch and bond it on top with a thin film of liquid polymer clay so it sits slightly raised. Keep the yellow thin so the piece stays light.
Make a matched mirrored pair: cut the second arch with the same cutters and flip one blank so the two read as a balanced reflection. Cut both from the same slab so size and color placement match.
Lightly dust your fabric-weave cloth, texture sheet, or sponge with cornstarch and press it evenly across the front of both arches in one steady pass, without rocking, for the uniform pebbled matte surface. Check both arches against each other so neither outline distorts.
Set both top holes at the same distance from the top edge with a needle tool while the clay is raw, keeping a generous margin of clay between the hole and the edge so the loop will not tear out. Holes cannot be moved after baking, so confirm the mirror and the matched hole height now.
Lay the arches flat on a cardstock- or parchment-lined ceramic tile and bake at your clay brand's package temperature and time, with an oven thermometer to confirm the real shelf reading. For a dead-flat result on thin blanks, a second smooth tile resting lightly on top of a paper interleaf holds them flat through the cure.
Let the pieces cool completely before handling. Wet-sand the cut edges through rising grits, keeping the paper wet, and keep the edge moving so you round it rather than cutting a new flat. Rounded legs sit comfortably against the neck and will not catch hair.
Finding option 1, jump ring to a huggie or stud (matches the photos): clean the gold huggies or studs with isopropyl alcohol, open a jump ring sideways with two pliers, thread it through the pierced hole, link it to the huggie loop or stud loop, and twist it closed until the ends meet flush. Keep the holes reinforced so the loop has support.
Finding option 2, embedded loop for a fixed dangle: before baking, kink or curl the buried end of an eye pin and press it into a slit at the top of the raw arch, then snug the clay around it so the cured clay grips the bent end and the loop cannot slide out. Take a jump ring from that loop to the hoop.
Finding option 3, glued post for a stud version: after baking and cooling, score and alcohol-wipe both a flat-pad post and the cured back, then set the post with a small amount of two-part epoxy (such as Devcon 2-Ton) or E6000 and let it reach full cure before wearing.
Choose your finish on purpose. Leaving the surface bare keeps the velvety matte pebble look. If you want a touch of sheen, brush a thin water-based polyurethane such as Varathane, and always test any coating on baked scrap first so you can confirm it dries clear and is not tacky against skin.
Metal findings like posts, hooks, and jump rings may contain nickel or other allergens. If your wearer has sensitive skin, choose surgical steel or titanium findings and test any sealant or coating on a small spot before wearing.
Before you buy, match the sizes and parts to the version you want to make.
The color stock and clay body choices that carry the visible design.
Matches the full outer arch color.
Useful for the smaller inner arch layer.
Useful if you want to recreate the lightly pebbled matte surface.
A firmer polymer clay ideal for crisp details, pixel grids, and canes to prevent distortion during slicing and assembly.
A polymer clay safe glaze that seals the piece without becoming sticky over time.
What you condition with and how you keep the slab even.
Stencils, blades, and cutters for cleaner outlines.
Hole placement, bake surface, and oven check tools.
A flat tile helps the cutout arch plaques cure without twisting.
Useful for checking the real shelf temperature before baking detailed or supported polymer clay pieces.
Useful for tiny marks, seam cleanup, piercing points, and crisp separations before baking.
Posts, jump rings, chain, and connectors that finish the piece.
Adhesives and attachment choices when the build needs them.
Optional surface products if you want to shift sheen, sand, or coat.
Each one walks through a technique used in this piece, in full detail.
Cutout arches and hoops work best when the wall width is even, the inner opening matches the outer curve, and the hardware choice is made from the finished front view.

Skinner blends turn muddy when the two colors are different softness, the slab keeps getting re-rolled after the fade looks good, or the final shape is cut too early. The fix is matched conditioning and stopping at the right moment.
Custom range
Ask for a build pack to make it yourself (the cutter or tool files, a supply list, and a plan), or ask the studio to make the finished pieces for you.

More pieces with a related form, finish, or making path.
Pin it to a board, copy the link, or keep it saved here while you make your own version.
Tag Clay Bake Studio on Instagram or TikTok so we can see how you adapted it.