How to Support Polymer Clay During Bake Without Guessing
Your thin overhang drooped or the hollow body caved because it had no support inside the oven. Compare flat tiles, fiberfill, foil, and armatures by shape before you build another version.

Lookbook view
Styled context
Treat this as a starting point for a test piece, not a finished spec. AI may help explore design directions, organize notes, and draft parts of this guide. Clay brands, ovens, glues, finishes, and hardware behave differently, so check product instructions and test on scrap before making a batch. Measurements, spacing, and timing are estimates from the reference images. Test them on scrap before making a batch. Some product links on this page are affiliate links. If you buy through them, we may earn a commission at no extra cost to you. Check listing details, dimensions, materials, and fit before you buy. As an Amazon Associate I earn from qualifying purchases. Full disclosures
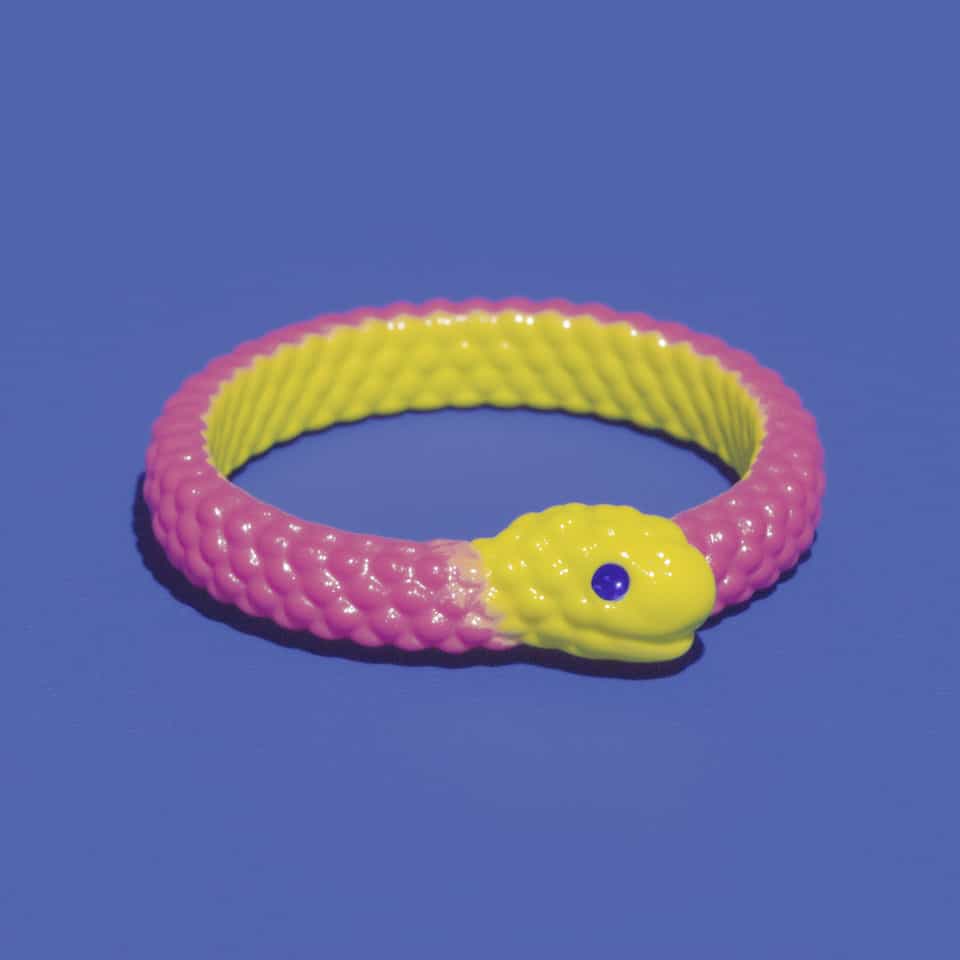
Hand-sculpt this elegant coiled snake pendant with a cohesive, rope-textured pink body. Carefully refine the warm yellow underside and place a single, domed blue eye near the head. Before baking, ensure there is a balanced hanging point at the top coil to allow the pendant to hang beautifully from a gold chain.
This striking pendant features a coiled pink snake meticulously detailed with a raised, rope-like scale texture, a soft yellow underside, and a single glossy blue eye. Hanging elegantly from a gold chain, this sculpted necklace focal sits beautifully flat against the chest.
Use the list to check tool size, hardware placement, pad width, and slab thickness against the piece you want to make before you buy.
The color stock and clay body choices that carry the visible design.
Matches the raised body color that does most of the visual work.
Useful for the underside strip, lower jaw, and head details.
Useful for the domed eye when you want a cleaner blue without mixing it from scratch.
Helps you seat the eye cleanly and round the head details without tearing the clay.
A firmer polymer clay ideal for crisp details, pixel grids, and canes to prevent distortion during slicing and assembly.
A polymer clay safe glaze that seals the piece without becoming sticky over time.
Hole placement, bake surface, and oven check tools.
Posts, jump rings, chain, and connectors that finish the piece.
Gives the cured snake a clean hanging point that matches the gold necklace presentation.
Useful if you want to finish the sculpt as a ready-to-wear necklace.
Needed for opening and closing jump rings cleanly during jewelry assembly.
Adhesives and attachment choices when the build needs them.
Optional surface products if you want to shift sheen, sand, or coat.
Use this only if you want a brighter gloss on the finished snake. Without it, the pebbled body reads more matte.
A lightweight clay with a cohesive suede finish that holds fine textures without sticky residue.
The cleanest clay version is a coiled rope build shaped directly on a flat tile, with a deliberate contrast between the smooth-textured pink-rope body and the small yellow pixel-staircase head. Roll the pink body first, lay the yellow belly strip into the inner curve and head, sculpt or pixel-cut the head while the coil is still stable, then texture the body after the silhouette is set. Embed a screw-eye into the top of the coil before bake for a planned attachment point, or plan for a post-cure bail attached with a label-approved adhesive tested on baked scrap. Keep the relief shallow enough to bake evenly; if you lock a plain base in an early bake, add later raw details with compatible liquid clay or the bond product your clay line supports and rebake only before paint or glaze.
Condition your polymer clay colors. Use FIMO Professional for the yellow head to keep the pixelated edges sharp, and Sculpey Soufflé for the pink body to get a lightweight, matte finish. Roll a thick pink rope and a thin yellow strip, then lightly dust your texturing tools with cornstarch as a release agent.
Press the pink rope into a braided-texture mold to create the detailed scale pattern. Wipe the contact areas with a damp cotton swab to remove any release powder, then press the yellow strip along the inner belly line of the pink rope.
Coil the textured snake body into a tight S-curve directly on a ceramic baking tile. Wipe the touching points of the coils with a damp cotton swab and press them gently together to ensure they fuse securely during the baking process.
Roll out a flat sheet of yellow clay and use a precision blade to cut out the stepped, pixelated head shape. Press a small dome of blue clay into the center for the eye. Wipe the joining areas with a damp cotton swab, then attach the head to the snake's neck.
Insert a gold bail or eye pin into the top curve of the pink coil to create a pilot hole, then bake the pendant flat on the tile. Once cooled, remove the metal finding, clean the contact areas with rubbing alcohol, and glue it back in place using Devcon 2-Ton Epoxy or E6000.
Apply a glossy water-based polyurethane glaze like Varathane or UV resin strictly to the blue eye for a high-gloss contrast against the matte body and head. Avoid solvent-based or aerosol glazes. Thread your gold chain through the bail to finish the necklace.
Metal findings like posts, hooks, and jump rings may contain nickel or other allergens. If your wearer has sensitive skin, choose surgical steel or titanium findings and test any sealant or coating on a small spot before wearing.
Open these when you want more depth on a technique behind the build, not another supply row.

Your thin overhang drooped or the hollow body caved because it had no support inside the oven. Compare flat tiles, fiberfill, foil, and armatures by shape before you build another version.

Pendants hang crooked or the hole tears through the top edge because the hardware was placed from the side instead of the visual center. Mark the real balance line, leave enough clay margin, and choose drilled hole, bail, or short jump ring from the finished front view.

Your slab cracked at the edge or the cane squished because the clay was still stiff in spots. Condition until every color folds in a similar way, then do the fold test before you roll the working slab.
Custom range
Use this piece as the starting point for a make-ready plan, cutter or tool model files, a supply list, or a finished range inquiry.
More pieces with a related form, finish, or making path.
Pin it to a board, copy the link, or hold it in your saved list while you sample your version.
Tag Clay Bake Studio on Instagram or TikTok so we can see how you adapted it.