guides2 min read
Polymer Clay Trinket Dishes, Forms, and Rims
Use a documented trinket-dish project as the starting point, verify the form and package bake, and keep the result decorative unless the maker supports another use.
Open the guide

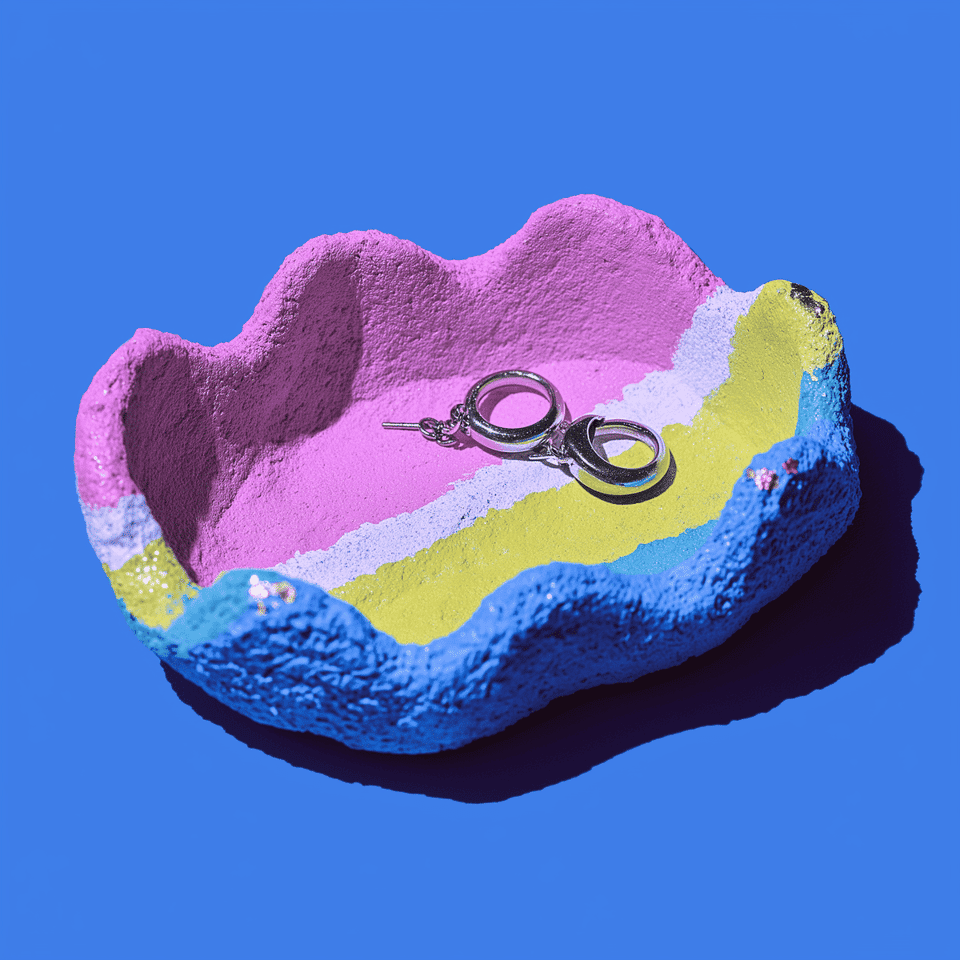
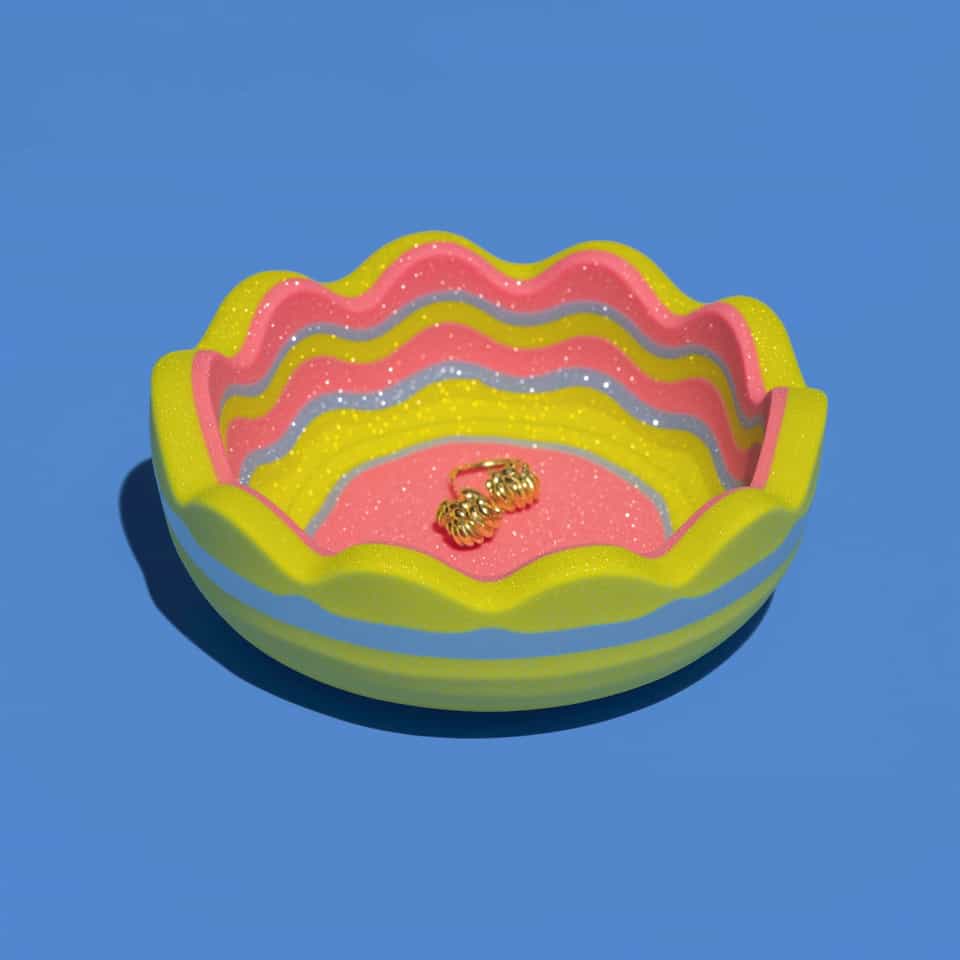
A ruffled ring dish with big pools of magenta and yellow inside, each edged in a bright blue line, and a patchwork of lime green, royal blue and purple on the outside, all under a wet gloss. The blue lines come from wrapping each pink and yellow log in a thin skin of turquoise before you twist and roll them. The steps marble the inside, join it to a patchwork outside, press the blank into a glass custard cup, ruffle the rim and bake the dish in the cup. The picture is here for inspiration: follow the steps as a guide, then change the colours, the size of the patches or the ruffles to make your own version.
The pictures began as AI-assisted concept images and are here for inspiration. The steps are a guide to making your own version, so change the colours, size or details as you like. Clay brands, ovens, glues, finishes and hardware behave differently, so follow their product instructions and bake a scrap before a batch. Some product links on this page are affiliate links. If you buy through them, we may earn a commission at no extra cost to you. Check listing details, dimensions, materials, and fit before you buy. As an Amazon Associate I earn from qualifying purchases. Full disclosures
What gives it this look: the patches are big and few, not a fine swirl. On a dish about 11 cm across, the pink and yellow patches are each a few centimetres long, split about half and half, and every edge between them carries a thin blue line. The outside is a different colour scheme from the inside, green, royal blue and purple with a little pink and yellow. The rim rises and dips in ten to twelve soft ruffles that lean outward. The whole inside shines wet.
Lookbook view

Condition every colour before you start and mix the purple in one go. Build the outside patchwork on parchment, so the joins never have to be pulled apart, and clean your hands between colours, because blue on your fingers streaks the yellow. This is a dish for dry trinkets: Sculpey does not recommend making dishes you eat or drink from or serve food on, even when glazed.
Condition all five colours. For the purple on the outside, knead a small piece of fuchsia with about the same amount of cobalt until no streaks show. Roll the turquoise very thin, about 0.5 mm, with a stack of two playing cards under each end of the roller.
Help with this step
Roll three logs of fuchsia and three of yellow, each about 1.5 cm thick and 6 cm long. Wrap each log in turquoise, trimming the edge with the tissue blade so it meets itself without overlapping, and roll the log gently on the table to close the seam. The turquoise skin is what becomes the bright blue line between every pink and yellow patch.
Lay the six logs side by side, pink and yellow alternating, and press them together into a loaf. Give the loaf half a twist, press it flat with your palm, then roll it about 3 mm thick, turning it and rolling in different directions so the colours spread into big flowing patches edged in blue. Stop as soon as the patches are about the size in the picture: every extra fold makes them smaller and the lines thinner.
Help with this step
For the outside of the dish, roll the green, cobalt, purple and some pink and yellow scraps about 2 mm thick, tear them into patches with ragged edges and lay them edge to edge on parchment, pushing the edges firmly together. Roll across the joins with light passes until they are one piece that does not open when you flex a corner.
Help with this step
Lay the marbled slab on top of the patchwork, pink and yellow side up, and roll lightly from the middle outward so no air is trapped between them, until the two are joined into one slab about 5 mm thick. Trace a circle about 14 cm across on it with the needle tool and peel away the waste.
Lift the blank into the custard cup, marbled side up, and let it settle onto the floor before you touch the wall. Press the floor level with your fingertips first, then ease the wall up the glass a little at a time instead of stretching it, pressing out any air you feel under the floor. Let the top of the wall stand a little above the lip of the cup.
Help with this step
Pinch the rim between finger and thumb into ten to twelve soft ruffles all the way round, leaning each crest out so it rests on the lip of the cup, which holds it up in the oven. Round the cut edge with a fingertip so it is not sharp and does not chip, and smooth any fingerprints inside with a fingertip, because every mark shows under the gloss. Keep the wall the same thickness as the floor as you go.
Help with this step
Stand the cup on the ceramic tile and bake by the instructions on the Premo packet, going by the 5 mm wall. Check the oven with a thermometer beside the cup, and tent a foil pan loosely over it to shield the yellow. Let the dish cool fully in the cup: clay is still slightly soft while hot and only firms up as it cools, so a dish lifted warm can sag out of shape. Once cool, it should pop out of the cup and sit level on a table.
Help with this step
Brush two or three thin coats of Sculpey Gloss Glaze over the inside and the rim, letting each coat dry as the bottle directs, for the wet shine in both pictures; keep every coat thin, because Sculpey's directions warn that a thick coat can peel. Try it first on a baked offcut and check it dries clear and not tacky. Use the dish for rings, earrings and other dry trinkets: Sculpey does not recommend dishes you eat or drink from or serve food on, even when glazed, and says its glazes do not seal the clay against water, so keep food, drinks and water out of it.
Help with this step
What you will need
Everything here is used in the steps above. The clay and the cup are for this dish; most makers already own the tools, so tick those off first.
One 2 oz (57 g) block each of fuchsia and yellow, half a block of turquoise and small pieces of green and cobalt make a dish about 11 cm across with some left over.
The magenta pink that takes half the inside, and with the cobalt, the purple for the outside. All the colours are Premo, so one packet's bake instructions cover the dish.
The yellow that takes the other half of the inside.
Rolled very thin and wrapped round each pink and yellow log, it becomes the bright blue lines between the colours.
The lime green patches on the outside of the dish.
The royal blue patches on the outside, and kneaded into fuchsia for the purple.
Press the slab into a cup and bake the dish in it, so the floor stays level and the wall keeps its lift; the ruffled rim flares out over the lip. Keep the cup for clay only.
Two or three thin coats give the wet shine in both pictures, inside and over the rim.
A soft flat brush lays the glaze over the floor and into the ruffles without leaving ridges.
Tick what you already have, then get only what is missing.
Rolls the turquoise skins, the marbled inside and the patchwork outside, and presses the two together.
Trims the turquoise skins so their edges meet round each log without a double layer.
Traces the round blank and pricks any air bubble in the floor.
Build the patchwork outside on it, so the joins never have to be pulled apart.
Stand the cup on it in the oven, so you can carry the soft dish to the oven level.
Sits beside the cup so you bake at the temperature on the Premo packet; the yellow shows scorching first if the oven runs hot.
For even slabs, a tent over the yellow, a dish that rocks, or a crack.
Set one under each end of the roller so the marbled inside and the patchwork outside come out an even 3 mm and 2 mm, and the joined wall bakes through evenly with no thin spots in the ruffles.
Turned upside down over the cup as a loose tent, it shields the yellow from direct heat.
Only if the baked dish rocks: rub the base flat on a wet sheet.
Wear it for any sanding on the baked dish, to keep clay dust out of your lungs.
Only for a crack: mixed with dust filed from a baked offcut, it makes a matching putty that fills the crack.
Each one walks through a technique used in this piece, in full detail.
Use a documented trinket-dish project as the starting point, verify the form and package bake, and keep the result decorative unless the maker supports another use.

Learn how to marble polymer clay with three colors, a roller, and a blade. A beginner tutorial with pulled, stacked, and tile-cut variations, plus the fix for muddy slabs.

Bake flat pieces on a glossy tile and move them onto plain card only for a matte back. Hold curves, limbs and overhangs with fiberfill, crumpled foil or an oven-safe glass form, bake round beads on skewers, and leave everything on its support until it feels cool.
Custom range
Ask for a build pack to make it yourself (a supply list and a making plan for your version), or ask the studio to make the finished pieces for you.
More pieces with a related form, finish, or making path.
Pin it to a board, copy the link, or keep it saved here while you make your own version.
Tag Clay Bake Studio on Instagram or TikTok so we can see how you adapted it.