Inlay
Polymer clay inlay tutorials for stamping recess depth, pressing flush inserts, sutton slices, and gold foil shifts.

Articles

Polymer Clay Surface Applique and Confetti Inlay Guide
If an inspiration piece looks like it was built from placed petals, dots, lips, stars, or tiny cut motifs, this is usually the technique family you need. Learn when to applique, when to press pieces flush, and how to keep flat builds crisp instead of lumpy.
Read the build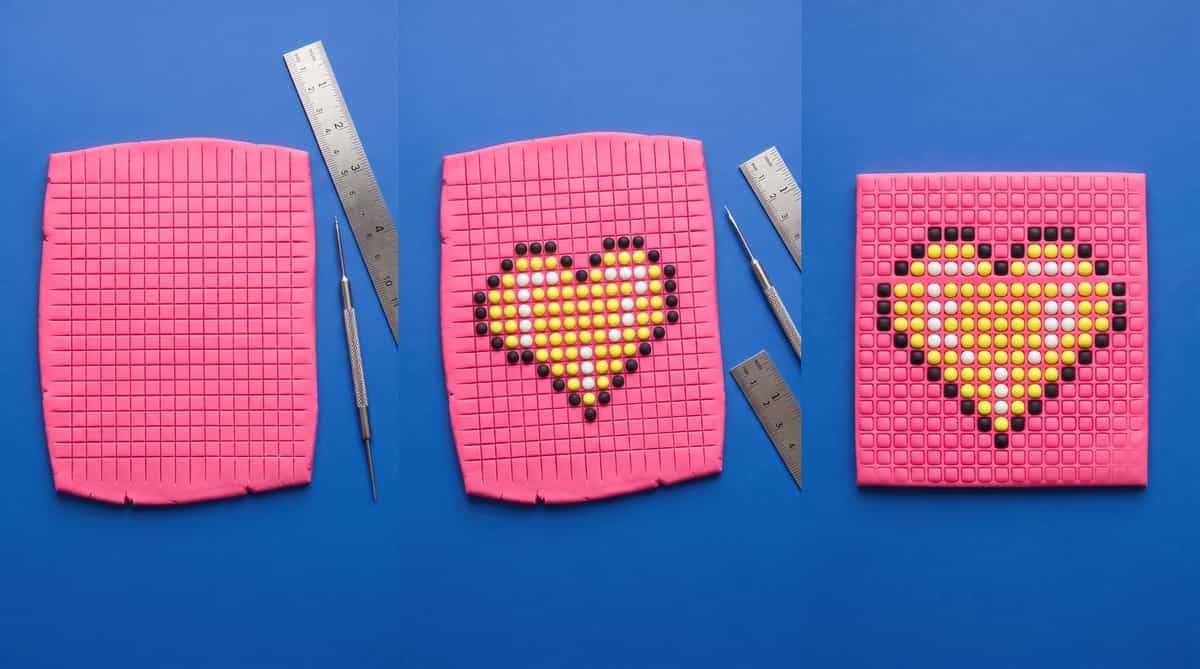
Polymer Clay Bead Grid Tutorial: Cross-Stitch Pixel Patterns
A regular grid of small clay beads can look like cross-stitch when the bead size, spacing, and color placement stay disciplined. This guide covers bead rolling, grid jigs, and how to keep the inlay flat and aligned through cure.
Read the buildPolymer clay inlay
Set the recess depth before pressing in the insert.
Inlay and applique allow you to press contrasting clay lines, metallic foils, or mica powders directly into a base slab. These resources suggest ways to roll layers flat to help prevent blurred boundaries, carve uniform channels for inlay strips, and wet-sand the cured surface so the motif is completely flush. Practice rolling details into a small scrap tile first.
Weekly notes
Get weekly polymer clay inlay notes
New project notes, small checks, and practical links each week. Free, no spam, unsubscribe anytime.
We will not share or sell your email. Unsubscribe anytime.