How to Use Sutton Slice in Polymer Clay (Surface Inlay Tutorial)
Sutton slice puts a thin patterned cane slice into a textured base slab so the design sits flush with the surface. This guide covers texture choice, slice thinness, the press-and-shave step, and how to keep the inlay from lifting at the edges.
In brief
Key takeaways
- 1Use a deeply recessed rubber stamp so the inlay clay has somewhere to sit after the shave step
- 2Press contrast clay firmly into every part of the textured pattern so the recesses fill completely before shaving
- 3Shave the surface flush with a sharp clay blade in one confident pull so the inlay reads flat against the base
- 4Back the thin Sutton slice slab onto a thicker base before cutting the final shape so the inlay holds during cure
When the contrast color in your Sutton slice keeps tearing out during the shave step, the cause is usually that the inlay clay never fully filled the recessed pattern. Sutton slice looks deceptively simple, but it depends on getting contrast clay deep into every part of the texture before the shave begins. Skip that step and the blade lifts the inlay back out instead of cutting it flush.
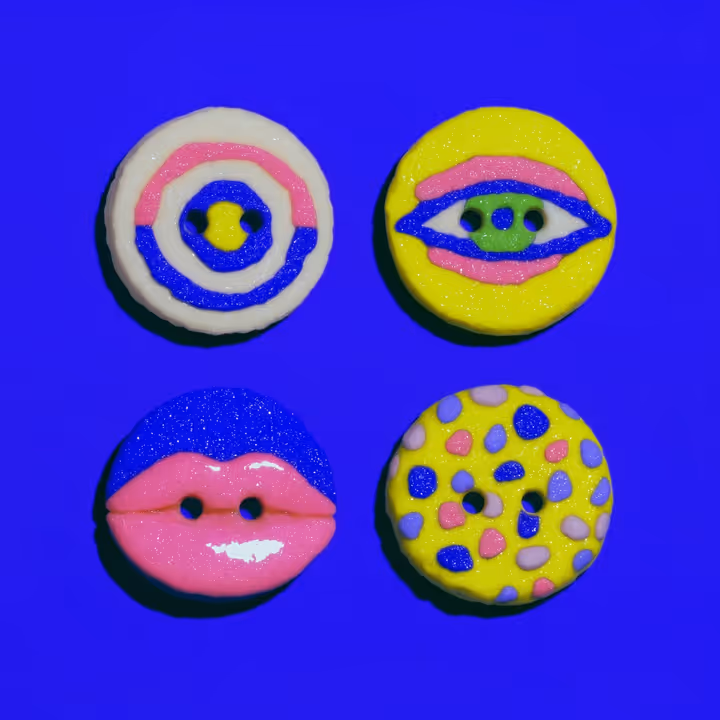
The technique was developed by polymer clay artist Pete Sutton and produces a flush surface inlay that sits inside the base slab rather than on top of it. The pattern reads cleanly because there is no raised edge to catch on fabric or other surfaces, which makes it especially useful for buttons, brooches, and pendants where the surface needs to feel as smooth as it looks.
Maker reference only. Verify brand instructions, seller details, dimensions, and safety guidance for your own setup.
Choose A Deep Texture Stamp
Sutton slice needs a stamp with at least 1 mm of recess depth. Shallow paper-crafting stamps will not hold enough contrast clay to survive the shave.
Look for rubber stamps marketed specifically for art clay or polymer clay, or for stamps designed for soap and resin work. These usually have deep recessed patterns. Geometric repeats, botanical motifs, and lace-like patterns all work well. Avoid line-art stamps where the recesses are very narrow, since they trap air and make the inlay step harder.
Test the stamp depth with a scrap of clay before starting a real piece. Press the stamp into the scrap, lift it cleanly, and look at the indent depth. If the recesses look shallow under raking light, the stamp will not perform well for Sutton slice and is better used for surface texture only.
Roll And Texture The Base Slab
Roll the base color to about 3 mm thick, then press the texture stamp firmly into the surface.
Condition the base color fully and roll it through the pasta machine to a medium thickness, around 3 mm. The slab needs to be thick enough to hold the impression without tearing through the back. Lay it on a tile.
Press the rubber stamp face-down onto the slab with even pressure. A roller passed over the back of the stamp can help drive the texture in evenly. Lift the stamp straight up to avoid distorting the recesses; rocking the stamp blurs the pattern.
Inspect the slab. The recesses should be clearly visible and the surface between them should still be flat and intact. If the stamp left an uneven impression, lay another slab on top, re-condition, and try again. Re-using a partially impressed slab usually produces a muddy second impression.
Work Contrast Clay Into The Recesses
This is the step that makes or breaks Sutton slice. Press conditioned contrast clay firmly into every part of the recessed pattern.
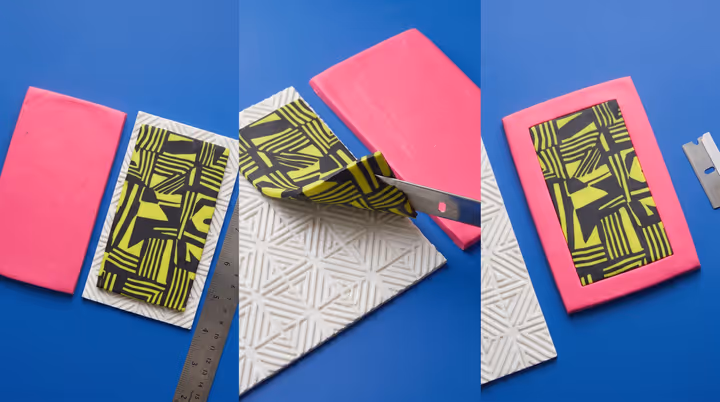
Take the contrast color and condition it until it is soft and pliable. Roll it into a thin sheet at about 1 mm. Lay the contrast sheet onto the textured base slab, covering the area you want to inlay.
Press the contrast sheet into the recesses with fingertip pressure, working from one edge to the other. For tight or detailed recesses, use a small ball stylus or the back end of a paintbrush to push the contrast clay deep into corners. Do not skip any part of the pattern. Any recess you miss will show as an empty spot in the final piece.
Run an acrylic roller gently across the surface to compress the inlay. The contrast clay should now sit slightly above the base surface, with no air gaps under it. If you see air pockets, peel back and re-press that area.
Shave The Surface Flush
Use a sharp long clay blade to shave the top layer of contrast clay off, leaving only the inlay in the recesses.
Hold the slab firmly on the tile. Position the blade at one edge of the slab, almost flat against the surface. Pull the blade across the slab in one confident motion, slicing off the raised contrast clay layer. The blade should come away with a thin shaving of contrast clay attached.
The slab now shows the base color on its raised surface and the contrast color in the recessed pattern. If you see streaks of contrast color outside the recesses, that part of the surface was not shaved cleanly. Repeat the shave with a slightly different angle until only the recesses hold the contrast color.
Chill the slab for a few minutes before shaving if the clay is too soft. Warm clay smears under the blade and pulls inlay out instead of cutting it flush. A brief 5 to 10 minute fridge rest usually solves this without making the slab too hard to work with.
Back The Slab And Cut The Final Shape
Press the inlay slab onto a backing slab of solid color, then cut the final earring, button, or pendant shape.
Sutton slice slabs are usually thin after the shave step. A backing slab of conditioned solid color adds thickness for buttons, drops, or brooches. Press the inlay slab face-up onto the backing and seal the seam at the edges by running a fingertip around the perimeter.
Cut the final shape with a cutter or a clay blade. The inlay pattern stays flush with the surface, so the cut edges look clean. For arch drops or pendants, plan the cutter placement so the pattern centers on the visible front.
Bake Flat And Finish For Smoothness
Bake on a tile per your clay line's package directions. The flush surface lets you finish very smooth without losing pattern detail.
Cure the piece flat on a ceramic tile at the temperature on your clay package. Once cooled, sand the back with 400 then 600 then 800 grit wet sandpaper. The front rarely needs aggressive sanding since the shave step already left it flat.
A satin or low-gloss finish works well for Sutton slice. Heavy gloss can pool in the recessed inlay and create uneven reflections. Test the finish on a scrap before committing the full batch.
Use This Guide With The Lookbook
If an item page mentions Sutton slice, surface inlay, or flush patterned slabs, use this guide as the build logic behind the technique.
It is most useful for:
- geometric and botanical inlay buttons
- lace-pattern slab brooches
- flush-pattern earring drops where surface smoothness matters
For a layered slicing technique that produces topographic patterns rather than flush inlay, see the mokume gane guide.
Take the next step
Continue the series with the next guide in this path.