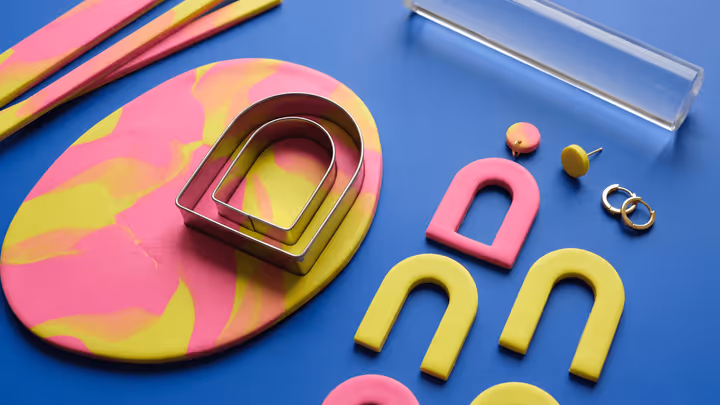
Polymer Clay Cutout Arch Earrings and Hoop Drops
Open-center arches only look clean when the wall thickness, inner cut, and hardware choice all agree. This guide covers the build order that helps keep cutout drops lighter-looking, better balanced, and more consistently matched.
In brief
Key takeaways
- 1Cut the outer arch and the inner opening from the same setup while the slab is still plain
- 2Keep the wall thickness even all the way around the opening or the pair stops reading intentional
- 3Choose between stud toppers and huggies from the front view of the design, not from habit
- 4Place the top hole near the intended balance line, then test the hang before you lock the final hardware setup
Open-center polymer clay arches look clean because the negative space is controlled. If the wall thickness drifts, the inner opening sits off center, or the top hardware pulls from the wrong point, the whole pair starts reading homemade in the wrong way.
The fix is not more decoration. It is a calmer build order: even slab first, repeated cutout second, surface detail third, and hardware decisions based on the front view before you bake.
Maker reference
Maker reference only. Verify brand instructions, seller details, dimensions, and safety guidance for your own setup.
Affiliate note
Some links in this article are affiliate links. If you buy through them, we may earn a small commission at no extra cost to you. As an Amazon Associate I earn from qualifying purchases.
Cut The Outer Arch And The Inner Opening From One Setup
A reliable starting path for open arches is to cut both the outside and the center opening while the slab is still plain.
Once dots, scallops, stripes, or chip patterns go on the face, it becomes much harder to judge whether the opening is truly centered. Get the silhouette right first, then move on to the surface work.
Arch clay cutters help you repeat the outer curve and the inner opening cleanly.
Keep The Wall Thickness Even
Arch earrings stop looking intentional when one side of the opening is visibly heavier than the other.
That is why sheet thickness matters so much on cutout earrings. The slab has to stay even before you cut it, and the remaining arch wall has to stay even after you remove the center.
Thickness guide strips make it much easier to keep the arch walls repeatable from side to side.
Choose The Hardware From The Front View
Stud toppers and huggies solve different problems, and the image should decide which one you use.
If the top is visible and decorative, like a round ball stud or cluster topper, treat it as part of the design. If the arch hangs directly from a hoop, let the hoop stay simple and keep the clay drop close to the crown.
Gold huggie hoops can be a workable starting point when the arch should hang directly from a hoop without a separate top slab, but confirm loop direction, inner diameter, and metal type before you buy.
Place The Top Hole Near The Intended Balance Line
The top hole or connector point should sit close to where the finished arch is meant to hang, not just where the raw blank makes it easy to pierce.
On many arches, that means keeping the top hole close to the crown and centered from the finished front view. If the hole is too low or slightly off center, the drop can tip forward, so it is worth testing the hang from a scrap blank before you commit.
Bake Flat Unless The Design Truly Needs Something Else
For flat cutout arches, a tile is often a practical cure surface, but follow your clay line package instructions first and support the blank as needed for its size and thickness.
The more open the center is, the more obvious every little twist becomes after cure. A flat tile keeps the face calmer and gives you a straighter baseline for later sanding, buffing, or hardware attachment.
Use This Guide With The Lookbook
If an item page mentions cutout arches, huggie arches, or open-center slab earrings, use this guide as the build grammar behind the shape.
It is most useful for:
- nested two-color arch drops
- patterned cutout arches with stud toppers
- terrazzo arches and hoop-connected slab drops
Take the next step
Continue the series with the next guide in this path.