Brooches
Polymer clay brooch tutorials for pin back placement, weight balance, flat backs, and comfortable wear on clothing.

Articles
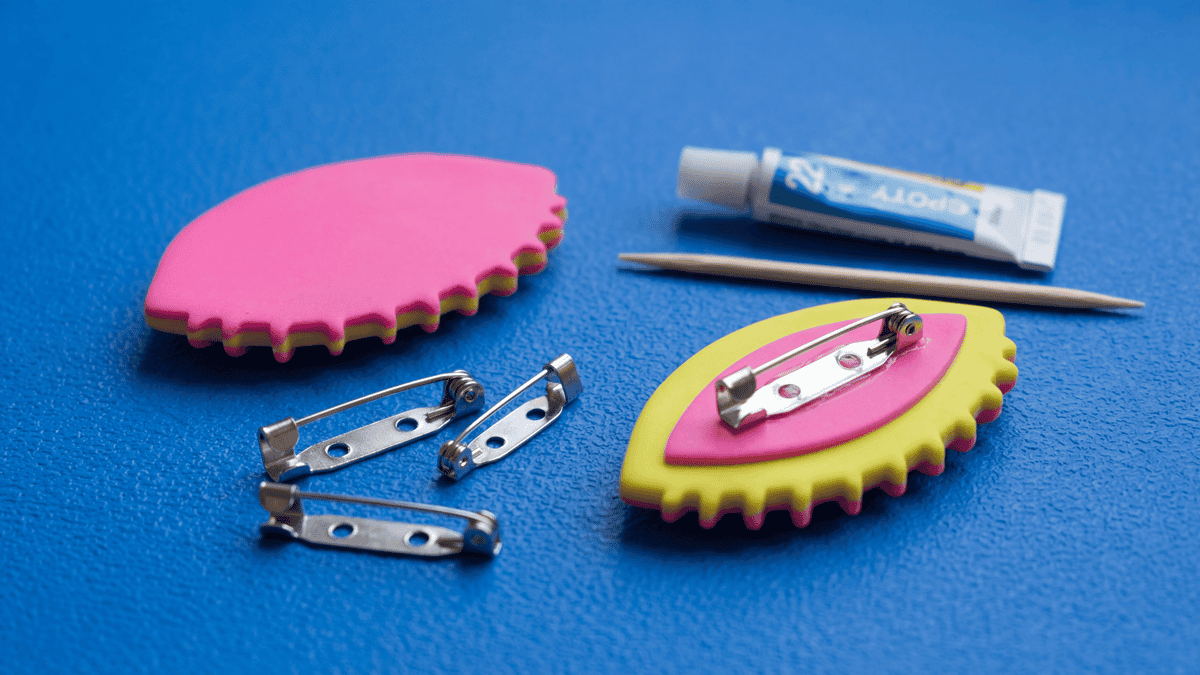
How to Attach Brooch Backs to Polymer Clay
Brooch fronts can tip or lose grip when the rear contact is curved, too small, or glued over a finish. Prepare a flat zone, match the finding size to the scale, and place it on the visual balance line before the adhesive cures.
Read the build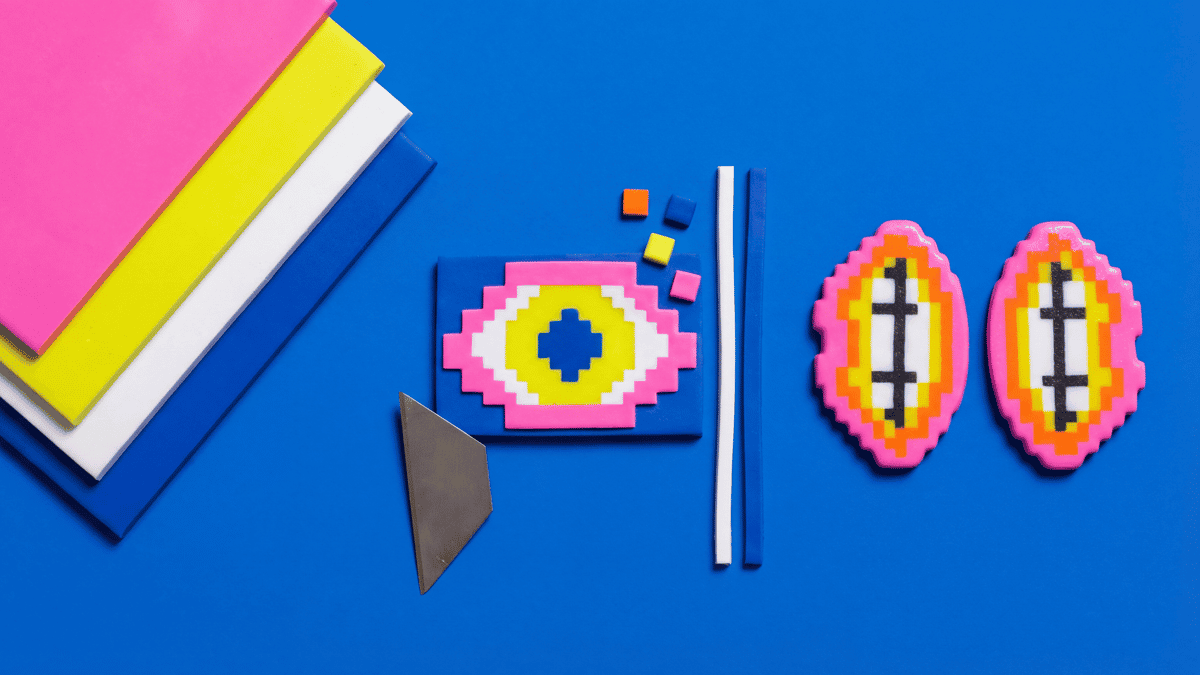
Polymer Clay Pixel Slabs, Stepped Layers, and Mirrored Pairs
Graphic lips, eyes, mushrooms, and badge-like brooches are often easier to build as flat or gently domed pixel slabs. This guide covers crisp staircase edges, stacked layers, and ways to keep left and right pieces matched.
Read the build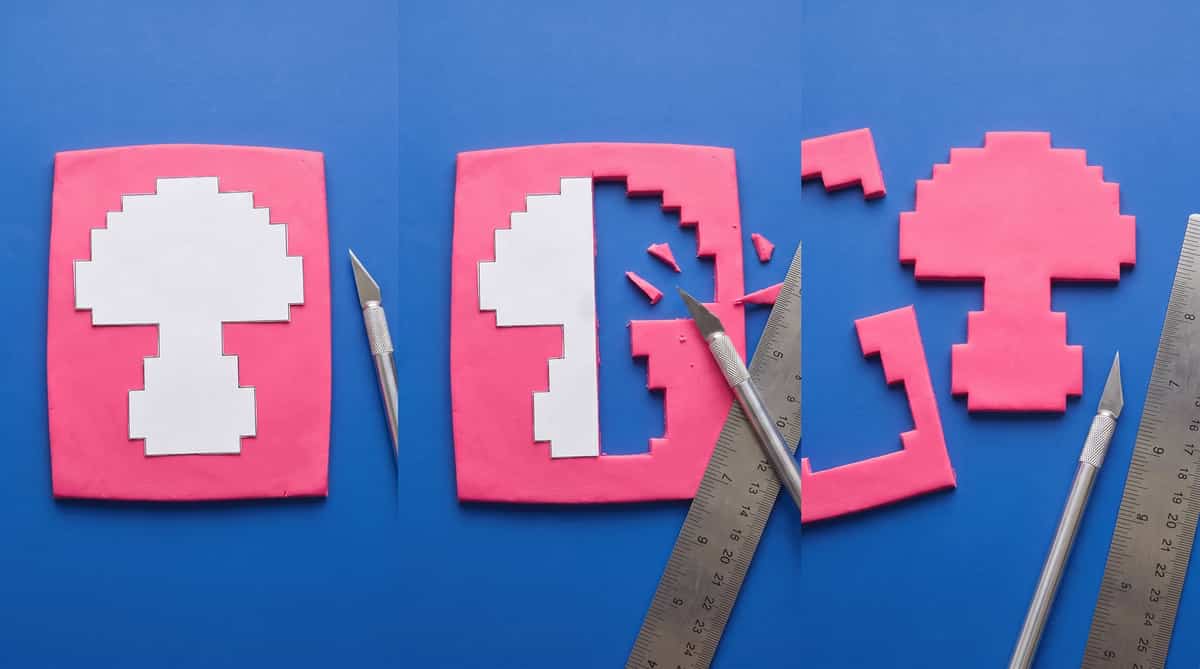
Cut 8-Bit Pixel Polymer Clay Earrings: Staircase Guide
True 8-bit pixel earrings and brooches need stepped-edge silhouettes that look like deliberate pixels from a distance, not softened curves. This guide covers grid-based templates, blade-cut checks, and keeping the staircase crisp through cure.
Read the buildPolymer clay brooches
Solve weight and pin placement before the front gets heavy.
A beautiful clay brooch isn't successful if it sags, pulls down fine fabric, or rotates when worn. These articles suggest how to position your pin back near the top third of the design for stable balance, embed or glue metal hardware securely to flat clay, and keep the overall weight light. Try your pin layout on a plain card prototype before baking.
Weekly notes
Get weekly polymer clay brooch notes
New project notes, small checks, and practical links each week. Free, no spam, unsubscribe anytime.
We will not share or sell your email. Unsubscribe anytime.